X
wikiHow is a “wiki,” similar to Wikipedia, which means that many of our articles are co-written by multiple authors. To create this article, volunteer authors worked to edit and improve it over time.
This article has been viewed 20,433 times.
Learn more...
OpenOffice Draw has a lot of drawing capabilities for your word processing needs. This article will tell you how to create different types of lines.
Steps
-
1Start with the simplest element – a straight line.
-
2Click on the Line icon on the Drawing toolbar and place the mouse pointer at the point where you want to start the line (see Figure 3). Drag the mouse while keeping the mouse button pressed. Release the mouse button at the point where you want to end the line.
- A blue or green selection handle appears at each end of the line, showing that this is the currently selected object. The colors depend on the standard selection mode – green with a normal selection and blue if you are in the point edit mode (this effect is easily apparent if on the Options toolbar both Simple Handles and Large Handles are switched on.
-
3Hold down the Shift key while you draw a line to restrict the angle of the line to a multiple of 45 degrees (0, 45, 90, 135 and so on).
-
4
-
5Hold down the Alt key while drawing a line results in the line extending outwards symmetrically from the start point (the line will extend out equally each side of the starting point). This lets you draw lines by starting from the middle of the line.
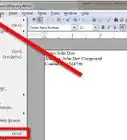
- The line just drawn has all the standard attributes (such as color and line style). To change any of these line properties, select the line by clicking on it, then right-click and select Line.
- The line just drawn has all the standard attributes (such as color and line style). To change any of these line properties, select the line by clicking on it, then right-click and select Line.
-
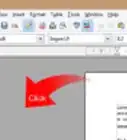
6While you are working with this line, look at the information field on the status bar. A description of the current activity or status of selection is shown when you are working with an element or elements.


References
- This article was created from this wiki