X
This article was written by Travis Boylls. Travis Boylls is a Technology Writer and Editor for wikiHow. Travis has experience writing technology-related articles, providing software customer service, and in graphic design. He specializes in Windows, macOS, Android, iOS, and Linux platforms. He studied graphic design at Pikes Peak Community College.
This article has been viewed 24,928 times.
Dreamweaver is web design software used to create and publish websites using HTML, CSS, Javascript, and more. Dreamweaver is part of the Adobe Creative Cloud family of applications. This wikiHow teaches you the basics of how to use Adobe Dreamweaver.
Steps
Part 1
Part 1 of 5:Getting Started
Part 1
-
1Download Dreamweaver. You can download Dreamweaver from https://www.adobe.com/products/dreamweaver.html. You need a subscription to Creative Cloud to download and use Adobe Dreamweaver. A subscription to a single Creative Cloud app costs about $20.99 per month. A subscription to all Creative Cloud apps costs $52.99 per month. There are different pricing options for businesses and students.
- If you want to do a free 7-day trial of Adobe Dreamweaver, click Free Trial on the web page to download Adobe Dreamweaver with a 7-day free trial.
-
2Select a subscription plan. Use the following steps to select a subscription plan:
- Click Buy now.
- Click one of the tabs at the top of the page that's appropriate for your use. The tabs are, Individuals, Business, Students & Teachers, Schools & Universities.
- Click Buy Now or Select your plan.
- Follow the instructions to finalize your purchase.
- Click the option to download Dreamweaver.
- Double-click the Dreamweaver install file.
- Follow the instructions to install Dreamweaver.
Advertisement -
3Open Dreamweaver. Dreamweaver has an icon that resembles a green box that says "Dw" in the middle. Click the icon to open Dreamweaver.
-
4Click Yes, I have, or No, I'm new. The first time you open Dreamweaver, it asks if you have ever used Dreamweaver. You can either click Yes, I have or No, I'm new to view a quick tutorial on how to set up your workspace.
-
5Select Developer Workspace or Standard Workspace. When you are setting up Dreamweaver, it asks which workspace you prefer. If you are new to Dreamweaver, it's recommended that you select Standard Workspace.
-
6Select the color scheme for Adobe Dreamweaver. To select a color scheme, click one of the colored squares at the bottom of the page. This doesn't effect how Dreamweaver functions.
-
7Click Start with a new or existing folder. It's the option in the middle. It has an icon that resembles a plus sign (+). Click this icon to get started with a new or existing website.[1]
- Alternatively, you can click Start by watching a video tutorial to view a video with more information about how to use Dreamweaver, or you can click Start with a sample file to view a pre-made sample file in Dreamweaver.
Advertisement


Part 2
Part 2 of 5:Creating a New Website
Part 2
-
1Create a folder for your website. Use File Explorer on Windows or the Finder on Mac to navigate to the location on your computer where you want to save your website. Here you will create a new folder that will contain all the files for the website. Use the following steps to create a new folder:
- Right-click a location in File Explorer or the Finder.
- Click New (windows only)
- Click New Folder.
- Type a name for the folder.
-
2Create an image folder for your website. The image folder should be inside the folder for your website. Use the same steps you used to create a website folder to create an image folder for your website inside the website folder.
-
3Open Dreamweaver. Dreamweaver has an icon that resembles a green box that says "Dw" in the middle. Click the icon to open Dreamweaver.
-
4Create a new website. Use the following steps to create a new website in Dreamweaver:
- Click Site in the menu bar at the top.
- Click New Site.
- Enter a name for your website.
- Click the folder icon next to "Local site folder".
- Select your website folder and click Open.
- Click Select.
- Click Advanced Settings in the panel to the left.
- Click Local Info.
- Click the folder icon next to "Default Images folder" at the top.
- Select the images folder and click Open.
- Click Select.
-
5Create a new HTML document. HTML stands for HyperText Markup Language. It's the basic language used to design websites. A web browser uses HTML code to render a web page. You can click HTML on the opening page to open a new HTML file, or you can use the following steps to create a new HTML page.
- Click File.
- Click New.
- Click HTML.
- Click Create.
Advertisement


Part 3
Part 3 of 5:Adding Objects
Part 3
-
1Click Split. It's the middle button at the top of the page. This displays a split-screen view with the code displayed at the bottom and the Live website view on top.
- Alternatively, you can click Live to view the live view screen. This displays what your website looks like when rendered in a web browser. You can also click Code to view HTML document and code.
-
2Click Insert. It's in the panel to the side. This displays a list of objects you can add to an HTML file. If you don't see the "Insert" tab, click Windows in the menu bar at the top and click Insert.
-
3Select an object to add. This will add the object to your website and automatically insert the proper code for the object. There's a variety of objects you can add to your website. The following are a few objects you can add:
- Image: Select this option to add an image to your HTML document. You can select an image file on your computer or from Adobe Stock.
- Heading: This adds a heading to your web page. You can edit the heading text directly in the Live window, or in the Code window.
- Headers: Headers are like headings, but they have set sizes. To add a header, select Header and select one of the Heading options. "H1" is the largest text size, which "H6" is the smallest text size.
- Paragraph: Select this option to add paragraph text to your web page. You can use the text formatting options at the bottom of the screen to add bolds, italics, align the text, and add a font.
- Ordered List: Select this option to add a numbered list to your web page.
- Unordered list: Select this option to add a bullet-point list to your web page.
- List item: Select this option to add a numbered or bullet-point list item to a list.
- Table: Use this item to add a table to your web page.
-
4Use the Code screen to edit the HTML code (optional). If you want, you can use the code screen to write your own HTML. When you start writing an HTML tag in Adobe Dreamweaver, it will display a list of HTML tags that match what you are writing. You can click the tag you want to use as soon as you see it. Then when you type "</", Dreamweaver will usually automatically close the HTML tag automatically.Advertisement


Part 4
Part 4 of 5:Styling Your Webpage
Part 4
-
1Highlight an object you want to style. To select an item, highlight it in the Live window or Code window. For example, if you want to style the header, you would select the entire header text and the header tags in the Code window.
-
2Click +. It's in the identifier below the object in the Live window. This displays a box that allows you to give the object an ID.
-
3Type <nowiki>#</<nowiki> followed by an ID name for the object. For example, if you want to style your header, you would type "#header" or "#heading" in the box.
-
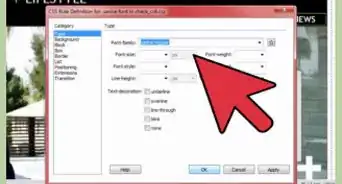
4Click + and select Create a new CSS file. After giving the object an ID, click the plus icon again and click Define in page. This displays a drop-down menu. Select Create a new CSS file from the drop-down menu. This opens a dialogue you can use to create a new CSS file.
- CSS stands for Cascading Style Sheets. It is a supplemental language used to style the look of a website. CSS can be applied in-line to an individual object. It can be added in the Head of an HTML document in order to apply it to a single HTML document, or it can be created as a separate CSS document and linked to an HTML file. This allows you to apply the same CSS style sheet to multiple HTML documents and give your entire website a consistent look.
- If you are using an older version of Dreamweaver, you will need to highlight an object, right-click it and select New.
-
5Click Browse. It's next to the "File/URL" bar at the top. This opens a file browser you can use to select or create a new CSS document.
-
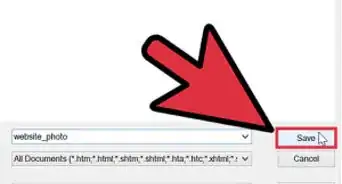
6Type a name for the CSS document and click Save. Type the name of the CSS file next to "File name". Give it a descriptive name like "site style" or "style sheet". Click Save to save the file as a ".css" file.
-
7Click Ok twice. First click Ok to confirm the location of the CSS file. Then click Ok to link the CSS file.
- Ensure the radio button next to "Link" is checked.
-
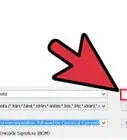
8Click CSS Designer. It's one of the tabs in the panel to the right. If you don't see this option, click Window in the menu bar at the top and click CSS Designer.
- On older versions of Dreamweaver, you'll need to click the "CSS Styles" tab.
-
9Click + next to "Selectors". It's in the CSS Designer panel. This adds the object ID as a selector.
- Ensure that the correct ID you entered for your object is listed below "Filter CSS Rules".
-
10Uncheck the box next to "Show set". This displays a list of attributes you can edit.
-
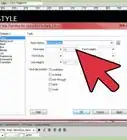
11Change the attributes of the object. To change the attributes, click the field next to an attribute in the CSS Designer panel. Then select a new attribute for the object. Attributes you can change include Color, Font-family, Font-style, font-size, text-align, background, border, and more.
- On older versions of Dreamweaver, you'll need to click Add property in the CSS Styles panel. Then use the drop-down menu to select an attribute. Then click the field next to the attribute to select an option to style the attribute.
- If you want to edit a CSS tag, you can highlight the object in the Code window and click Quick edit. This will display the CSS code in a drop-down below the object. You can edit the CSS in the drop-down section. Click the "X" icon to close out of the drop-down and save your changes.[2]
Advertisement


Part 5
Part 5 of 5:Saving and Publishing a Website
Part 5
-
1Save your HTML files. Use the following steps to save your HTML files:
- Click File in the menu bar at the top.
- Click Save as.
- Enter a name for the document next to "Filename".
- Click Save.
-
2Purchase web hosting. In order to upload a website online, you'll need to purchase web hosting. There are a variety of web hosts out there. Show around for the best options and services. A few popular web hosting services include Bluehost, Hostgator, Cloudways, GoDaddy, and Namecheap.[3]
-
3Get your FTP information. This information is provided by your web hosting service provider. Contact your web hosting service to get your FTP information. You can usually find your FTP information by logging into the web hosting service control panel, and then clicking the "FTP" option.
- If you have multiple websites per server, you will need to get the URL of the root directory for your website as well.
-
4Open your website in Dreamweaver. Click the Dreamweaver icon to open Dreamweaver. You can open recently edited files on the title screen, or use the following steps to open an HTML file in Dreamweaver.
- Click File.
- Click Open.
- Select an HTML document.
- Click Open.
-
5Click Sites. it's in the menu bar at the top of the screen.
-
6Click Manage Sites. It's the second in the "Sites" menu.
-
7Double-click your site. This opens your site setup dialogue box.
-
8Click Servers. It's in the panel to the left.
-
9Click + below the server list. This opens a dialogue box you use to enter the server information needed to connect to your online server.
-
10Enter a name for the server. You can name the server anything you want.
-
11Enter the FTP address, username, and password. Enter the FTP address you got from your web hosting serving next to "FTP server". Then enter the username and password used to log in to your server next to "Username" and "Password".
- If you want, you can click Test to test the connection to the server.
-
12Enter the URL for the root directory. If you have more than one website on a server, you'll need to get the URL for the root directory of the website you want to upload. Enter it in the field next to "Root Directory". If you don't have multiple websites, enter the URL for the public_HTML folder.
-
13Click Save. It's in the lower-right corner of the FTP menu.
-
14Click Done. This closes the window with the list of servers.
-
15Click Files. It's one of the tabs over the panels to the right. This displays a list of all files associated with your website.
- If you don't see this panel, click Windows in the menu bar at the top, and click Files.
-
16Select the files you want to upload. Click all the files you want to upload in the Files panel. To select multiple files, hold Ctrl or Command and click the files you want to upload.
-
17Click the icon with the arrow pointing up. It's at the top of the Files panel. This uploads all the files to your FTP server. You can go to the URL of your website to view your website.
- If you are asked if you want to upload dependant files, click Yes.
Advertisement


References
About This Article

Travis Boylls
Tech Specialist
This article was written by Travis Boylls. Travis Boylls is a Technology Writer and Editor for wikiHow. Travis has experience writing technology-related articles, providing software customer service, and in graphic design. He specializes in Windows, macOS, Android, iOS, and Linux platforms. He studied graphic design at Pikes Peak Community College. This article has been viewed 24,928 times.
How helpful is this?
Co-authors: 9
Updated: November 4, 2021
Views: 24,928
Categories: Adobe Dreamweaver
Advertisement