X
wikiHow is a “wiki,” similar to Wikipedia, which means that many of our articles are co-written by multiple authors. To create this article, volunteer authors worked to edit and improve it over time.
This article has been viewed 62,189 times.
Learn more...
A font (also known as typeface) is a set of letters, numbers, punctuation marks and symbols that usually follow a unified theme or style. Some popular fonts that you may already see installed on your computer include Arial, Helvetica, Times New Roman and Verdana, however, there are many others. To add a font to Dreamweaver you must first install the new font on your computer and then add it in Dreamweaver's font list.
Steps
Method 1
Method 1 of 3:Downloading Fonts
Method 1
-
1Download a font file and save it on your computer. These files are usually in TrueType format (with extension ".TTF") and can be downloaded using the following websites.
- 1001 Free Fonts: Offers free downloads for fonts arranged in alphabetical order or by themes such as Decorative, Retro, Sci Fi and Horror. You can even find some fonts that appear as 3D images.
- Urban Fonts: Has a large variety of fonts of various language themes including old-fashioned English as well as Arabic, Chinese and Greek.
- MyFonts: You have to purchase most fonts here but free trials are available.
- Fontstock: Fonts arranged in alphabetical order and categories such as Elegant and Futuristic. There is also a separate section for Christmas fonts.
Advertisement

Method 2
Method 2 of 3:Installing Fonts
Method 2
-
1Open the folder containing the font that you have downloaded.
-
2Go to the Windows Start menu and click on Control Panel.
-
3Switch to Classic View (the option is available on the left sidebar).
-
4Double-click on the Fonts folder.
-
5Drag the font file that you had downloaded and drop it into the Fonts folder. The font is now installed on your computer.Advertisement


Method 3
Method 3 of 3:Adding Fonts in Dreamweaver
Method 3
-
1Open the Macromedia Dreamweaver software.
-
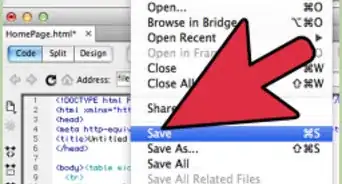
2Select "Text" in the top menu.
-
3Browse to "Font" and select "Edit Font List."
-
4Find the font that you want to add in the "Available fonts" list.
-
5Add the font to the "Chosen fonts" list by clicking on it and pressing the arrow pointing left.
-
6Press the "OK" button. This will close the window for editing the font list and you should be able to see the new font that you have added appear in the list of other fonts that could previously be seen and selected in Dreamweaver.Advertisement


Warnings
- Even though you can create web pages using different fonts on Dreamweaver, the fonts may not appear to other people who view the web page after it has been uploaded if they don't have the font installed on their computer. Usually, the font that is missing on their system will be replaced by another font that is installed.Thanks!
Advertisement


References
About This Article
Advertisement