X
wikiHow is a “wiki,” similar to Wikipedia, which means that many of our articles are co-written by multiple authors. To create this article, volunteer authors worked to edit and improve it over time.
This article has been viewed 15,202 times.
Learn more...
Sometimes, you can bring back the 'days of yore' by doing small things with your shots to give them the appearance of the 'old days'. This article will show you how to do so with Gimp and how to turn your photo into a Polaroid.
Steps
-
1Open the photo in GIMP and add an Alpha Channel (JPEG files don't have an alpha channel, so change it to a format that does). You will be working with transparency (Layer > Transparency > Add Alpha Channel).
-
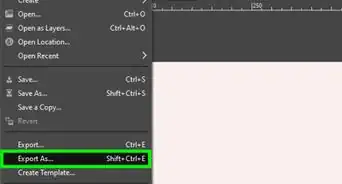
2Now enlarge the image (the canvas), to make room for the Polaroid border (Image > Canvas Size).Advertisement
-
3Move (drag & drop) the active photo somewhere in the middle of the enlarged canvas.
-
4Add a new layer (Layer > New Layer) and move it (drag & drop) under the photo layer, it will be used to hold the paper border.
-
5Use the Rectangle Select Tool to make a rectangular selection in the new layer around the photo, it will be the border. For a realistic Polaroid, make the bottom border thicker.
-
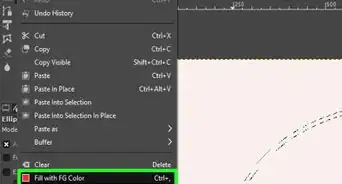
6Fill the selected rectangle with white, as it is paper, or with a very light grey, to get a bit of contrast, as if the photo is over a white background.
- This example has a very light grey as foreground color and fill the rectangle with a gradient from light grey to white.
- The result is like this, it starts to resemble a photo.
-
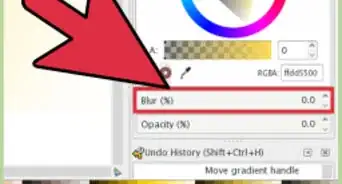
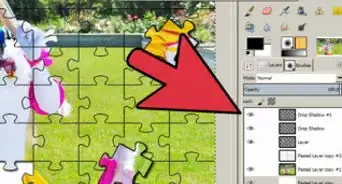
7For increased realism, add a small drop shadow (Filters > Light and Shadow > Drop Shadow).
-
8Select some values as you like; here, small values are used.
- Now the photo has a slight 3D look.
-
9Use the text tool, select a nice hand font (we want a realistic effect, remember) and write something.
-
10To get a clearer view, add a new layer, fill it with white and move it at the bottom (under the drop shadow).
-
11Now merge down the text layer and the photo with the paper layer, we need them in one piece for the next step (bending).
- This is how it should look.
-
12Now bend the photo a little. (At the end of the article, an alternate way to get the effect using another filter, iWarp, will be explained).
-
13So use the Curve Bend filter (Filters > Distorts > Curve Bend), make sure Smoothing and Antialiasing are checked, check Live Preview too if you want, and play with the upper and lower Curve for Border.
- You can make them identical (copy) or slightly different, depending on what bend you want.
- The result will be something like this; the paper is a bit displaced from the shadow, but that will be dealt with next.
-
14Move the photo layer to fit the shadow and then merge them together. You should have two layers at this time.
-
15Use the Rotate Tool and rotate the photo layer a bit for even more realism.
- Almost done. You could stop here if we want, but there is more.
-
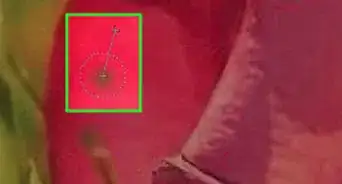
16Add a piece of adhesive tape to keep the photo "glued". So start by creating a new transparent layer on top. (If confused, refer to picture 4}.
-
17On this empty layer, make a rectangular selection and fill it with some color (depending on what type of adhesive tape you like).
-
18Use the Eraser Tool and make the tape ends look realistic:
-
19Select the tape (a rectangular selection around it), rotate it and move in the desired position (a corner or a margin):
-
20For a relief look, add a slight drop shadow to the tape (Smaller values were used compared with the ones used for the paper's shadow).
-
21Merge the tape layer with its shadow and decrease the opacity if you want a transparent tape:
- And this time you really are done.
- We can leave the background solid or remove it and have transparency:
- Or fill the background with a texture (Here a cork board texture).
- As I said above, I am not very happy with the results of the Curve Bend effect in GIMP, so we can use another filter instead, IWarp (Filters > Distorts > IWarp).
-
22Use the Deform Mode with a large deform radius and move the edges and corners.
- With some experimenting you can get to something like this.
- And get to a smoother final result.
Advertisement


References
- This article originates from another creative commons author
About This Article
Advertisement