X
wikiHow is a “wiki,” similar to Wikipedia, which means that many of our articles are co-written by multiple authors. To create this article, 12 people, some anonymous, worked to edit and improve it over time.
wikiHow marks an article as reader-approved once it receives enough positive feedback. In this case, 87% of readers who voted found the article helpful, earning it our reader-approved status.
This article has been viewed 54,095 times.
Learn more...
Clouds are a fairly easy and relaxing way to get to know how to use Gimp. This article will show you how to do it using a few of the tools available in Gimp.
Steps
-
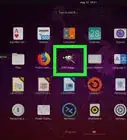
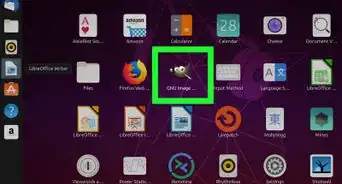
1
-
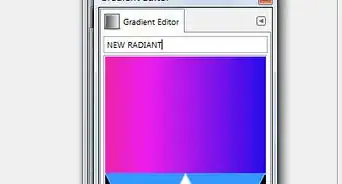
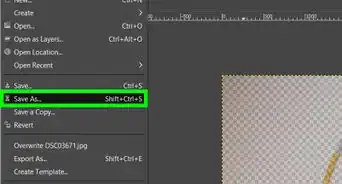
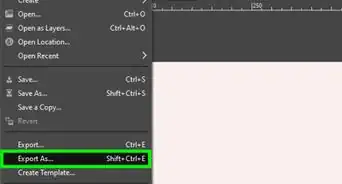
2Make a gradient. You can do that 'by hand' or using the gradient tool.Advertisement
-
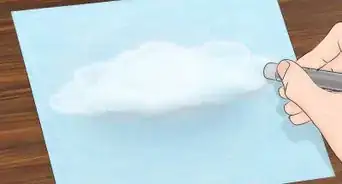
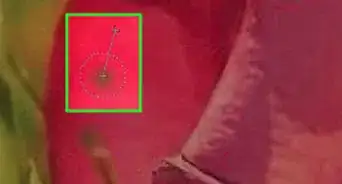
3Using the dodge tool, make a 'cloud-like' shape.
-
4Select the smudge icon and begin smudging the cloud. You will be working on making it puffy.
-
5Using the dodge tool with the same settings as before, create another cloud shape inside the part of the cloud you have already started.
-
6Smudge it again. Be sure to stay within the edges created by your first dodge and smudge. This will help create a distinctive look. Be sure not to do this too much.
-
7With a slightly larger brush, smudge the cloud again.
-
8Do it again. You are giving your cloud depth by doing this.
-
9
-
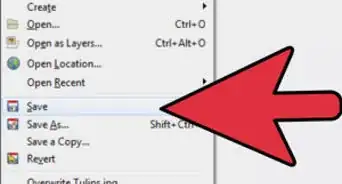
10Continue doing this until your cloud is complete.Advertisement


Community Q&A
-
QuestionDoes GIMP work with mobile?
 Community AnswerNo, it does not.
 -
QuestionWhich software is better for photo editing and making icons: GIMP or Adobe Illustrator?
 Community AnswerGIMP is a raster graphics editor, while Illustrator is a vector graphics editor. GIMP is good for editing images to the pixel, and Illustrator is good for making icons. GIMP is a good free alternative to Adobe Photoshop, and Inkscape is a good free alternative to Adobe Illustrator.
Things You'll Need
- Gimp
- Computer


About This Article
Advertisement