X
This article was co-authored by wikiHow Staff. Our trained team of editors and researchers validate articles for accuracy and comprehensiveness. wikiHow's Content Management Team carefully monitors the work from our editorial staff to ensure that each article is backed by trusted research and meets our high quality standards.
This article has been viewed 60,530 times.
Learn more...
Windows automatically sets your screen resolution to a recommended size based on your monitor. However, you can make adjustments to your screen resolution as needed by making a few simple changes to your display settings. Finding your native resolution is a great way to get the most out of your monitor's display capabilities.
Steps
Method 1
Method 1 of 2:Settings (Touch Friendly)
Method 1
-
1Click on the start button.The Windows button is in the bottom left corner of your screen.
-
2Type in settings.
-
3An icon with a gear called PC settings will appear in your search. Click or tap on it.
-
4Select PC & devices then Display. You will see a resolution slide bar on the right-hand side..
-
5Click or tap across the slider to find your recommended setting. The word "Recommended" will appear once you scroll to the corresponding resolution. This is your monitor's native resolution.
- Often times, your resolution is already set to the recommended size. In this case, you won't need to make anymore adjustments and can exit out of the settings window.
-
6Click Apply. A preview will appear.
- If you don't like the resolution in the preview, select Revert to pick another resolution from the list.
-
7Press Keep Changes if you've found a good resolution. Your changes will be kept.


Method 2
Method 2 of 2:Control Panel
Method 2
-
1Navigate to the start screen. Click on the "Windows" icon at the bottom left of your screen. It has the Windows logo on it.
-
2Type in "Control Panel." Windows will begin to search for the "Control Panel" app as you type.
-
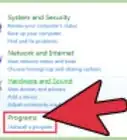
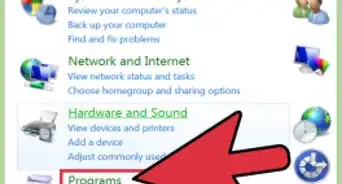
3Click on "Control Panel." A new window will appear. Navigate to the "Appearance and Personalization" category. It appears as a computer screen with some paint swatches.
-
4Click "Adjust screen resolution." A new window will appear.
-
5Click on the drop-down menu next to "Resolution." A menu will appear showing you all of your available screen resolutions.
-
6Choose your desired resolution. Drag the scroll bar up or down to choose the resolution you want to use.
- It's best to set your monitor to its "native resolution," or the resolution that it was designed for. If you don't know your monitor's native resolution, find it by following Method 2 of this article.
-
7Click on "Apply." You will be given a preview of your selected resolution.
- If you don't like the resolution in the preview, select "Revert" to pick another resolution from the list.
-
8Click on "Keep Changes." Your changes will be applied.


Community Q&A
-
QuestionHow do I change my resolution back to what I had in Windows 7 if it automatically switched to a different one in Windows 8?
 Community AnswerOn your desktop, right-click, and then click "Display Settings." This will redirect you to an app where you can change the resolution of your PC, under the heading, "Resolution."
 -
QuestionMy resolution is set on 1366 x 768, but at bottom, says that it is lower than 1200 x 900. What is wrong?
 Community Answer1366 x 768 is a lower resolution than 1200 x 900; despite the width being greater, the overall pixel area in your resolution is 1,049,088, whereas in 1200 x 900, it's 1,080,000.


About This Article

wikiHow Staff
wikiHow Staff Writer
This article was co-authored by wikiHow Staff. Our trained team of editors and researchers validate articles for accuracy and comprehensiveness. wikiHow's Content Management Team carefully monitors the work from our editorial staff to ensure that each article is backed by trusted research and meets our high quality standards. This article has been viewed 60,530 times.
How helpful is this?
Co-authors: 7
Updated: September 20, 2020
Views: 60,530
Categories: Windows 8