wikiHow is a “wiki,” similar to Wikipedia, which means that many of our articles are co-written by multiple authors. To create this article, volunteer authors worked to edit and improve it over time.
The wikiHow Tech Team also followed the article's instructions and verified that they work.
This article has been viewed 3,207 times.
Learn more...
Normally, you want to keep the date automatically synced on your computer. However, in some cases, you may want to manually set it, such as when the computer is offline for an extended period of time. It's also useful in some other cases as well. If you want to change the date in Windows 10, then this wikiHow article will teach you how to do so. However, keep in mind that you need administrator privileges to change the date on Windows 10.
Steps
-
1Right-click on the date and time. It's often at the bottom-right corner of your screen on the taskbar. This will open a context menu.
-
2Click on "Adjust date/time" in the context menu.
-
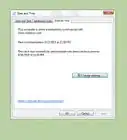
3
-
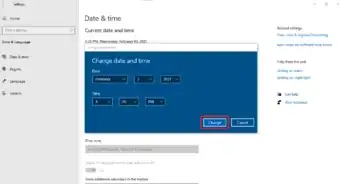
4Click the Change button. It's underneath the "Change date and time" header.
-
5Use the dropdown menus to set a new date.
- You can also manually specify a time if you'd like.
-
6Click Change. This will set the new date.


Warnings
- If the date that you select is too far off from the actual date, then you may experience errors when trying to browse the internet. It could also cause security issues.Thanks!
Things You'll Need
- Administrator privileges