This article was co-authored by wikiHow Staff. Our trained team of editors and researchers validate articles for accuracy and comprehensiveness. wikiHow's Content Management Team carefully monitors the work from our editorial staff to ensure that each article is backed by trusted research and meets our high quality standards.
This article has been viewed 555,165 times.
Learn more...
YouTube supports a number of ways to subtitle your videos. In order to access the various methods, go to the “Video Manager” in your YouTube channel, select the “Subtitle and CC” option from the “Edit” menu, and choose how you want to add your subtitles.[1]
Steps
Method 1
Method 1 of 3:Using the YouTube Subtitle Tool On Your Own Video
-
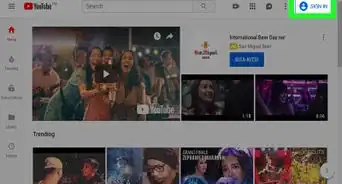
1Log in to your YouTube account.
-
2Press “My Channel”. This button is located near the top of the sidebar and will take your personal YouTube page.
-
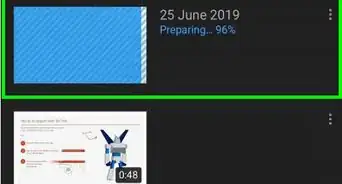
3Press “Video Manager”. This button appears in the top left of your channel and will take you to a list of your video uploads.
- You can also access the Video Manager by clicking your account icon and going to “Creator Studio > Video Manager”.
-
4Click the “Edit” dropdown arrow and select “Subtitles and CC”. The “Edit” button and its menu are located next to the video that you wish to add subtitles to. This will take you to the subtitling interface.
-
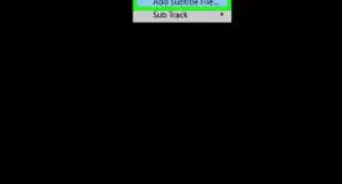
5Click “Add New Subtitles” and select “Create new subtitles or closed captions”. This button is to the right of the video in the subtitling interface. A text area will appear next to the video for subtitle entry.
-
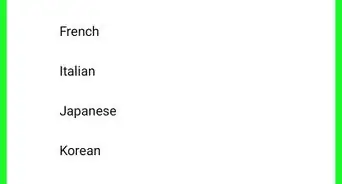
6Select your subtitle language. This categorizes your subtitles for future viewing by youtubers from all over the world.
- Non-native speakers (and others, like the d/Deaf and hard of hearing, or those with audio processing disorder) may find English language subtitles on English language videos very helpful so don't be discouraged from subtitling in the original language of the video!
-
7Play the video and pause when you want to enter a subtitle. Playback can be used to listen to the spoken line before entering the text into the text area.
-
8Enter the subtitle text into the text area. Click the blue “+” button next to the text area to add the subtitle. The subtitle will appear on the transcript and in the timeline underneath the video.
-
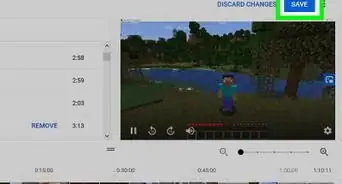
9Adjust the length of the subtitle. The subtitle will be placed in the timeline where you paused the video. Click and drag the bar on either side of the subtitle to change the starting and stopping points in which the subtitle displays.
- Don't add too much at once, make sure you have time to read the subtitles within the timespace. If not, you'd be better off splitting the subtitles so they don't all appear at once.
-
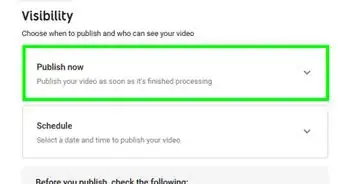
10Publish the video. When you have completed your subtitling, press “Publish” and your subtitles will be uploaded to the video.


Method 2
Method 2 of 3:Uploading Subtitles to Your Video from a File
-
1Open a text editor. Notepad for Windows users or TextEdit for Mac are good free options, but any text editor will do.
-
2Create your subtitles. Subtitle files utilize a specific format: subtitle number, timestamp, and text - each occupying a different line. Timestamps use an hour:minute:second:millisecond format.
- For example:
1
01:15:05:00
This is a sample subtitle text. - This example will place “This is a sample subtitle text” as the first subtitle at the 1 hour, 15 minute, and 5 second mark in the video.
- For example:
-
3Go to “File” and select “Save As…”. Here you can set the filetype using the the SubRip (or srt) extension (a common text format for subtitling videos).
-
4Enter a filename ending in “.srt”. For example: ‘subtitles.srt’. The extension at the end of the name is required to set the filetype.
-
5Click the “Save As Type” and select “All Files”. This menu is located below the filename field. Selecting “All Files” allows the extension to be something other than plaintext.
-
6Click the “Encoding” menu and select “UTF-8”. SubRip files will not function properly without this encoding set. When that is complete, press “Save”.
-
7Go to your YouTube “Video Manager”. Login to your YouTube account. Press “My Channel > Video Manager” to see a list of your video uploads.
- You can also access the Video Manager by clicking your account icon and going to “Creator Studio > Video Manager”.
-
8Click the “Edit” dropdown arrow and select “Subtitles and CC”. The “Edit” button and its menu is located next to the video that you wish to add subtitles to. This will take you to the subtitling interface.
-
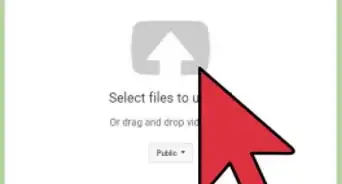
9Click “Add New Subtitles” and select “Upload a File”. A popup menu will appear to choose which kind of file to upload.
-
10Select “Subtitle File” from the popup menu. This will open a window to select which file to upload.
-
11Browse for the file you created and select “Upload”. The subtitles will be pulled from your .srt file and placed into the timeline and transcript.
-
12Adjust your subtitles. Edit changes to the text in the transcript or alter timestamps by clicking and dragging the bar on either side a subtitle in the timeline.
-
13Publish your video. Press “Publish” and your subtitles will be uploaded to your video.


Method 3
Method 3 of 3:Using YouTube’s Automatic Transcript Sync
-
1Go to your YouTube “Video Manager”. Login to your YouTube account. Press “My Channel > Video Manager” to see a list of your video uploads.
- You can also access the Video Manager by clicking your account icon and going to “Creator Studio > Video Manager”.
-
2Click the “Edit” dropdown arrow and select “Subtitles and CC”. The “Edit” button and its menu is located next to the video that you wish to add subtitles to. This will take you to the subtitling interface.
-
3Click “Add New Subtitles” and select “Transcribe and auto-sync”. A text area will appear next to the video for subtitle entry.
-
4Select your subtitle language.
-
5Transcribe the video to the text area. Type out everything spoken into the text area to the right of the video. You do not have to worry about the timings here.
-
6Press “Set Timings”. YouTube will automatically sync what you wrote to timings in the video.
-
7Adjust the timings. The auto-sync subtitles will appear in the timeline. Click and drag the bar on either side of the subtitle to adjust the subtitles for timing accuracy.
-
8Publish the video. When you are ready, press “Publish” and the subtitles will be uploaded to the video.


Community Q&A
-
QuestionCan I use my phone to add subtitles or is this limited to the PC?
 Community AnswerCurrently, subtitling/closed captioning cannot be performed from the YouTube mobile app.
 -
QuestionWhy do subtitles I have submitted to the video not appear?
 Community AnswerIf you're adding to subtitles to other people's videos, they need to be approved by the community first.
 -
QuestionIs it possible to force viewers to watch with subtitles on?Community AnswerNo, you have to add them manually using video editing software before uploading.
-
QuestionWhat do I get out of contributing subtitles to someone else's video?Community AnswerNothing, it’s just something implemented by YouTube for the community. An example is the video being in a language other than your native one; adding subtitles can help others in your region understand it.
-
QuestionHow long does it take for the written subtitles to show up on my YouTube videos?
 Community AnswerIf you add them to your own content, then it is instant. If you are adding subtitles or captions to content that belongs to someone else, YouTube will wait for other community members to confirm the quality of your work. Nevertheless, you can outsource your captions via services like subtly.cc and they will take care of it all for you.
 -
QuestionHow do you add more "beautiful" subtitles? For example, applying font color, style, and some more effects?
 RubyTop AnswererPeople can do that themselves by editing how they view closed captions in their system settings. The point of closed captions is accessibility, not how they look. Sometimes having subtitles with fancy effects can make it harder for some people to read, such as dyslexic people. You can add open captions (i.e. captions that are directly on your video, which you can get by editing your video) to your videos with fancy effects, but if you do this, it is still recommend that you add closed captions. Think about the people who need to use captions, and what will be helpful to them.
 -
QuestionIs it possible to add subtitles to someone else's video?RubyTop AnswererUnfortunately, as of 28th of September 2020, the community captions option, which allowed you to contribute captions to other people's videos, was removed. As a result there is no way to contribute captions to another user's video.


About This Article

1. Sign into YouTube.com.
2. Go to http://www.youtube.com/my_videos.
3. Click the menu next to the video.
4. Click Subtitles and CC.
5. Click Add new subtitles or CC.
6. Select a language.
7. Play the video.
8. Pause where you want to insert a subtitle.
9. Enter the subtitle and select a length.
10. Click Publish.