wikiHow is a “wiki,” similar to Wikipedia, which means that many of our articles are co-written by multiple authors. To create this article, volunteer authors worked to edit and improve it over time.
The wikiHow Tech Team also followed the article's instructions and verified that they work.
This article has been viewed 2,309 times.
Learn more...
The guest account is the user account that is built into Windows that you can use to allow guests to use your computer. However, while this account was in previous versions of Windows, it cannot be enabled in Windows 10 even though the account is still built in.[1] However, you can create another account that functions the same as the guest account. If you want to create a new guest account, follow the steps in this article.
Steps
-
1
-
2Click or tap "Accounts".Advertisement
-
3Select the "Family & other users" menu in the left pane.
-
4Click or tap on "+ Add someone else to this PC".
-
5Select "I don't have this person's sign-in information".
-
6Click or tap on "Add a user without a Microsoft account".
-
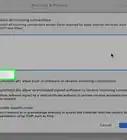
7Pick an account name in the, "Who's going to use this PC" box. You cannot use "Guest” since this account is still in Windows even though it cannot be activated. You can use another name such as "Visitor" or "Guest User".
-
8Enter a password and then reenter it in the "Make it secure." boxes. This is not required, but it's a good idea to have a password on every user account on your PC.
- If you do not want to enter a password, then skip this and the next step.
- Check out How to Make a Secure Password for advice on making your password secure.
-
9Fill out the security questions in case you forget your password. These questions will allow you to reset the password. Simply select a question from the drop down menu, and then enter the answer underneath it.
-
10Click Next. This will create the account. Once you are done, log into the account to allow the setup to complete.Advertisement


Warnings
- Users can still accidentally download viruses through the "guest" account, so be careful with who you let onto your computer.Thanks!
-Step-17.webp)


-Step-17.webp)