X
This article was written by Nicole Levine, MFA. Nicole Levine is a Technology Writer and Editor for wikiHow. She has more than 20 years of experience creating technical documentation and leading support teams at major web hosting and software companies. Nicole also holds an MFA in Creative Writing from Portland State University and teaches composition, fiction-writing, and zine-making at various institutions.
This article has been viewed 6,761 times.
This wikiHow teaches you how to prevent certain email messages from landing in the Spam or Junk mailbox in Gmail, Outlook, and the Mac Mail app.
Steps
Method 1
Method 1 of 5:Marking as Not Spam in Gmail
Method 1
-
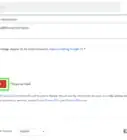
1Go to https://www.gmail.com in a web browser. If you’re not already signed in to your account, sign in now.
-
2Click the Spam folder. It’s in the folder list along the left side of Gmail. This opens your Spam inbox.Advertisement
-
3Select a message that isn’t spam. To select a message, click the empty box to the left of the sender’s name. You can select more than one message if you wish.
-
4Click Not spam. It’s a button above the message list. This marks the selected message(s) as spam and moves it/them to the inbox.Advertisement


Method 2
Method 2 of 5:Adding a Sender as a Contact in Gmail
Method 2
-
1Go to https://www.gmail.com in a web browser. If you’re not already signed in to your account, sign in now.
- Use this method to ensure that all messages from a specific sender will arrive in your inbox.
-
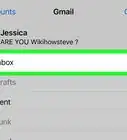
2Click the Spam folder. It’s in the folder list along the left side of Gmail. This opens your Spam inbox.
-
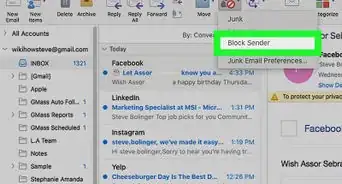
3Click the message from the sender you want to add. The contents of the message will appear.
-
4Hover your mouse over the sender’s name or address. It’s at the top-left corner of the message. A pop-up containing the sender’s email address will appear.
-
5Click Add to contacts. It’s at the bottom of the pop-up window. Now that the sender is added to your contacts, future messages will be directed to the inbox instead of the Spam folder.Advertisement


Method 3
Method 3 of 5:Marking as Not Junk in Outlook
Method 3
-
1Open Outlook on your PC or Mac. It’s under Microsoft Office in the All Apps area of the Start menu in Windows, and in the Applications folder in macOS.
-
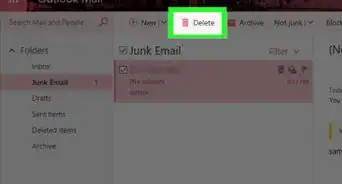
2Click the Junk folder. It’s in the left column of Outlook. A list of junk messages will appear.
-
3Right-click the message that isn’t spam. A menu will appear.
-
4Click the Junk menu. Additional options will expand.
-
5Click Not Junk. It’s the next-to-last option in the menu. A confirmation message will appear.
-
6Check the box to add the sender to your safe list. This ensures that future messages from this sender are directed to the inbox instead of the Junk folder.
-
7Click OK. The message is now in your inbox.Advertisement


Method 4
Method 4 of 5:Marking a Not Junk in Mac Mail
Method 4
-
1Open the Mail app on your Mac. It’s the postage stamp icon in the Dock, which is usually at the bottom of the screen.
-
2Click the Junk mailbox. It’s in the left column of the Mail app.[1]
-
3Click a message that isn’t junk. Its contents will appear.
-
4Click Not Junk. It’s in the banner at the top of the message. The message will be moved to the inbox.Advertisement


Method 5
Method 5 of 5:Disabling Junk Mail in Mac Mail
Method 5
-
1Open the Mail app on your Mac. It’s the postage stamp icon in the Dock, which is usually at the bottom of the screen.
- Use this method if you want all of your email to arrive in your inbox. None of your messages will be filtered to the junk mailbox if you complete these steps.
-
2Click the Mail menu. It’s in the menu bar at the top of the screen.
-
3Click Preferences.
-
4Click the Junk Mail tab.
-
5Remove the check mark from “Enable junk mail filtering.” This prevents the Mail app from sorting junk mail.Advertisement


About This Article

Nicole Levine, MFA
Tech Specialist
This article was written by Nicole Levine, MFA. Nicole Levine is a Technology Writer and Editor for wikiHow. She has more than 20 years of experience creating technical documentation and leading support teams at major web hosting and software companies. Nicole also holds an MFA in Creative Writing from Portland State University and teaches composition, fiction-writing, and zine-making at various institutions. This article has been viewed 6,761 times.
How helpful is this?
Co-authors: 2
Updated: March 29, 2019
Views: 6,761
Categories: Email Spam
Advertisement