wikiHow is a “wiki,” similar to Wikipedia, which means that many of our articles are co-written by multiple authors. To create this article, 14 people, some anonymous, worked to edit and improve it over time.
This article has been viewed 26,312 times.
Learn more...
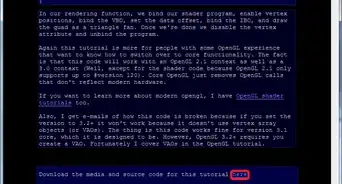
Many programmers prefer OpenGL for graphics. If you are one of them, you are strongly advised by its producer to use a window toolkit (such as GLFW) and an OpenGL loading libraries (such as GLAD). This guide will help you get over the first challenge of using OpenGL with GLFW and GLAD: Installing and setting them up, and creating your first project with OpenGL-GLFW-GLAD Template in Visual Studio 2019 or 2022.
This guide will assume your platform is Windows 10, and your IDE is Visual Studio 2019 or 2022. During Visual Studio installation, check the Desktop development with C++ workload box. Also click "Language pack" and check "English" box.
It is addressing the beginner. He can set up GLFW and GLAD in project with Visual Studio by 3 ways: 1st targeting x32 platform, 2nd targeting x64 platform, and 3rd set up GLFW source compiled by CMake and Visual studio, and GLAD.
Steps
Part 1
Part 1 of 11:Downloading GLFWx32 and GLAD
-
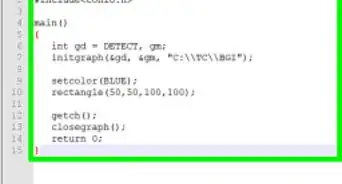
1Highlight what you expect to do. For example see picture above.
-
2Create folder GL. Open Windows's File Explorer > Navigate to disk (directory) C.
- If folder GL already exists it's okay.
- If it doesn't, right click in empty area > select New > Folder > type GL > hit ↵ Enter.
- In folder GL create folder with name GLAD.
-
3Download GLFW. Right click on following address and select Open Link in New Window https://www.glfw.org/download.html, click 32-bit Windows binaries. You get "glfw-3.3.4.bin.WIN32" or latest version.
- Click it > right click > select Copy.
- Navigate to C: > GL > right click > select paste.
- (Alternatively click folder "glfw-3.3.4.bin.WIN32", or latest version, in window where is downloaded and drag into folder C:\GL).
- Click on "glfw-3.3.4.bin.WIN32" and rename to GLFWx32.
- Now in "GL" folder you have folders: GLAD (empty) and GLFWx32.
-
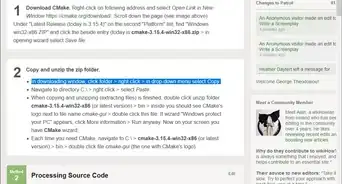
4Download GLAD. Right click on following address and select Open Link in New Window https://glad.dav1d.de/.
- In Language leave C/C++.
- In API/gl entry, select the latest version (today is 4.6).
- In Specification leave OpenGL.
- In Profile select Core.
- Scroll down the page and click GENERATE.
- In "Glad" window (see picture above), click "glad.zip".
- In downloading window you have two zip folders: include and src.
- Click folder include > right click > Copy.
- Navigate to C: > GL > GLAD. In GLAD folder right click > select Paste.
- (Alternatively click folder include and drag into folder GLAD, at C:\GL\GLAD).
- Go back to downloading window > click folder src > right click > Copy.
- Navigate to C: > GL > GLAD. In GLAD folder right click > select Paste.
- (Alternatively click folder src and drag into folder GLAD, at C:\GL\GLAD).
- Now in folder GLAD you have two (unzipped) folders: include and src.


Part 2
Part 2 of 11:Creating Project targeting x32 Platform
-
1Create folder GLP. Navigate to disk (directory) C.
- If folder GLP already exists it's okay.
- If it doesn't, right click in empty area > select New > Folder > type GLP > hit ↵ Enter.
-
2Create empty project.
-
If Visual Studio is not open. Open it > Click Create a new project > Empty Project > Next.
- In "Project name" text field type (or copy and paste) GLFWx32-GLAD-0
- In "Location" text field type C:\GLP
- Check "Place solution and project in the same directory".
- Click Create.
- Wait till Visual Studio instance appears.
- If it's open. Click File > New > Project… > Empty Project > Next. The rest as above.
-
If Visual Studio is not open. Open it > Click Create a new project > Empty Project > Next.
-
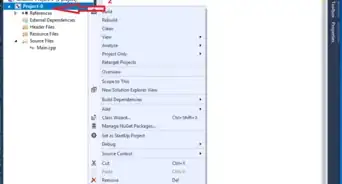
3Add your source file to the Project.
- In the "Solution Explorer" window, right click the Source Files entry (the last one).
- Click Add > New Item… In the Add New Item - GLFWx32-GLAD-0 wizard, click C++ File (.cpp) (the first one) from the middle of the window.
- In the Name text box type Main.cpp.
- The Location is C:\GLP\GLFWx32-GLAD-0\.
- Click the Add button. The file will open in the main text editor but leave the file blank for now.
Part 3
Part 3 of 11:Installing GLFWx32 and GLAD in the Project
-
1Add file glad.c. Go to Visual Studio > Solution Explorer > right click Source Files > click Add > Existing Item ... .
- In "Add Existing Item - GLFWx32-GLAD-0" wizard, navigate to C: > GL > GLAD > src > glad.c > click glad.c. "File name" should be glad.c. Click Add.
-
2Configure "Property Pages". Go to "Solution Explorer" > right click on the name of your project GLFWx32-GLAD-0 > select "Properties". In "GLFWx32-GLAD-0 Property Pages" wizard,
-
1. Main menu. In Configuration entry select Active(Debug) > in Platform: entry, select "x32" or "Win32" > Click {{macButton|Configuration manager...}. In Configuration Manager wizard,
- Active solution platform: select "x32" or "x86"
- Platform entry, "x32" or "Win32" is automatically selected.
- Click Close
-
2. Additional Include Directories. Open C/C++ drop-down menu. Click General > Additional Include Directories. > the down arrow at the right of the field > click <Edit...> in the drop down menu.
- Copy C:\GL\GLFWx32\include > in Additional Include Directories wizard click first icon > paste. .
- Copy C:\GL\GLAD\include > in Additional Include Directories wizard click first icon > paste.
- On Additional Include Directories wizard click OK.
-
3. Additional Library Directories. Open the Linker drop-down menu, and click General. Click Additional Library Directories entry > down arrow at the right of the field > click <Edit...> in the drop-down menu.
- In "Additional Library Directories" wizard click first icon > ....
- In "Select Directory" wizard, navigate to C: > GL > GLFWx32 > lib-vc2019 or the latest. "Folder:" should be "lib-vc2019" or the latest. Click Select folder.
- In "Additional Library Directories," click OK.
-
4. Additional Dependencies. In Linker drop down menu click "Input". Click Additional Dependencies entry > the down arrow at the right of the field > <Edit...> in the drop-down menu.
- Copy opengl32.lib; glfw3.lib; glfw3dll.lib and paste in the top-most text box in the Additional Dependencies wizard. Click OK in the Additional Dependencies wizard.
- 5. System. In the Linker drop-down menu, click System > SubSystem > click the down arrow at the end of the field > select Console(/SUBSYSTEM:CONSOLE) from the dropdown menu > click Apply, then OK on the Project Property Pages wizard.
-
1. Main menu. In Configuration entry select Active(Debug) > in Platform: entry, select "x32" or "Win32" > Click {{macButton|Configuration manager...}. In Configuration Manager wizard,
-
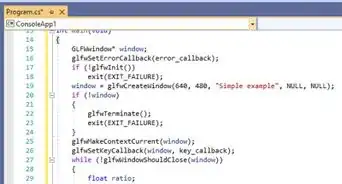
3Test your project. Right click on following address and select Open Link in New Window https://learnopengl.com/code_viewer_gh.php?code=src/1.getting_started/2.1.hello_triangle/hello_triangle.cpp. Copy the code. Go to Visual Studio and paste in Source.cpp code area > hit Ctr+F5, and wait... Two windows should appear: One black and other with name "LearnOpenGL" and inside an orange triangle.
- If only the black window (the console) appears with message: "Failed to create GLFW window", set up is okay, function glfwCreateWindow did not work.
-
4Correct any errors. In "Error List" if you see error about
- file with extension .h go to Part 3, step 2, 2. Additional Include Directories and follow instructions.
- file with extension .lib go to Part 3, step 2, 3. Additional Library Directories, and follow instructions. Also to step 2, 4. Additional Dependencies.
- "entry point must be defined" go to step 2, 5. System and follow instructions.
- file glad.c go to step 1, and follow instructions.
- For other errors, if you cannot correct them, close Visual Studio > delete project folder GLFWx32-GLAD-0 which lives in C:\GLP > open Visual Studio > repeat set up from Part 2. Good job.


Part 4
Part 4 of 11:Creating a Project with an GLFWx32-GLAD Template
-
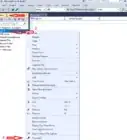
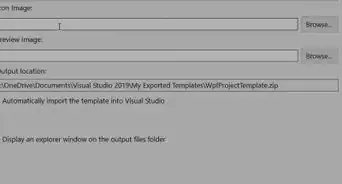
1Create Template. Go to Visual Studio main menu and, while GLFWx32-GLAD-0 is open, click Project > Export Template.... On Export template Wizard check Project Template, if it's not checked. Click Next >. On Select Template Options, in Template name text box type (or copy and paste) GLFWx32-GLAD > Click Finish. The Template has been created.
-
2Create Project. Click File > New > Project....
- In Create a new project wizard in the list of templates select GLFWx32-GLAD > click Next.
- In Configure your new project wizard, in "Project name" text field type GLFWx32-GLAD-1
- Copy C:\GLP and paste in "Location" text field.
- Be sure Place solution and project in the same directory is checked. Click Create.
- In Visual Studio main menu, select x86.
- Hit Ctr+F5. Good job.
-
3Tips. When you create project with template, remember select x86.
Part 5
Part 5 of 11:Creating Project to target Platform x64
-
1Download GLFW. Right click on following address and select Open Link in New Window https://www.glfw.org/download.html, click 64-bit Windows binaries. You get "glfw-3.3.4.bin.WIN64" or latest version.
- Click it > right click > select Copy.
- Navigate to C: > GL > right click > select paste.
- (Alternatively click folder "glfw-3.3.4.bin.WIN64", or latest version, in window where is downloaded and drag into folder C:\GL).
- Click on "glfw-3.3.4.bin.WIN64" and rename to GLFWx64
Part 6
Part 6 of 11:Creating Project targeting x64 Platform
-
1Create folder GLP. Navigate to disk (directory) C.
- If folder GLP already exists it's okay.
- If it doesn't, right click in empty area > select New > Folder > type GLP > hit ↵ Enter.
-
2Create empty project.
-
If Visual Studio is not open. Open it > Click Create a new project > Empty Project > Next.
- In "Project name" text field type (or copy and paste) GLFWx64-GLAD-0
- In "Location" text field type C:\GLP
- Check "Place solution and project in the same directory".
- Click Create.
- Wait till Visual Studio instance appears.
- If it's open. Click File > New > Project… > Empty Project > Next. The rest as above.
-
If Visual Studio is not open. Open it > Click Create a new project > Empty Project > Next.
-
3Add your source file to the Project.
- In the "Solution Explorer" window, right click the Source Files entry (the last one).
- Click Add > New Item… In the Add New Item - GLFWx64-GLAD-0 wizard, click C++ File (.cpp) (the first one) from the middle of the window.
- In the Name text box type Main.cpp.
- The Location is C:\GLP\GLFWx64-GLAD-0\.
- Click the Add button. The file will open in the main text editor but leave the file blank for now.
Part 7
Part 7 of 11:Installing GLFWx64 and GLAD in the Project
-
1Add file glad.c. Go to Visual Studio > Solution Explorer > right click Source Files > click Add > Existing Item ... .
- In "Add Existing Item - GLFWx64-GLAD-0" wizard, navigate to C: > GL > GLAD > src > glad.c > click glad.c. "File name" should be glad.c. Click Add.
-
2Configure "Property Pages". Go to "Solution Explorer" > right click on the name of your project GLFWx64-GLAD-0 > select "Properties". In "GLFWx64-GLAD-0 Property Pages" wizard,
-
1. Main menu. In Configuration entry select Active(Debug) > in Platform: entry, select "x64" > Click {{macButton|Configuration manager...}. In Configuration Manager wizard,
- Active solution platform: select "x64"
- Platform entry, "x64" is automatically selected.
- Click Close
-
2. Additional Include Directories. Open C/C++ drop-down menu. Click General > Additional Include Directories. > the down arrow at the right of the field > click <Edit...> in the drop down menu.
- Copy C:\GL\GLFWx64\include > in Additional Include Directories wizard click first icon > paste. .
- Copy C:\GL\GLAD\include > in Additional Include Directories wizard click first icon > paste.
- On Additional Include Directories wizard click OK.
-
3. Additional Library Directories. Open the Linker drop-down menu, and click General. Click Additional Library Directories entry > down arrow at the right of the field > click <Edit...> in the drop-down menu.
- In "Additional Library Directories" wizard click first icon > ....
- In "Select Directory" wizard, navigate to C: > GL > GLFWx64 > lib-vc2019 or the latest. "Folder:" should be "lib-vc2019" or the latest. Click Select folder.
- In "Additional Library Directories," click OK.
-
4. Additional Dependencies. In Linker drop down menu click "Input". Click Additional Dependencies entry > the down arrow at the right of the field > <Edit...> in the drop-down menu.
- Copy opengl32.lib; glfw3.lib; glfw3dll.lib and paste in the top-most text box in the Additional Dependencies wizard. Click OK in the Additional Dependencies wizard.
- 5. System. In the Linker drop-down menu, click System > SubSystem > click the down arrow at the end of the field > select Console(/SUBSYSTEM:CONSOLE) from the dropdown menu > click Apply, then OK on the Project Property Pages wizard.
-
1. Main menu. In Configuration entry select Active(Debug) > in Platform: entry, select "x64" > Click {{macButton|Configuration manager...}. In Configuration Manager wizard,
-
3Test your project. Right click on following address and select Open Link in New Window https://learnopengl.com/code_viewer_gh.php?code=src/1.getting_started/2.1.hello_triangle/hello_triangle.cpp. Copy the code. Go to Visual Studio and paste in Source.cpp code area > hit Ctr+F5, and wait... Two windows should appear: One black and other with name "LearnOpenGL" and inside an orange triangle.
- If only the black window (the console) appears with message: "Failed to create GLFW window", set up is okay, function glfwCreateWindow did not work.
-
4Correct errors. As in Part 3, step 4.
Part 8
Part 8 of 11:Creating a Project with an GLFWx64-GLAD Template
-
1Create Template. Go to Visual Studio main menu and, while GLFW64-GLAD-0 is open, click Project > Export Template.... On Export template Wizard check Project Template, if it's not checked. Click Next >. On Select Template Options, in Template name text box type (or copy and paste) GLFWx64-GLAD > Click Finish. The Template has been created.
-
2Create Project. Click File > New > Project....
- In Create a new project wizard in the list of templates select GLFWx64-GLAD > click Next.
- In Configure your new project wizard, in "Project name" text field type GLFWx64-GLAD-1
- Copy C:\GLP and paste in "Location" text field.
- Be sure Place solution and project in the same directory is checked. Click Create.
- In Visual Studio main menu, select x64.
- Hit Ctr+F5. Good job.
Part 9
Part 9 of 11:Setting up GLFW built by CMake, and GLAD
-
1Build GLFW by CMake and Visual Studio, and set up in project. Right click on following link and select Open Link in New Window Use CMake to Get Binaries from Source Code. Follow it to the end. As project's name type GLFWsrc-GLAD-0
-
2In folder GL create folder GLAD. In folder C:\GL right click > select New > Folder > type: GLAD > hit ↵ Enter.
-
3Download GLAD according to Part 1, step 4.
-
4Add file glad.c. Go to Visual Studio > Solution Explorer > right click Source Files > click Add > Existing Item ....
- Navigate to C: > GL > GLAD > src > glad.c > click glad.c. "File name" should be glad.c. Click Add.
- In Solution Explorer, below Source Files you should see two files: glad.c and Main.cpp.
-
5Configure GLFWsrc-GLAD-0 Property Pages. In addition to configuration you have done for GLFWsrc do following for GLAD.
- In Solution Explorer, right click on the name of your project, that is GLFWsrc-GLAD-0, and select Properties. Select Configuration: Active(Debug), Platform: x64.
- Open C/C++ drop-down menu. Click General > Additional Include Directories. > the down arrow at the right of the field > click <Edit...> in the drop down menu.
- Copy C:\GL\GLAD\include and, in Additional Include Directories wizard, click first icon > paste > click OK.
-
6Test your project and correct errors if any. In present article follow Part 3, steps 3 and 4.
Part 10
Part 10 of 11:Creating a Project with an GLFWsrc-GLAD Template
-
1Create Template. Go to Visual Studio main menu and, while GLFWsrc-GLAD-0 is open, click Project > Export Template.... On Export template Wizard check Project Template, if it's not checked. Click Next >. On Select Template Options, in Template name text box type (or copy and paste) GLFWsrc-GLAD > Click Finish. The Template has been created.
-
2Create Project. Click File > New > Project....
- In Create a new project wizard in the list of templates select GLFWsrc-GLAD > click Next.
- In Configure your new project wizard, in "Project name" text field type GLFWsrc-GLAD-1
- Copy C:\GLP and paste in "Location" text field.
- Be sure Place solution and project in the same directory is checked. Click Create.
- In Visual Studio main menu, select x64.
- Hit Ctr+F5. Good job.
-
3TIPS: In every project you create with it, select x64 (next to Debug) in Visual Studio's GUI.
Part 11
Part 11 of 11:Choosing Set Up
-
1In this tutorial you learn 3 was to set up GLFW and GLAD in Project with Visual Studio.
- Set up binaries x86 (32 bits). It's the easiest. You should start learning set up from here.
- Set up binaries x64 (64 bits). It targets x64 platform. Choose it only when you have specific reason for doing so.
- Compile GLFW source, and set up, together with GLAD, in project. Targets x64 too.The most difficult. The best though.
-Step-16-Version-3.webp)