X
wikiHow is a “wiki,” similar to Wikipedia, which means that many of our articles are co-written by multiple authors. To create this article, volunteer authors worked to edit and improve it over time.
The wikiHow Tech Team also followed the article's instructions and verified that they work.
Learn more...
This wikiHow will show you how to lock your Windows 10 PC remotely. Locking your PC logs out all accounts on the computer and displays a lock screen message that you can specify. Once locked, only administrators will be able to unlock it. Keep in mind that this will only work if your device is signed into a Microsoft Account.
Steps
Part 1
Part 1 of 2:Enable Find My Device
Part 1


Part 2
Part 2 of 2:Locking Your Computer
Part 2
-
1Go to account.microsoft.com/devices. Then, enter your password. You need to enter your password even if you are logged in for extra security.
-
2Click "Show details" on the device that you want to lock.
-
3Select the "Security & protection" tab in the details window.
-
4Click on "Find my device". A new window will open up and a list of all your devices will be shown.
-
5Select the device that you want to lock. Then, click on Lock.
-
6Read the message that comes up. Then, if you still want to proceed, click Lock.
-
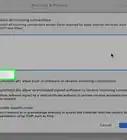
7Type in the message that you want to display on the locked device. This message will be displayed on the lock screen. Then, click Lock. This will immediately lock the computer and prevent non-administrator accounts from logging in.
- If you do not specify a message a generic one will be displayed.
- If the device is not connected to the internet, then you will see an error message. In this case, you'll have to try again latter.
- To unlock the computer, log into an administrator account on it.


-Step-17.webp)


-Step-17.webp)