X
wikiHow is a “wiki,” similar to Wikipedia, which means that many of our articles are co-written by multiple authors. To create this article, volunteer authors worked to edit and improve it over time.
This article has been viewed 2,320 times.
Learn more...
The Anycubic Photon is a great entry-level machine for first-time 3D-Printer hobbyists. Correctly leveling the print bed is first and often the greatest obstacle encountered when setting up your machine. Incorrectly leveled build plates are the number one cause of failed prints, which is why this step is so crucial. However, with precision and patience, your bed can be properly leveled, resulting in beautifully detailed prints.
Steps
-
1Gather the materials. To correctly level the print bed, you’ll need:
- A hex-wrench. The correct size comes with standard with the machine.
- A standard sheet of letter or copy paper.
-
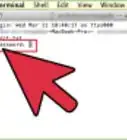
2Raise the print bed. Turn on the machine by flipping the “ON switch”. Then select “Tools” → “Move Z” → “10mm” then press the “↑” button several times until the plate has been raised to the top of the machine.
-
3Remove the resin vat. Unscrew the two screws on the left and right of the vat holder to release the vat. This will uncover the LCD display on the bottom of the machine.
-
4Loosen the plate. Using the hex-wrench, loosen the screw on the top of the build plate. The screw is located on the top of the plate below the red knob.
-
5Lower the plate. Press the “Home” button to lower the build plate towards the LCD screen. The plate will stop just above the screen.
-
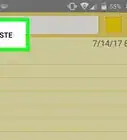
6Insert the paper. Raise the build plate 3mm by selecting the “1mm” button and then pressing the “↑” button 3 times. Then slide in the paper between the LCD screen and the plate. It’s often easier to cut the paper in half to allow the paper to lay flat on the screen.
-
7Find resistance between the paper and the LCD screen. Slowly lower the build plate by selecting either the “1mm” or “.1mm” button and then pressing the “↓” button. The plate should be lowered to the point where the paper can be pulled out but cannot be pushed in.
-
8Align the plate with the LCD screen. This is most easily done by looking directly down from the top of the machine to ensure equal alignment on every side of the plate.
-
9Hold down on the plate. While pressing down on the plate, tighten the screw on the top of the plate using the hex-wrench. Make sure to press evenly on both sides of the plate while tightening. The paper should now be able to be evenly pulled from between the plate and the screen.
-
10Raise the build plate. After selecting the “1mm” button, raise the build plate 3mm by pressing the “↑” button 3 times.
-
11Level the plate. Slowly lower the build plate by selecting either the “1mm” or “.1mm” button and then pressing the “↓” button. Lower the plate to the point where the paper can be pulled out with resistance, but it cannot be pushed in.
-
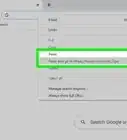
12Set the Z-axis. Press the “Back” → “Z=0” and “Enter” buttons to register the correct leveling height.
- Note: DO NOT press the “Home” button during this step. The “Home” button does not bring the screen to the home page.