This article was co-authored by wikiHow Staff. Our trained team of editors and researchers validate articles for accuracy and comprehensiveness. wikiHow's Content Management Team carefully monitors the work from our editorial staff to ensure that each article is backed by trusted research and meets our high quality standards.
There are 9 references cited in this article, which can be found at the bottom of the page.
This article has been viewed 3,051 times.
Learn more...
A zig zag blanket is a classic knitting project, and it is something even a beginner to knitting can create. You will need to understand the basics of knitting, such as casting on, knitting, and purling, and you will also need several balls of yarn. Knitting a zig zag blanket can take a while depending on how big you want it to be, but it will be worth the effort when you can sit back, admire, and enjoy your finished product!
Steps
Part 1
Part 1 of 3:Designing Your Blanket
-
1Choose a pattern to get an exact blanket size or design. If you want to achieve a specific blanket size or if you want to get a specific type of zig zag design, then using a knitting pattern is recommended. You can find lots of free zig zag blanket knitting patterns online or you can look at knitting pattern books and magazines in your local craft supply store.
- If this is your first time knitting a zig zag blanket, then opt for an easy or beginner level pattern.
- Some common blanket sizes include: crib 45 by 65 inches (110 by 170 cm), twin 66 by 90 inches (170 by 230 cm), double 80 by 90 inches (200 by 230 cm), queen 90 by 100 inches (230 by 250 cm), and king 108 by 100 inches (270 by 250 cm).[1]
-
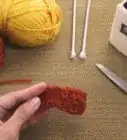
2Pick at least 2 different colors of medium-weight yarn. To make the zig zag pattern stand out more, use 2 different colors of yarn. You can use any type of yarn you like, but a medium-weight yarn is usually best for knitting blankets. Make sure that you check the pattern to find out how much yarn you will need to create your blanket.
- You will need around 6 balls of yarn to create a twin size zig zag blanket, so divide the number of colors you want to use evenly to get this amount of yarn. For example, if you are using 3 colors, then get 2 or 3 balls of each color.[2]
- Yarn balls and skeins come in different sizes, so check the yardage to determine how much yarn you will get with each ball or skein.
-
3Select a pair of knitting needles appropriate for your yarn type. Yarn labels usually include a recommendation for what size needles you will need. Check the label on your yarn to be sure.
- With a medium weight-yarn, you can use a pair of US size 7 (4.5mm), 8 (5.0 mm), or 9 (5.5mm) knitting needles.[3]
-
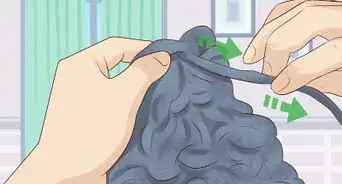
4Make a slipknot and place it onto your right-hand needle. Loop the yarn around your index and ring fingers twice. Then, slip the loops off of your fingers while pinching where the loops begin and end. Pull the first loop over the second loop and tug on the tail to secure the knot. Slip the loop onto the right-hand knitting needle and tug the tail more to tighten the loop.[4]
- The slipknot will anchor your cast on stitches and it will also count as your first cast on stitch.
-
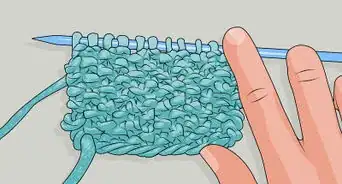
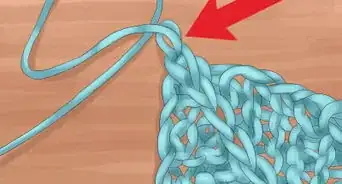
5Cast on 121 stitches or the amount required for your pattern. Wrap the yarn around your left-hand needle, and insert the right-hand needle into this loop. Bring the yarn over the right-hand needle and pull the yarn through.[5]
- Keep casting on until you have the desired number of stitches.
- Casting on 121 stitches with medium weight yarn and a pair of 9 (5.5mm) knitting needles will result in a crib size blanket that is suitable for toddlers or as a decorative throw.[6]
- You will need to cast on more stitches for a larger blanket, such as 242 stitches for a queen-size blanket.
Part 2
Part 2 of 3:Working a Zig Zag Pattern
-
1
-
2Do a slip slip knit sequence.[9] Slip the first stitch from the main needle to your working needle by inserting the working needle through it knit-wise (going from front to back). Then, do the same thing with the next stitch. Once both stitches are on the working needle, insert the main needle through both of the stitches and yarn over the end of the working needle. Then, pull this yarn through both stitches to replace them with 1 new stitch.[10]
-
3Knit 9 and yarn over. Knit the next 9 stitches as you normally would. Then, wrap the working yarn around the end of the right-hand needle. This will form a new stitch.[11]
-
4Knit 1 and yarn over. Next, knit 1 stitch and loop the yarn over the right-hand needle to create an increase.[12]
-
5Knit 10 and slip slip knit again. Knit the next 10 stitches as you normally would. Then, do another slip, slip, knit stitch to decrease by 1.[13]
-
6Knit 10 more and yarn over. Knit the next 10 stitches as you normally would. Then, yarn over the end of the right-hand needle.[14]
-
7Repeat the sequence from knit 1 and yarn over. The stitch sequence for the rest of the row is as follows:[15]
- Knit 1
- Yarn over
- Knit 10
- Slip, slip, knit
- Knit 10
- Yarn over
-
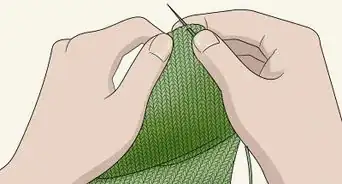
8Purl once into each stitch in your next row. To purl, move the working yarn to the front of your knitting. Insert your right-hand needle into the first stitch on the left-hand needle going from back to front. Then, yarn over your right-hand needle and pull the yarn through.[16]
- Each even-numbered row will be a purl only row, so pay attention to the row number you are working on, such as by using a stitch marker or keeping a tally on a piece of paper.[17]
-
9Return to the knit row instructions when you finish the purl row. After you purl a row, go back to the knit row instructions. Keep alternating between the knit and purl rows to complete the zig zag stitch.
Part 3
Part 3 of 3:Finishing the Blanket
-
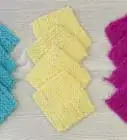
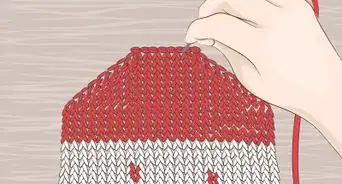
1Switch colors after 10 rows. Continue to repeat the same 2-row sequence for a total of 10 rows (or fewer rows if you want thinner zig zags), and then you will be ready to switch colors. To switch, tie the working end of your yarn to the base of the first stitch in row 11. Cut the old yarn about 6 inches (15 cm) from the stitch. Then, pick up the new color yarn and begin working the same 2-row sequence.[18]
- You may also weave in the end of the old color of yarn at this time by holding the old strand alongside the new strand as you knit the first few stitches.
-
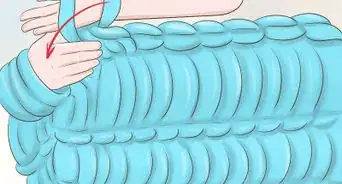
2Knit in the zig zag pattern until the blanket is the desired length. Keep working the zig zag pattern and switching colors after every tenth row until your blanket is the length you want it to be. You may also keep working it until your yarn runs out.
- Make sure that you have enough yarn to complete 10 rows in a color before beginning a new block of zig zags.
- If you run out before finishing a block, then you will have to go and buy another ball of that color of yarn to maintain the symmetry in your zig zag pattern.
-
3Bind off the last row. Casting off will secure the edges of your blanket after you have completed your final row. To cast off, knit the first 2 stitches in the row. Then, use your left-hand needle to bring the first stitch you knit onto the right hand needle up and over the second 1. Then, knit another stitch and bring the first 1 over the second 1 again.
- Repeat this sequence until you have cast off all of the stitches on the edge of the blanket.
-
4Cut and tie off the last stitch. When you get to the last stitch in the bind off row, cut the working yarn about 6 inches (15 cm) from the last stitch. Then, pull the tail of this yarn through the loop of the final stitch to secure it in a knot.[19]
- If desired, you may thread this end of yarn onto a yarn needle and weave it into the edge of your blanket, or you may cut the excess yarn about 0.25 inches (0.64 cm) from the knot.
Things You’ll Need
- Knitting pattern
- Yarn
- Knitting needles
- Scissors
- Yarn needle (optional)
References
- ↑ https://www.thesprucecrafts.com/standard-bed-and-blanket-sizes-2116316
- ↑ https://espacetricot.files.wordpress.com/2011/12/chevron-baby-blanket1.pdf
- ↑ https://www.craftyarncouncil.com/standards/yarn-weight-system
- ↑ http://newstitchaday.com/knitting-101-how-to-make-a-slip-knot-for-beginners/
- ↑ https://www.craftyarncouncil.com/instructions_kn.php3
- ↑ https://www.youtube.com/watch?v=KC5cNi9jU5U&feature=youtu.be&t=46s
- ↑ https://espacetricot.files.wordpress.com/2011/12/chevron-baby-blanket1.pdf
- ↑ https://www.craftyarncouncil.com/instructions_kn.php3
- ↑ https://espacetricot.files.wordpress.com/2011/12/chevron-baby-blanket1.pdf
- ↑ http://newstitchaday.com/ssk-slip-slip-knit-decrease-knitting/
- ↑ https://espacetricot.files.wordpress.com/2011/12/chevron-baby-blanket1.pdf
- ↑ https://espacetricot.files.wordpress.com/2011/12/chevron-baby-blanket1.pdf
- ↑ https://espacetricot.files.wordpress.com/2011/12/chevron-baby-blanket1.pdf
- ↑ https://espacetricot.files.wordpress.com/2011/12/chevron-baby-blanket1.pdf
- ↑ https://espacetricot.files.wordpress.com/2011/12/chevron-baby-blanket1.pdf
- ↑ https://www.craftyarncouncil.com/mar06_purl.html
- ↑ https://espacetricot.files.wordpress.com/2011/12/chevron-baby-blanket1.pdf
- ↑ https://espacetricot.files.wordpress.com/2011/12/chevron-baby-blanket1.pdf
- ↑ http://newstitchaday.com/knitting-101-the-basic-knit-bind-off-for-beginners/
About This Article