This article was co-authored by Lois Wade, a trusted member of wikiHow's volunteer community. Lois Wade has 45 years of experience in crafts including sewing, crochet, needlepoint, cross-stitch, drawing, and paper crafts. She has been contributing to craft articles on wikiHow since 2007.
wikiHow marks an article as reader-approved once it receives enough positive feedback. In this case, 86% of readers who voted found the article helpful, earning it our reader-approved status.
This article has been viewed 322,476 times.
Learn more...
Do you have a skein of yarn that has morphed into an unrecognizable mass? Perhaps you have some "colored spaghetti" hanging out in your project room or box? Or maybe you've just come across your toddler or pet playing in your knitting bag? Whatever the knitting crisis you are facing, you can tidy up that mess in no time the old-fashioned way.
Steps
Method 1
Method 1 of 4:Finger Wrap Approach
-
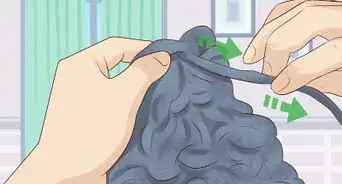
1Gently untangle as much yarn as you can.
-
2Loosen any knotted areas but be careful not to pull it into two pieces.Advertisement
-
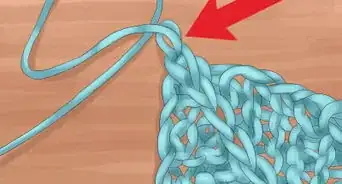
3Find one end of the yarn.
-
4Lightly wrap the end of the yarn around your fingers.
-
5Remove the wrapped loops and hold them in one hand.
-
6Wrap the remaining yarn around the loops until no more will comfortably fit.
-
7Pinch the "football" shape you have created between your thumb and forefinger of one hand.
-
8Wrap the yarn lengthwise around the "football", flattening it into a rounder shape by pulling snugly as you go.
-
9Change directions of your wrap every 15 to 20 rounds. There is no "right" direction. Just wrap until it's rounded.
-
10Continue until all of the yarn mass is wrapped into an easy to manage yarn ball!Advertisement
Method 2
Method 2 of 4:Using the Center Pull Approach
-
1Use your fingers again. When you wrap the yarn in the beginning, wrap it around your pinky finger and your thumb in a figure eight, making sure the loose end doesn't get caught up in it.
-
2Pinch the figure eight in the center and pull it off of your fingers.
-
3Wrap the remaining yarn around the center of the figure eight. Again, be sure that loose end is free.
-
4Continue wrapping around the figure eight until you have a ball. See the video below for visuals.
-
5Finished.Advertisement
Method 3
Method 3 of 4:Cardboard Square Approach
-
1Take a square of cardboard and cut a notch in it.
-
2Tie one end of the yarn around the cardboard square.
-
3Wrap the yarn around the square. This will start to form a small ball with more wraps.
- Roll the yarn reasonably tightly.
-
4Switch the side you are wrapping every few minutes. Go for a cross pattern. As the ball grows, this enhances the stability and prevents it from tangling.
-
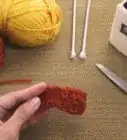
5Keep wrapping until all of the yarn is used up. Eventually, you will have a neat ball.
-
6Finish up. To end it, take the last strand and tuck it under another oneAdvertisement


Method 4
Method 4 of 4:Using a hand-operated yarn baller
-
1Put the skein or hank on a swift. If you don't have one, then put it on a chair. First untwist the hank, then put it on the swift, and adjust the swift to make it the same size as the hank.
-
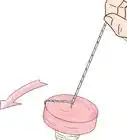
2Use an end of the skein and put it through the piece of metal that looks like a coil.
-
3Pull part of the yarn through the coil and put it into the notch in the yarn baller.
-
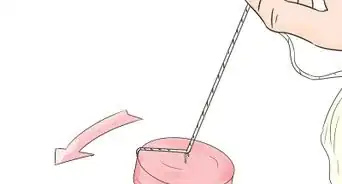
4Turn the crank clockwise while holding the yarn taught.
-
5Pull the yarn off the winder. Now you're done!Advertisement
Community Q&A
-
QuestionWhich one is easier?
 AnotheronebitesthesoilCommunity AnswerDifferent methods work better for different people. Try all the methods and select the one that works for you.
Things You'll Need
- A bunch of yarn (probably somewhat tangled)
- Scissors (optional)
- A small square of cardboard (for Method 3)
About This Article