This article was co-authored by wikiHow Staff. Our trained team of editors and researchers validate articles for accuracy and comprehensiveness. wikiHow's Content Management Team carefully monitors the work from our editorial staff to ensure that each article is backed by trusted research and meets our high quality standards.
There are 13 references cited in this article, which can be found at the bottom of the page.
The wikiHow Video Team also followed the article's instructions and verified that they work.
This article has been viewed 3,346 times.
Learn more...
Knitting lace is a great way to get the delicate, elegant appearance of lace in less time. If you are new to knitting lace, start by finding a pattern meant for beginners and gather your knitting supplies. Then, try following along with a simple lace knitting pattern to master some of the basics. You’ll be knitting fancy lace doilies and shawls in no time!
Steps
Part 1
Part 1 of 3:Designing a Knit Lace Project
-
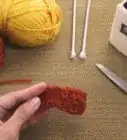
1Find a beginner-level lace knitting pattern. Lace knitting patterns range from easy to advanced, so try looking at some easy patterns if you are new to knitting. You can find lots of free lace knitting patterns online, or you can visit your local craft supplies store and browse the pattern books and magazines.[1]
- Try starting with a simple project, such as a knit lace doily, scarf, or shawl.
- Be aware that some lace knitting patterns will include a chart to help you see how the stitches are laid out, but this is more common with intermediate to advanced patterns.
-
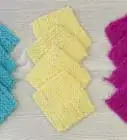
2Select a light to medium-weight yarn that is appropriate for knitting lace. You may want to opt for a smooth, light to medium-weight yarn to help you create a defined lace pattern. These yarn weights will also create a finished product with a more delicate texture than you might get with a chunky or super bulky yarn.
- You can also find delicate yarns meant for making lace, but these will require very small needles and it will take a long time to complete a project.[2] Start out with a light to medium weight yarn to learn lace knitting, and then try a more delicate yarn later if desired.
-
3Choose needles 1 to 2 sizes larger than the yarn label recommends. Since the goal of lace knitting is to create a delicate item that resembles lace, use larger needles than the yarn usually requires. You can find needle size recommendations on the package of your yarn.
- For example, if you are using a medium-weight yarn and the recommendation is to use a pair of US size 7 (4.5mm) knitting needles, then opt for size 8 (5.0 mm) or 9 (5.5mm) instead.[3]
-
4Get some stitch markers to help make it easier to follow the pattern. Lace knitting patterns often include lots of different stitches, and using stitch markers can make it much easier to keep track of where you are at in a pattern. Try getting 2 or more different color stitch markers to indicate different types of stitches in the pattern.
- For example, you could place a blue stitch marker before each knit 2 together stitch in the pattern and a pink stitch marker before each yarn over.


Part 2
Part 2 of 3:Working a Basic Knit Lace Stitch
-
1Make a slipknot. Wrap the yarn around your index and ring finger twice leaving a roughly 6 inches (15 cm) tail. Pinch the intersection of the 2 loops. Slide both loops off your fingers while pinching this section to keep the loops together. Then, pull the second loop over the first loop. Slide the loop onto your right-hand needle. Then, tug on the tail to tighten it.[4]
- The slipknot is your first stitch, so make sure to count it.
-
2Cast on an even number of stitches. You can cast on as many stitches as you like as long as it is an even number. Loop the yarn over your left-hand needle, and then insert the right-hand needle onto the loop. Loop the yarn over the right-hand needle. Then, pull the yarn through to create the next cast on stitch. Keep casting on until you have the desired number of stitches.[5]
- To practice this lace knitting technique, try casting on 12 stitches. This will be enough for you to try it out and see what it looks like. You can keep working until you have a square and use it as a doily.
-
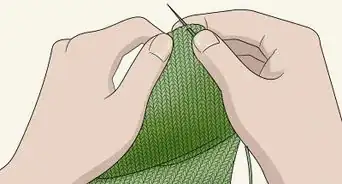
3Knit the first stitch.[6] Insert your right-hand needle into the first stitch on the left-hand needle from front to back. Then, bring the yarn over the right-hand needle behind the stitch, and pull the new loop through the old loop. Let the old loop slide off of the end of your left-hand needle to complete the stitch.[7]
- The knit stitch is often represented as an I on lace knitting charts. [8]
-
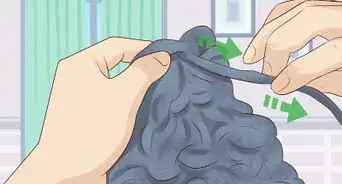
4Loop the yarn over the right-hand needle. Next, you will need to do a yarn over to make up for the decrease that will follow it. Take your working yarn and wrap it around the end of your needle the same way that you would for a knit stitch, and that’s it![9]
- This stitch is often represented as an O on lace knitting charts.[10]
-
5Knit 2 stitches together to decrease. This stitch will decrease your total stitches by 1, but the yarn over will have increased your total stitches by 1, so they cancel each other out. Insert your knitting needle into the next 2 stitches at once. Then, yarn over and pull through both to replace the 2 stitches with 1 stitch.[11]
- This stitch is often represented as a T that is tilted to the left on lace knitting charts.[12]
-
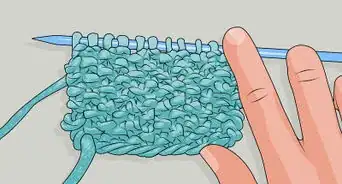
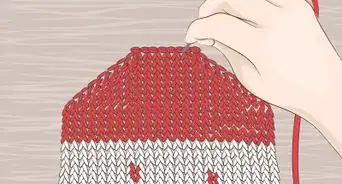
6Continue to loop the yarn over and knit 2 to the last stitch. Repeat the last 2 stitches until you get to the last stitch. This sequence will create a series of eyelets that will look like a piece of simple, mesh-like lace when you are done.[13]
- You will see different variations of this sequence in patterns, and sometimes the knit 2 together and yarn overs will be separated by other stitches. For example, for a simple variation of this sequence, you might be instructed to knit 3, yarn over, knit 2 together, then knit 3 again, and repeat.
-
7Knit 1 at the end of the row. When you get to the last stitch in the row, knit it as usual. You will always begin and end your rows by knitting 1 to create a straight, solid border.[14]
- If you are using a pattern, make sure to defer to what it says. Some patterns may include instructions for creating a special kind of border.
Part 3
Part 3 of 3:Finishing a Knit Lace Project
-
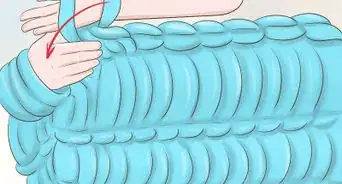
1Turn your work and repeat the stitch sequence. Once you complete the first row, turn your work around and repeat the same basic knit lace stitch sequence to continue working the simple lace pattern. You can make the piece as long as you like.[15]
- Some patterns will require you to purl across the opposite side, so 1 side will be the front and the other will be the back, but this pattern is worked the same way on both sides.
-
2Bind off the stitches when your knit lace is complete. When your project reaches the desired length, you can bind it off as you normally would with other types of knitting. Knit the first 2 stitches and then loop the first stitch over the second stitch. Let the first stitch slip off the end of the right-hand needle. Then, knit 1 and loop the first stitch over the second stitch again.[16]
- Repeat to the end of the row to bind off all of the stitches.
-
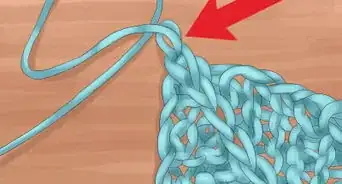
3Tie off and cut the yarn to secure the last stitch. When you finish binding off your stitches, cut the working yarn about 6 inches (15 cm) from the last stitch. Then, pull the end of the tail through the final stitch to secure it in a knot.[17] Cut the excess yarn about 0.25 to 0.5 inches (0.64 to 1.27 cm) from the last stitch to complete your project.
- You may double knot the tail through the last stitch before you cut it if desired.

Things You’ll Need
- Lace knitting pattern
- Yarn
- A pair of knitting needles
- Stitch markers
References
- ↑ http://www.knittingstitchpatterns.com/search/label/eyelet-lace-stitches
- ↑ https://www.craftyarncouncil.com/standards/yarn-weight-system
- ↑ https://www.craftyarncouncil.com/standards/yarn-weight-system
- ↑ http://newstitchaday.com/knitting-101-how-to-make-a-slip-knot-for-beginners/
- ↑ https://www.youtube.com/watch?v=7EiExDGjGoU&feature=youtu.be&t=24s
- ↑ https://www.youtube.com/watch?v=7EiExDGjGoU&feature=youtu.be&t=47s
- ↑ https://www.craftyarncouncil.com/instructions_kn.php3
- ↑ http://kcguild.org.uk/sharing-knowledge/lace-knitting/lace-knitting-beginners/
- ↑ https://www.youtube.com/watch?v=7EiExDGjGoU&feature=youtu.be&t=1m4s
- ↑ http://kcguild.org.uk/sharing-knowledge/lace-knitting/lace-knitting-beginners/
- ↑ https://www.youtube.com/watch?v=7EiExDGjGoU&feature=youtu.be&t=1m14s
- ↑ http://kcguild.org.uk/sharing-knowledge/lace-knitting/lace-knitting-beginners/
- ↑ https://www.youtube.com/watch?v=7EiExDGjGoU&feature=youtu.be&t=1m24s
- ↑ https://www.youtube.com/watch?v=7EiExDGjGoU&feature=youtu.be&t=1m52s
- ↑ https://www.youtube.com/watch?v=7EiExDGjGoU&feature=youtu.be&t=2m27s
- ↑ http://newstitchaday.com/knitting-101-the-basic-knit-bind-off-for-beginners/
- ↑ http://newstitchaday.com/knitting-101-the-basic-knit-bind-off-for-beginners/
About This Article