This article was co-authored by wikiHow Staff. Our trained team of editors and researchers validate articles for accuracy and comprehensiveness. wikiHow's Content Management Team carefully monitors the work from our editorial staff to ensure that each article is backed by trusted research and meets our high quality standards.
There are 22 references cited in this article, which can be found at the bottom of the page.
This article has been viewed 1,625 times.
Learn more...
Knit jewelry is lightweight, stylish, and easy to make! You can create a simple knit necklace, bracelet, or earrings with the yarn of your choice. Start by knitting a simple i-cord. You can make a few i-cords to wear together, or knit beads into the i-cord to give it some extra dimension. Then, finish your jewelry and show it off!
Steps
Method 1
Method 1 of 3:Knitting an I-Cord Necklace, Bracelet, or Earrings
-
1Cast on 3 to 7 stitches with double-pointed needles (DPNs).[1] To cast on, make a slipknot by looping the yarn around your index and middle finger twice and then pulling the first loop through the second loop. Slide the loop onto your left-hand knitting needle, insert your right-hand needle into the loop, and then loop the yarn over the end of the right-hand needle and pull this yarn through the slipknot to create the first cast on stitch.[2]
- You can cast on 3 stitches for a thin strand or 7 stitches for a thicker strand.
- Keep in mind that the type of yarn you are using will affect the thickness of the i-cord as well.
-
2
-
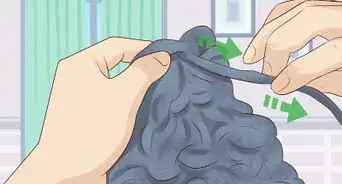
3Slide the stitches to the other end of the DPN. When you get to the end of the first row, do not turn your work around. Slide the stitches over to the other end of the double-pointed needle.
- This will allow you to begin forming the knit stitches into a cord shape.[5]
-
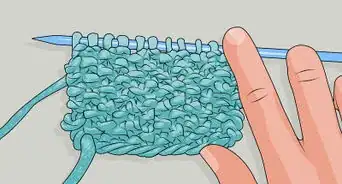
4Knit across the next row and slide the stitches over. The next row is a knit only row. Knit every stitch in the row and then slide the stitches to the other end of the DPN to begin knitting the next row.[6]
- Do not turn your work around.
-
5Continue to slide and knit until your i-cord is the desired length. You can make it as long or as short as you want it to be for your necklace, bracelet, or earrings. Some suggested lengths include:[7]
- Strands for earrings: 2 to 5 inches (5.1 to 12.7 cm). Attach them to fishhook earring bases straight or in loops.
- Bracelets: 5 to 9 inches (13 to 23 cm) depending on the size of the person’s wrist.
- Choker. Sits at the base of the neck and is 16 inches (41 cm).
- Princess. Falls at the collar bone and it is 16 inches (41 cm).
- Matinee. Falls between the collarbone and bust and is 20 to 24 inches (51 to 61 cm).
- Opera. Sits slightly below the bust and is 28 to 36 inches (71 to 91 cm).
- Rope. Worn doubled, sits at the bust, and is 36 to 42 inches (91 to 107 cm).[8]


Method 2
Method 2 of 3:Incorporating Knit Beads into an I-Cord
-
1Knit an i-cord until it is at least 1 in (2.5 cm) long. Your i-cord should be at least 1 in (2.5 cm) long before you begin adding knit beads. However, if you want the beads to be spaced out more, then wait until you have the desired amount of i-cord.[9]
-
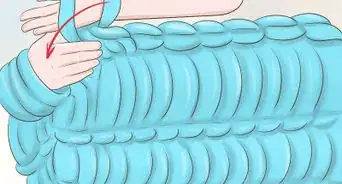
2Increase with a knit front and back stitch in every stitch and turn. Increasing the width of the i-cord will begin to create the bead shape. You need to double the width of the i-cord, so work a knit front and back stitch into every stitch in the row.[10]
- For example, if you have 3 stitches, then work 3 knit front and back stitches. If you have 6 stitches, then work 6 knit front and back stitches.
- Make sure to turn your work around at the end of the row.
-
3Purl across the row and turn. To purl, bring the working yarn in front of your work. Insert the right-hand needle into the front of the first stitch on the left-hand needle. Then, loop the yarn over the right-hand needle and pull it through.[11] Purl all of the stitches in the next row and then turn your work around. You should have twice as many stitches now as you did in the previous row.[12]
- For example, if you started with 4 stitches, then you should have 8 stitches to purl.
-
4Knit 1, knit front and back, knit the last stitch, and turn. To knit front and back, insert the right-hand needle in through the first stitch as usual (front to back). Then, loop the yarn over the needle and pull this yarn through the loop. Leave the old stitch on the needle, and insert the right-hand needle through the front of the stitch purl-wise (back to front). Then, loop the yarn over, and pull through to complete the stitch.[13]
- Knit the last stitch as a regular stitch and then turn your work around.[14]
-
5Purl across the row and turn. Purl all of the stitches in this row as usual, then turn your work around. This will start to build up the body of the knit bead.[15]
- Remember that when you purl, the working yarn should be in back and you insert the needle through the stitch going from back to front.
-
6Knit across the row and turn. Bring the yarn back to the front of your work to knit. Knit all of the stitches in this row as usual, then turn your work around.[16]
- After this row, you will start decreasing.
-
7Purl 1, purl 2 together, purl 1, and turn. Purl the first stitch in the row as usual. Then, purl 2 together until you reach the last stitch in the row. To purl 2 together, insert your right-hand needle into 2 stitches at once going from back to front, loop the yarn over the needle, and then pull it through both stitches. Then, purl 1 and turn your work around.[17]
- Make sure that the yarn is in the front of the work before you begin.
-
8Decrease across the row with knit 2 together stitches. To finish your bead, knit 2 together to the end of the next row. Insert your right-hand needle into 2 stitches at once (going from front to back), loop the yarn over the needle, and then pull this yarn through. The new stitch will replace 2 stitches.[18]
- Do not turn your work around after this row. Instead, slide the stitches across the DPN to the opposite end of the needle.
-
9Return to knitting the i-cord until you want to make another bead. Continue the same i-cord sequence you started out with and work this to the next space where you want to create another bead.[19]
- Alternate back and forth between knitting the i-cord and knitting the beads until you have completed your necklace, bracelet, or earring piece.


Method 3
Method 3 of 3:Finishing Knit Jewelry
-
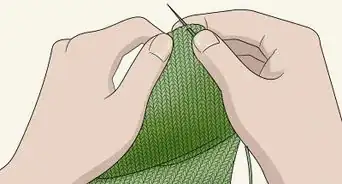
1Bind off the last few stitches. Casting off is the process of securing the end of the knitting. To start, knit the first 2 stitches. Then, loop the first stitch on the right-hand needle over second stitch. Then knit another stitch and loop the first stitch over the second stitch again.[20]
- Repeat this to the end of the row to bind off all of your stitches.
-
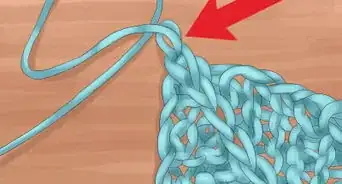
2Cut and tie off the last stitch in the row. Cut the yarn about 10 inches (25 cm) from the last stitch. Then, slide the last stitch off of the needle, and insert the end of the tail through the loop. Pull the tail of the yarn through the loop all the way to secure the last stitch in the row.
- If desired, you can double-knot the last stitch.
-
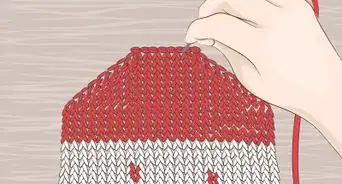
3Sew the ends together with a yarn needle. Thread a needle with the tail end of the yarn. Insert the threaded yarn needle through the first stitch in the row on both ends of your i-cord. Then pull the yarn until it is taut. Repeat this for the rest of the row to secure all of the stitches.[21]
- You can sew together the ends of pieces for earrings to create knit hoop earrings or leave them straight.
-
4Add a clasp if needed for a bracelet or smaller necklace. For a snug-fitting necklace or bracelet, add a closure instead of sewing the strand ends together. Use pliers to open a jump ring, which is a small metal ring used to attach a closure to the end of a necklace. Loop the jump ring around the end of the i-cord, and then attach it to the end of 1 side of the clasp. Use the pliers to close the ring. Repeat this for the other half of the clasp.
- You can purchase a simple necklace or bracelet closure at a craft supply store, such as an s-hook or lobster clasp. Jump rings are often sold along with closures, but you can also buy them separately.
-
5Mount earring pieces onto fishhook bases. Fishhook earring bases have a small metal loop with a tiny opening. Slide the part of the knit earring piece that you want to go on the base over the loop. Do this for both earrings. This will connect them to the earring bases.
- If you are using a chunky yarn and the opening is too small to slide the yarn over easily, then open the metal loop slightly with a pair of pliers. Then, slide the part of your knit earring piece over the metal loop and close it up again with the pliers.


Things You’ll Need
- Yarn
- Knitting needles
- Yarn needle
- Scissors
- Fishhook earring bases
References
- ↑ https://www.youtube.com/watch?v=0dSLp3n4HiU&feature=youtu.be&t=47s
- ↑ https://www.thesprucecrafts.com/knit-cast-on-2116503
- ↑ https://www.craftyarncouncil.com/instructions_kn.php3
- ↑ https://www.youtube.com/watch?v=0dSLp3n4HiU&feature=youtu.be&t=57s
- ↑ https://www.youtube.com/watch?v=0dSLp3n4HiU&feature=youtu.be&t=1m8s
- ↑ https://www.youtube.com/watch?v=0dSLp3n4HiU&feature=youtu.be&t=1m40s
- ↑ https://www.youtube.com/watch?v=0dSLp3n4HiU&feature=youtu.be&t=1m56s
- ↑ http://www.jewelrywise.com/just-for-you/article/choosing-the-right-necklace-length-for-you
- ↑ https://www.youtube.com/watch?v=eef611OCJds&feature=youtu.be&t=59s
- ↑ https://www.youtube.com/watch?v=eef611OCJds&feature=youtu.be&t=2m19s
- ↑ https://www.craftyarncouncil.com/mar06_purl.html
- ↑ https://www.youtube.com/watch?v=eef611OCJds&feature=youtu.be&t=2m41s
- ↑ https://www.thesprucecrafts.com/knit-in-the-front-and-back-2116509
- ↑ https://www.youtube.com/watch?v=eef611OCJds&feature=youtu.be&t=2m52s
- ↑ https://www.youtube.com/watch?v=eef611OCJds&feature=youtu.be&t=3m16s
- ↑ https://www.youtube.com/watch?v=eef611OCJds&feature=youtu.be&t=3m22s
- ↑ https://www.youtube.com/watch?v=eef611OCJds&feature=youtu.be&t=3m32s
- ↑ https://www.youtube.com/watch?v=eef611OCJds&feature=youtu.be&t=4m1s
- ↑ https://www.youtube.com/watch?v=eef611OCJds&feature=youtu.be&t=4m11s
- ↑ https://www.youtube.com/watch?v=0dSLp3n4HiU&feature=youtu.be&t=2m32s
- ↑ https://www.youtube.com/watch?v=0dSLp3n4HiU&feature=youtu.be&t=2m39s
- ↑ https://www.craftyarncouncil.com/standards/yarn-weight-system
About This Article