This article was co-authored by wikiHow Staff. Our trained team of editors and researchers validate articles for accuracy and comprehensiveness. wikiHow's Content Management Team carefully monitors the work from our editorial staff to ensure that each article is backed by trusted research and meets our high quality standards.
There are 27 references cited in this article, which can be found at the bottom of the page.
This article has been viewed 1,451 times.
Learn more...
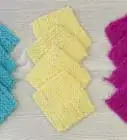
Entrelac knitting requires many small rows with alternating increases and decreases to create squares with opposing weaves. A finished entrelac knitting project has a patchwork look, but the stitches are all connected. Entrelac knitting is best for intermediate and advanced knitters because of all the rows and different stitch sequences, but this technique is something even a novice knitter could learn with a little patience. Try entrelac knitting for a fun challenge with impressive results!
Steps
Part 1
Part 1 of 4:Designing an Entrelac Project
-
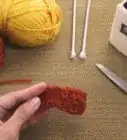
1Use a pattern if you want specific instructions for a project. Entrelac knitting is an advanced technique, so following a pattern may be helpful if you are new to knitting entrelac. A pattern will provide recommendations for yarn type and needle size, so you won’t have to worry about these aspects of your project as much. Try searching online for entrelac knitting patterns or visit your local craft supply store and browse their pattern books.
- A pattern is especially helpful if you want to make a garment with specific dimensions, such as an entrelac sweater or beanie.
-
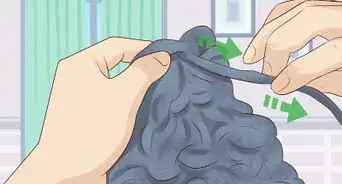
2Choose your yarn color and type. You can use any kind of yarn you want for entrelac knitting. Variegated yarns will give the appearance of using multiple yarn colors, or you can just pick 2 or more yarn colors to switch between for your project. Consider the thickness of the yarn you are choosing as well. Thicker yarns will be quicker to knit and produce a bulkier finished product than lightweight or medium-weight yarns.[1]
- Try choosing a super bulky yarn for a chunky look, or go with a lightweight or medium-weight yarn for something more delicate.
-
3Select appropriately sized needles for the yarn you are using. Make sure to use the recommended knitting needle size for your yarn type. You can usually find this recommendation on the yarn label. It is important to use needles that match your yarn type or your project may not turn out well.
- For example, if you are using a medium-weight yarn, then the recommended needle size is a US size 7-9 (4.5-5.5 mm), while a super bulky yarn will require a US size 11-17 (8-12.75 mm).[2]
Part 2
Part 2 of 4:Creating Base Triangles
-
1Cast on a multiple of 8. To cast on, make a slipknot and then slide it onto your left-hand needle. Insert the needle through the loop going from front to back. Then, yarn over, which is a knitting term that means to loop the yarn over the end of the knitting needle. Pull this loop of yarn through the slipknot to create your first cast on stitch. Then, loop the yarn over the left-hand needle, insert the right-hand needle through the loop, yarn over the tip of the left-hand needle, and pull through to create the next cast on stitch.[3]
- Repeat this sequence to create more cast on stitches.
- If you just want to practice entrelac knitting, cast on 16 stitches. Otherwise, cast on the multiple of 8 that is appropriate for the project you are creating.[4]
- For example, if you are knitting an entrelac scarf with a super bulky yarn, then you could cast on 32 stitches. If you are using a medium worsted weight yarn to create a scarf, then you might need to cast on 48 stitches to get the desired width. Check the yarn gauge on the yarn label or knit a gauge swatch to determine how many stitches you will need to cast on.
- You can make your triangles wider or narrower if desired. Just make sure to adjust the total number of cast on stitches using the triangle width.
-
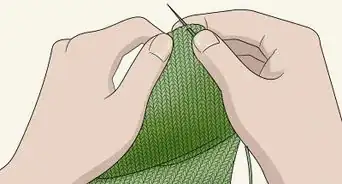
2Knit 1 and turn. To start the first triangle, knit into the first cast on stitch.[5] Insert the needle through the first cast on loop in your left-hand needle going from front to back. Then, yarn over, and pull through the loop. Let the old loop slide off the left-hand needle as the new one replaces it on the right-hand needle.[6]
-
3Begin counting your rows after the knit 1 row. Entrelac knitting requires lots of short rows and each row has a different stitch sequence. To ensure the best possible results, make sure to count your rows. Click or mark the counter to show that you have completed row number 1, and turn your work around.
- You can download an app for your phone to count rows, buy a row counter that you click at the end of each row, or keep a running tally on a sheet of paper.
-
4Purl 1 and turn. This is your second row. Even numbered rows will all be purl rows for the base triangles.[7] Bring your yarn in front of your work to purl. Insert the right-hand knitting needle through the first stitch on the left-hand knitting needle, yarn over, and then pull through. Let the old stitch slip off the end of the left-hand needle as the new stitch replaces it on the right-hand needle.[8] Turn your work around before starting the next row.
- Click or mark the counter and turn your work around when you are done purling.
-
5Slip 1, knit 1, and turn. This is your third row and these rows will be knit, except for the first stitch. Slip the first stitch from your left-hand needle to your right-hand needle, and then knit the next stitch.[9] To slip a stitch, insert your right-hand needle into the first stitch on the left-hand needle and then let it slide off of the left-hand needle.[10] Knit the stitch after the slipstitch, and then turn your work around.
-
6Purl 2 and turn. Now you are on row 4, so purl both stitches in the row. Then, click your counter and turn your work around to knit the other side.[11]
- Notice how you are purling 1 more stitch than you did in the first purl row. These small increases are how you create a base triangle.
-
7Knit an additional stitch for every odd row and purl all of the stitches in the even rows. With new each odd row, you work 1 additional stitch until you are working all 8 stitches of the base triangle. This will create the shape of the triangle. The rest of your rows should follow this pattern:
- Row 5: Slip 1, knit 2, and turn. [12]
- Row 6: Purl 3 and turn. [13]
- Row 7: Slip 1, knit 3, and turn.
- Row 8: Purl 4 and turn.
- Row 9: Slip 1, knit 4, and turn.
- Row 10: Purl 5 and turn.
- Row 11: Slip 1, knit 5, and turn.
- Row 12: Purl 6 and turn.
- Row 13: Slip 1, knit 6, and turn.
- Row 14: Purl 7 and turn.
- Row 15: Slip 1 and knit 7.
-
8Do not turn after working row 15. Your last row for the first base triangle will be row 15. For this row, you will slip 1 and knit 7, but do not turn your work after the last stitch. This completes the first base triangle, and you will need the work to be facing this direction to start the next base triangle.[14]
-
9Repeat the process to create the next triangle. Start at the beginning of the sequence by knitting 1 stitch and turning your work around. Do this to begin the next triangle in the row and then follow the rest of the stitch sequence to complete the next triangle.[15]
- For example, after knitting 1 and turning, you will purl 1 and turn, then slip 1, knit 1, and turn, then purl 2 and turn, and so on just as you did the first time.
- Keep repeating this process to complete as many base triangles as needed for your project. For example, if you cast on 40 stitches for triangles that are 8 stitches wide, then you should have a total of 5 base triangles when you reach the end of the row.
Part 3
Part 3 of 4:Working the Triangles
-
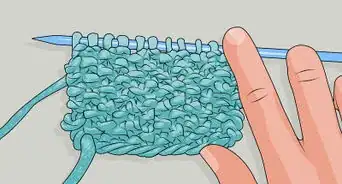
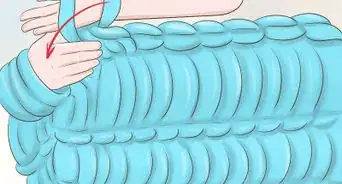
1Knit 1 and turn your work. Hold the needle with all of the stitches on it in your left hand and the empty needle in your right hand. Then, knit the first stitch and turn your work around so that the needle with all of the stitches on it is now in your right hand, and the needle with 1 stitch on it is in your left hand.[16]
-
2Increase by 1 with a knit front and back stitch, then turn. For the second row, work a knit front and back stitch to increase the total stitches by 1.[17] To knit front and back, insert the needle in through the first stitch going from front to back. Then, yarn over and pull through the loop, but don’t let the old stitch slip off yet. Instead, insert the right-hand needle through purl-wise (going from back to front), yarn over, and then pull through. Let the old stitch slide off the left-hand needle as the 2 new stitches you created replace it.[18]
- Turn your work around before starting the next row.
-
3Knit 1, purl 2 together, and turn. For the third row, knit 1 and then work a decrease by purling the next 2 stitches together. All of your odd rows will include a decrease from this point on.[19] To purl 2 together, bring the working yarn in front of your work and then insert your right-hand needle through the next 2 stitches going from back to front. Yarn over, and pull the yarn through both to replace the 2 loops with 1 on the right-hand needle.[20]
- Make sure to turn your work before starting the next row.
-
4Knit 1, increase 1, knit 1, and turn. For row 4, knit the first stitch, then work an increase just as you did before, and then knit the last stitch. Turn your work around before you do the next row.[21]
-
5Knit 1, purl 1, purl 2 together, and turn. Knit the first stitch in row 5. Then, purl 1, work a decrease by purling 2 together, and then turn your work around.[22]
-
6Continue alternating increase and decrease rows until you reach row 15. You will continue to work your rows in an alternating increase/decrease fashion until you have completed the triangle. The rest of your rows will be as follows:
- Row 6: Knit 1, increase by 1, knit 2, and turn.[23]
- Row 7: Knit 1, purl 2, purl 2 together, and turn.[24]
- Row 8: Knit 1, increase by 1, knit 3, and turn.
- Row 9: Knit 1, purl 3, purl 2 together, and turn.
- Row 10: Knit 1, increase by 1, knit 4, and turn.
- Row 11: Knit 1, purl 4, purl 2 together, and turn.
- Row 12: Knit 1, increase by 1, knit 5, and turn.
- Row 13: Knit 1, purl 5, purl 2 together, and turn.
- Row 14: Knit 1, increase by 1, knit 6, and turn.
- Row 15: Knit 1, purl 6 and purl 2 together.
-
7Repeat this process after you work the blank space. After you finish 1 triangle, you should have a gap in your stitches on the needle. For this section, you will need to pick up stitches and follow a new stitch pattern to continue your entrelac project. After that, you will repeat this process again to work another triangle.
Part 4
Part 4 of 4:Working the Blank Spaces
-
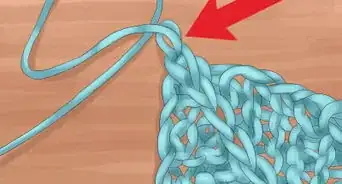
1Pick up the stitches between the triangles and turn your work. To pick up a stitch, insert the tip of the right-hand needle under both strands of the first stitch. Then, loop the yarn over the needle and pull it through. This is your first picked up stitch.[25]
- Repeat this to the end of the blank space so that you have picked up all 8 stitches.
-
2Slip the last stitch over to the left-hand needle and purl 2 together. When you get to the last picked up stitch, you will need to anchor it. Slip the last stitch you picked up over to the left-hand needle and then purl through this stitch and the stitch next to it. Insert the right-hand needle through both stitches going from back to front, yarn over, and then pull through both to replace them with 1 stitch on the right-hand needle.[26]
- Turn your work around after anchoring the stitch.
-
3Knit 8 and turn. Next, knit across the 8 stitches you just picked up. This counts as your first row, so go ahead and click your row counter or mark your row count tally.[27]
-
4Slip 1, purl 5, purl 2 together, and turn. For the second row, slip a stitch from the left-hand needle to the right-hand needle. Then, purl 5, purl 2 together, click or mark your counter, and turn your work around.[28]
-
5Repeat this sequence after the next triangle. Continue to knit across the row and then work a purl row with a decrease. The rest of your rows for this section will be as follows:
- Row 3: Knit 7 and turn.
- Row 4: Slip 1, purl 4, purl 2 together, and turn,
- Row 5: Knit 6 and turn.
- Row 6: Slip 1, purl 3, purl 2 together, and turn.
- Row 7: Knit 5 and turn.
- Row 8: Slip 1, purl 2, purl 2 together, and turn.
- Row 9: Knit 4 and turn.
- Row 10: Slip 1, purl 1, purl 2 together, and turn.
- Row 11: Knit 3 and turn.
- Row 12: Slip 1, purl 2 together, and turn.
- Row 13: Knit 2 and turn.
- Row 14: Slip 1, purl 1, and turn.
- Row 15: Knit 1.
-
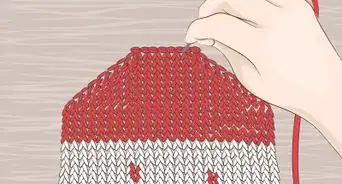
6Return to the process for working triangles. After you have completed work on the blank space, you will need to work across a new triangle row. Repeat the same process that you used for the first 1, and then you will be at another blank space. Keep going back and forth in this fashion until your project is completed.
- If you are following a pattern, follow its instructions for how to finish your project or use your preferred method of casting off to complete your project.
Community Q&A
-
QuestionIs the gauge comparable to stockinette stitch? I want to make a sweater, and need to know.
 MicheleTop AnswererThe gauge determines how many stitches and how many rows per inch so that clothing can be properly fit. Entrelac can be in stockinette or just knit, it’s your choice. Just be sure that the yarn and needle you use, gauge the correct amount as noted in the pattern.
 -
QuestionI am stuck on how to finish this throw... casting off before knitting the border? My last row is the purl side.MicheleTop AnswererIn Entrelac, there usually isn’t any border to speak of. But if you want to add one, it will depend upon what kind of border you’re doing whether you cast off first or not. A sideways-knit border will require casting off, while another may not.
Things You’ll Need
- Yarn
- Knitting needles
- Pattern (optional)
- Row counter, row counting app, or pen and paper
References
- ↑ https://www.craftyarncouncil.com/standards/yarn-weight-system
- ↑ https://www.craftyarncouncil.com/standards/yarn-weight-system
- ↑ https://www.thesprucecrafts.com/knit-cast-on-2116503
- ↑ https://www.youtube.com/watch?v=B4GGXzurphk&feature=youtu.be&t=2m35s
- ↑ https://www.youtube.com/watch?v=B4GGXzurphk&feature=youtu.be&t=3m15s
- ↑ https://www.craftyarncouncil.com/instructions_kn.php3
- ↑ https://www.youtube.com/watch?v=B4GGXzurphk&feature=youtu.be&t=3m37s
- ↑ https://www.craftyarncouncil.com/mar06_purl.html
- ↑ https://www.youtube.com/watch?v=B4GGXzurphk&feature=youtu.be&t=3m52s
- ↑ http://newstitchaday.com/slip-stitch-knitting/
- ↑ https://www.youtube.com/watch?v=B4GGXzurphk&feature=youtu.be&t=4m17s
- ↑ https://www.youtube.com/watch?v=B4GGXzurphk&feature=youtu.be&t=4m21s
- ↑ https://www.youtube.com/watch?v=B4GGXzurphk&feature=youtu.be&t=4m35s
- ↑ https://www.youtube.com/watch?v=B4GGXzurphk&feature=youtu.be&t=6m48s
- ↑ https://www.youtube.com/watch?v=B4GGXzurphk&feature=youtu.be&t=7m11s
- ↑ https://www.youtube.com/watch?v=B4GGXzurphk&feature=youtu.be&t=9m40s
- ↑ https://www.youtube.com/watch?v=B4GGXzurphk&feature=youtu.be&t=9m48s
- ↑ https://www.thesprucecrafts.com/knit-in-the-front-and-back-2116509
- ↑ https://www.youtube.com/watch?v=B4GGXzurphk&feature=youtu.be&t=10m17s
- ↑ http://newstitchaday.com/how-to-knit-the-purl-two-together-decrease-p2tog/
- ↑ https://www.youtube.com/watch?v=B4GGXzurphk&feature=youtu.be&t=10m31s
- ↑ https://www.youtube.com/watch?v=B4GGXzurphk&feature=youtu.be&t=11m1s
- ↑ https://www.youtube.com/watch?v=B4GGXzurphk&feature=youtu.be&t=11m18s
- ↑ https://www.youtube.com/watch?v=B4GGXzurphk&feature=youtu.be&t=11m57s
- ↑ https://www.youtube.com/watch?v=B4GGXzurphk&feature=youtu.be&t=15m36s
- ↑ https://www.youtube.com/watch?v=B4GGXzurphk&feature=youtu.be&t=16m40s
- ↑ https://www.youtube.com/watch?v=B4GGXzurphk&feature=youtu.be&t=16m56s
- ↑ https://www.youtube.com/watch?v=B4GGXzurphk&feature=youtu.be&t=17m17s
About This Article