This article was co-authored by Darlene Antonelli, MA. Darlene Antonelli is a Technology Writer and Editor for wikiHow. Darlene has experience teaching college courses, writing technology-related articles, and working hands-on in the technology field. She earned an MA in Writing from Rowan University in 2012 and wrote her thesis on online communities and the personalities curated in such communities.
This article has been viewed 1,026 times.
If you don't like your current options between iCloud Drive or Google Drive to create backups that are stored in the cloud, you can try IDrive. This wikiHow will teach you how to install IDrive. Before you can install the computer or mobile client, you'll need to create an account in a web browser.
Steps
Part 1
Part 1 of 2:Creating an Account
-
1Go to https://www.idrive.com/. You can use any web browser to make an account with IDrive.
-
2Click Sign up. This is in the top right corner of your browser page. If you have an IDrive account, you can click Sign in and skip this part about creating an account.Advertisement
-
3Fill in the required fields. Enter your first and last name, your email address, the password you want to use for this website, and your phone number.
-
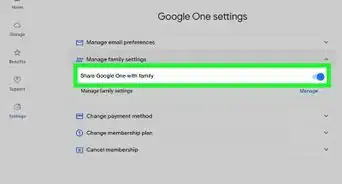
4Click to choose a plan. The circle next to the plan you've chosen will fill with blue to indicate that you've picked it.
- You can choose plans with different storage space for business or personal use. The business IDrive plans are more expensive, but offer more storage space.
-
5Fill in the required fields. Enter your payment information like your card number, the CVV, the expiration date, billing address, and zip code.
-
6Click to check the box next to "I agree…". The form won't submit or continue to the next page if you don't have this box checked.
-
7Click Create My Account. You'll see this centered at the bottom of the form.
-
8Choose either key option. You can use either the default IDrive encryption key or a private one. However, if you lose your private encryption key, IDrive will not be able to retrieve it for you and you'll possibly lose all the information stored on IDrive.
- Click Continue to proceed. IDrive should start downloading automatically.
Advertisement


Part 2
Part 2 of 2:Installing IDrive
-
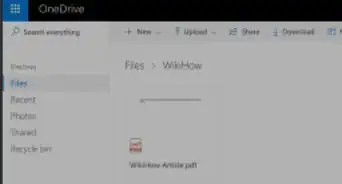
1Go to https://www.idrive.com/online-backup-download in a web browser. If you're using a mobile Android or iPhone, you can install IDrive from your app store (the Google Play for Androids and the App Store for iOS).
-
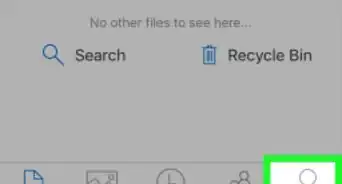
2Click the download you want. Pick the appropriate download for your OS. Your file manager should open as the installation file downloads.
- Save the file to continue.
-
3Navigate to and double-click the downloaded file. Some web browsers will send you a notification when they've finished downloading a file, but if you don't see this, you can most likely find the downloaded file in your Downloads folder of your file manager.
-
4Follow the on-screen instructions to install IDrive. You'll either be walked through an installation wizard or will need to drag and drop the application's icon from the downloaded folder to your Applications folder in Finder.[1]
-
5Open IDrive. You'll find this software in either your Start menu under "Recently added", on your desktop, or in your file manager. Once you open IDrive, you need to sign in to start using the client.[2]Advertisement


About This Article

1. Go to https://www.idrive.com/ and click Sign up.
2. Fill in the required fields.
3. Click to choose a plan.
4. Fill in the required fields then click to check the box next to "I agree…".
5. Click Create My Account.
6. Choose either key option.