This article was written by Jack Lloyd. Jack Lloyd is a Technology Writer and Editor for wikiHow. He has over two years of experience writing and editing technology-related articles. He is technology enthusiast and an English teacher.
The wikiHow Tech Team also followed the article's instructions and verified that they work.
This article has been viewed 1,483,341 times.
This wikiHow teaches you how to group a section of data in Excel so that you can hide it from the document. This is helpful if you have a large document with lots of data. You can group and outline data in Excel on both Windows and Mac platforms.
Steps
Part 1
Part 1 of 2:Outlining Automatically
-
1Open your Excel document. Double-click the Excel document to open it.
-
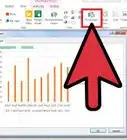
2Click the Data tab. It's in the left side of the green ribbon that's at the top of the Excel window. Doing so will open a toolbar below the ribbon.
-
3Click the bottom of the Group button. You'll find this option on the far-right side of the Data ribbon. A drop-down menu will appear.
-
4Click Auto Outline. It's in the Group drop-down menu.
- If you receive a pop-up box that says "Cannot create an outline", your data doesn't have an outline-compatible formula in it. You'll need to manually outline the data.
-
5Minimize your data. Click the [-] button at the top or on the left side of the Excel spreadsheet to hide the grouped data. In most cases, doing this will only display the final line of the data.
-
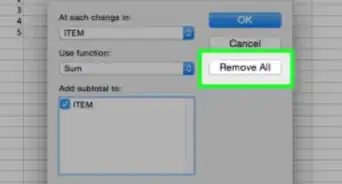
6Clear your outline if needed. Click Ungroup to the right of the Group option, then click Clear Outline... in the drop-down menu. This will ungroup and unhide any data that was minimized or grouped previously.


Part 2
Part 2 of 2:Outlining Manually
-
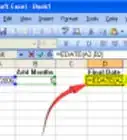
1Select your data. Click and drag your cursor from the top-left cell of the data you want to group to the bottom-right cell of the data.
-
2Click Data if this tab isn't open. It's in the left side of the green ribbon at the top of Excel.
-
3Click Group. It's on the right side of the Data toolbar.
-
4Click Group…. This option is in the Group drop-down menu.
-
5Select a group option. Click Rows to minimize your data vertically, or click Columns to minimize horizontally.
-
6Click OK. It's at the bottom of the pop-up window.
-
7Minimize your data. Click the [-] button at the top or on the left side of the Excel spreadsheet to hide the grouped data. In most cases, doing this will only display the final line of the data.
-
8Clear your outline if needed. Click Ungroup to the right of the Group option, then click Clear Outline... in the drop-down menu. This will ungroup and unhide any data that was minimized or grouped previously.


Community Q&A
-
QuestionHow do I reverse the grouping so that the total is at the top line and the collapsed lines fall below?
 Community AnswerClick the "Data" tab, then come to the "Outline" section, then click the small arrow on the right bottom corner to "Show the Outline Dialog Box". From the settings, unclick "Summary Rows Below Detail."
 -
QuestionMy data is grouped, but I cannot see the outline symbols along the left side of my spreadsheet. What can I do?
 Community AnswerWhile the document is open, go to "File," "Options," "Advanced," "Display options for this worksheet." Make sure "Show outline symbols if an outline is applied" is selected. This is necessary for every sheet where there are outlines/groupings applied.
 -
QuestionHow do I group Rows 23 through 31 and then group Rows 32 through 36? When I do it, Excel groups Rows 23 thru 36.
 Community AnswerYou need an empty row between your two groups. Otherwise Excel will automatically merge them.
 -
QuestionHow do I add two columns in Excel?Community AnswerSelect the heading letters of two columns and right-click on one of them. Then select "Insert" from the right-click options. The new columns will be added to the left of the selected columns.
-
QuestionHow do I collapse or expand only those groups in Excel that have a certain characteristic in one of their rows? (Example: Expand or collapse all groups with a red row).Community AnswerWrite a macro that determines if the cell color is red. Then place an asterisk or other sortable value into an extra column. Sort that column, then collapse based on that sort.
Warnings
- Don't use grouping/outlining if you plan to protect the worksheet. If you do, other users won't be able to expand and collapse the rows.Thanks!


About This Article
1. Open the Excel document.
2. Click Data
3. Click Group
4. Click Auto Outline
5. Click [-] to minimize data.