X
wikiHow is a “wiki,” similar to Wikipedia, which means that many of our articles are co-written by multiple authors. To create this article, 11 people, some anonymous, worked to edit and improve it over time.
This article has been viewed 186,961 times.
Learn more...
A common problem many computer users experience is a computer's virtual memory being too low. This happens when a person is running a program or multiple programs that are taking up a lot of memory usage and the computer is almost at the maximum of what its memory can handle. You can fix virtual memory problems by manually increasing the size of the virtual memory your computer uses.
Steps
Method 1
Method 1 of 3:Windows XP
Method 1
-
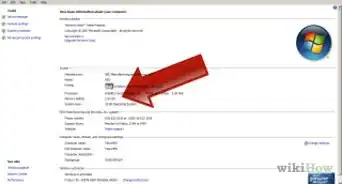
1Click the "Start" button. Click "Run." Type "sysdm.cpl" in the box labeled "Open" and then click "OK."
-
2Select the "Advanced" tab, and find the "Performance" heading. Click "Settings." Choose the "Advanced" tab and then click "Change" under "Virtual Memory."
-
3Look at the list of drives under the heading "Drive [Volume label]." Click on the drive that contains the operating system, as this is the drive of which you will adjust the virtual memory. Click "Custom size" under the heading "Paging file size for selected drive."
-
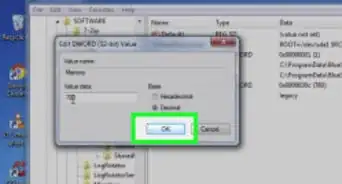
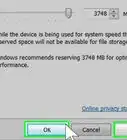
4Type an increased size in the text boxes labeled "Initial size (MB)" and "Maximum size (MB)." (Same number for max and min) When you are finished, click "Set." Click "OK" to close the window.
-
5Restart the computer if prompted.


Method 2
Method 2 of 3:Windows Vista and Windows 7
Method 2
-
1Click the "Start" button. Select the "Control Panel." If "System and Maintenance" is an available option, click it. Then click "System."
-
2Select "Advanced system settings" from the menu on the left side. Click Settings button from performance option.Performance options will be displayed. If you are prompted for the administrator password, enter it and click "OK."
-
3Press the "Advanced" tab. Find the "Virtual Memory" heading the click "Change."
-
4Uncheck the box labeled "Automatically manage paging file size for all drives."
-
5Find the list of drives under the heading "Drive [Volume Label]." Click on the drive that contains the operating system, as this is the drive of which you will adjust the virtual memory. Click "Custom size."
-
6Edit the number in the text boxes for "Initial size (MB)" and "Maximum size (MB)." (Same number for max and min) Click "Set" when you are finished. Click "OK."
-
7Restart the computer if prompted.


Method 3
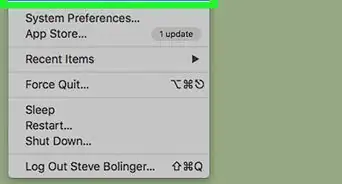
Method 3 of 3:Mac OS
Method 3
-
1Open the Terminal program. You'll find it in the Utilities folder under the Applications folder.
-
2To turn off the swap file, type this command into the Terminal window: sudo launchctl unload -w /System/Library/LaunchDaemons/com.apple.dynamic_pager.plist
-
3To re-activate the swap, Type this command in the terminal window: sudo launchctl load -w /System/Library/LaunchDaemons/com.apple.dynamic_pager.plistChoose the hard drive that will serve your virtual memory file. Up and down arrows will appear that will allow you to adjust the amount of virtual memory as either more or less.