wikiHow is a “wiki,” similar to Wikipedia, which means that many of our articles are co-written by multiple authors. To create this article, 21 people, some anonymous, worked to edit and improve it over time.
This article has been viewed 169,113 times.
Learn more...
Are your Wii discs getting scratched, damaged, and lost? Want to make an easily accessible backup of all your Wii games? To back up your games, you'll need to softmod your Wii and install a backup manager program. Softmodding refers to modifying the Wii's system software with a hack in order to allow you to install custom programs, such as the backup manager. This guide will walk you through the steps of softmodding your Wii as well as installing backup software and copying discs.
Steps
Part 1
Part 1 of 4:Preparing to Mod the Wii
-
1Assemble the items you’ll need. In order to mod the Wii and backup games, you’ll need a few things. You’ll need an SD card to copy hack files from your computer to your Wii. You’ll also need an external hard drive big enough to store multiple games. Game sizes range from around 1GB all the way up to 6GB per game, so find a drive with at least 250GB to store your library.
- To run the USB backup system, you will need to mod your Wii system. It is done completely through software and no special tools are required. This guide will run you through the steps.
-
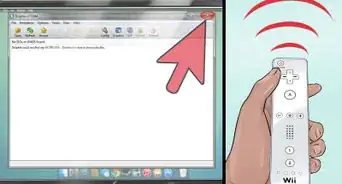
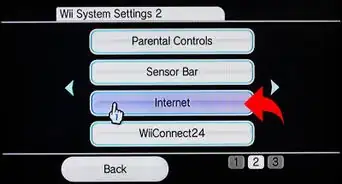
2Find your Wii version number. In order to install the right hack, you need to know which version of the Wii operating system you are using.
- Turn on the Wii, open the Wii Options menu, then click "Wii Settings". Your Wii version number will appear in the top-right corner.
Advertisement -
3Download the appropriate hack for your version. For system version 4.2 or lower, download the correct bannerbomb hack. If you have system version 4.3, you will need the correct official game and hack. For this guide, we will use LEGO Star Wars: The Complete Saga. You will need the game disc as well as the “Return of the Jodi” save hack.Advertisement


Part 2
Part 2 of 4:Modding Your Wii
Softmodding a 3.0-4.1 Wii
-
1Download the correct bannerbomb hack. Download the the HackMii installer as well.
-
2Insert an SD card into your computer. If you are using an SD card that the Wii has already used, rename the "Private" folder to avoid conflicts.
-
3Copy the files. Copy the contents of the bannerbomb zip file to the SD card, preserving the file structure. Copy the "installer.elf" file from the HackMii download, and rename it to "boot.elf".
-
4Remove the SD card from your computer and insert it into the Wii. Turn it on, open the Wii Options menu, click "Data Management", then "Channels". Select the SD tab.
-
5Confirm the pop-up. A window will appear when the SD tab is selected with the message “load boot.dol/elf?” Select "Yes" to proceed with the softmod.
-
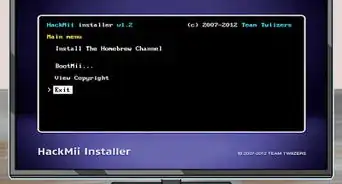
6Install the Homebrew Channel and DVDx. Use the direction pad to navigate the menus, and the A button to make selections. The Homebrew Channel will allow you to install custom software, and the DVDx utility will allow your Wii to play DVD movies.
-
7Finish the installation. After a few moments, you should receive a Success message letting you know that Homebrew has been successfully installed. You can return to the Wii menu and access Homebrew anytime from the Channels.Advertisement


Softmodding a 4.2 Wii
-
1Download the correct bannerbomb hack. Download the the HackMii installer as well.
-
2Insert an SD card into your computer. If you are using an SD card that the Wii has already used, rename the "Private" folder to avoid conflicts.
-
3Copy the files. Copy the contents of the bannerbomb zip file to the SD card, preserving the file structure. Copy the "installer.elf" file from the HackMii download, and rename it to "boot.elf".
-
4Remove the SD card from your computer and insert it into the Wii. Turn it on and press the button with the picture of the SD card.
-
5Confirm the pop-up. A window will appear when the SD card button is pressed with the message “load boot.dol/elf?” Select "Yes" to proceed with the softmod.
-
6Install the Homebrew Channel and DVDx. Use the direction pad to navigate the menus, and the A button to make selections. The Homebrew Channel will allow you to install custom software, and the DVDx utility will allow your Wii to play DVD movies.
-
7Finish the installation. After a few moments, you should receive a Success message letting you know that Homebrew has been successfully installed. You can return to the Wii menu and access Homebrew anytime from the Channels.Advertisement


Softmodding a 4.3 Wii
-
1Download and extract the "Return of the Jodi" hack. Place the files on an SD card, keeping the file structure intact.
-
2Insert the SD card in the Wii. Turn it on, open the Wii Options menu and select "Data Management". Open the "Save Data" menu, select "Wii", then the SD tab. Copy the "Return of the Jodi" save that matches your region.
-
3Start LEGO Star Wars. Load the saved game. After the game loads, walk to the bar on the right and switch characters. Select the character named “Return of the Jodi.” This will begin the hack process.
-
4Install the Homebrew Channel and DVDx. Use the direction pad to navigate the menus, and the A button to make selections. The Homebrew Channel will allow you to install custom software, and the DVDx utility will allow your Wii to play DVD movies.
-
5Finish the installation. After a few moments, you should receive a Success message letting you know that Homebrew has been successfully installed. You can return to the Wii menu and access Homebrew anytime from the Channels.Advertisement


Part 3
Part 3 of 4:Installing the Backup Program
-
1Download the necessary software. In order to install the backup software, you will need to install a few more tools for the Wii now that it is softmodded. Download the latest version of DOP-Mii as well the cIOS installer.
-
2Extract DOP-Mii onto the SD card. Keep the file structure intact. Insert the SD card into the Wii and open the Homebrew Channel. Run DOP-Mii from the list of programs and select “Install IOS36 (v3351) w/ FakeSign”.
- Select "Yes" when asked to Apply NAND permissions and download the patches from the internet server. Select "Yes" again when it prompts you to restore. When it completes, it will drop you back at the Homebrew Channel. Remove the SD card from the Wii and put it back in your computer.
-
3Extract the cIOS installer onto the SD card into the Apps folder. Keep the file structure intact.
-
4Insert the SD card back into the Wii and open the Homebrew channel. Open the cIOS installer. Select IOS36 from the version options, then select Network Installation and press A. After installing successfully, the program will ask you to press any button to restart the Wii.
-
5Prepare your external hard drive. Plug your external hard drive into your computer. You will need to download a program that will format your hard drive to match the file system of the Wii. WBFS (Wii Backup File System) Manager is a free, open-source program that will properly format the drive.
- Run WBFS Manager with your external connected and select it from the dropdown menu in the program. Be sure to select the right drive because all data will be lost when it is formatted.
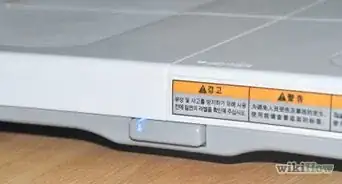
- After formatting remove the external hard drive from your computer and plug it into the Wii in the bottom USB port.
-
6Install USB Loader GX. Insert the SD card into your computer. Download the latest version of USB Loader GX free from the website. The site offers an executable file for download that will automatically put the files into the right section of the SD card.
-
7Launch USB Loader GX. Once you’ve copied the files to the SD card, insert it in the Wii and open the Homebrew Channel. Select USB Loader GX from the list of programs.Advertisement


Part 4
Part 4 of 4:Copying Wii Games
-
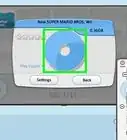
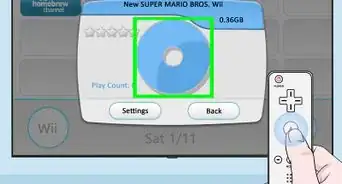
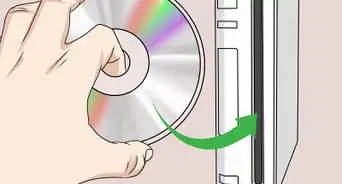
1Insert a game disc. With USB Loader GX open, click the "Install" button. Depending on the size of the game, this could take up to several minutes. Once the game is finished copying, it will appear in the main window of USB Loader GX.
- Repeat this step for as many games as you want to copy.
-
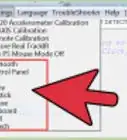
2Download cover art. Press 1 on the Wiimote to open the Cover download menu. You can choose between several different types of images, including cover images and disc images.
-
3Play a game. You can select any game from the list to begin playing. You can also change the way games are listed by using the top buttons in USB Loader GX.Advertisement


Community Q&A
-
QuestionCan a Wii be used to play movies?
 Community AnswerNormally the Wii cannot play DVDs or Bluray discs but it is possible to modify it to do so using third party software. It does have streaming capabilities and has applications for Netflix, Hulu, and YouTube.
Warnings
- Copying games that you do not own is illegal. This guide is only for making legitimate copies of your personal collection.Thanks!
- Never update the Wii system after you have softmodded it, as you run a very high risk of bricking the system. Disable online updates and decline games that ask you to install an update.Thanks!
Things You’ll Need
- Wii console
- PC with SD card reader
- External USB hard drive (recommended 250GB or larger)
- LEGO Star Wars: The Complete Saga (If modding a Wii ver. 4.3)
-Step-6-Version-2.webp)
-Step-6-Version-2.webp)