X
This article was written by Nicole Levine, MFA. Nicole Levine is a Technology Writer and Editor for wikiHow. She has more than 20 years of experience creating technical documentation and leading support teams at major web hosting and software companies. Nicole also holds an MFA in Creative Writing from Portland State University and teaches composition, fiction-writing, and zine-making at various institutions.
This article has been viewed 203,400 times.
This wikiHow teaches you how to import an XML file into a Microsoft Excel workbook using Windows or macOS.
Steps
Method 1
Method 1 of 2:Windows
Method 1
-
1Open Microsoft Excel. You’ll find Excel in the “Microsoft Office” group in the All Apps area of the Windows menu.
-
2Click File. It’s at the top-left corner of Excel.
- If you’re using Excel 2007, click the round button with the Microsoft Office logo inside instead.[1]
-
3Click Open. This opens the file browser.
-
4Double-click the XML file. Depending on the format of the file, you may have to take additional steps to open this file:
- If you see a dialog box called Import XML, the file references at least one XSLT style sheet. Select Open the file without applying a style sheet to select the standard format, or Open the file with the style sheet applied to format the data in accordance with the style sheet.
- If you see the Open XML dialog, select As a read-only workbook.
-
5Click the File menu.
-
6Click Save As….
-
7Navigate to the folder where you’d like to save the file.
-
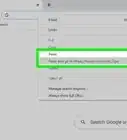
8Select Excel Workbook from the “Save as type” drop-down.
-
9Click Save. The XML data is now saved as an Excel file.


Method 2
Method 2 of 2:macOS
Method 2
-
1Open Microsoft Excel. You’ll find it in the Applications folder.
- Excel for macOS cannot import XML data from another source, but it will allow you to open XML spreadsheet files.[2]
-
2Click the File menu. It’s at the top of the screen.[3]
-
3Click Open. This opens a Finder window.
-
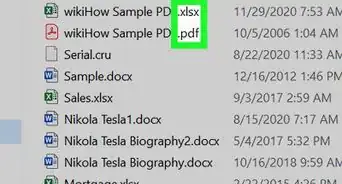
4Select the XML file. To do this, browse to the folder where it’s contained, then click the file name once.
-
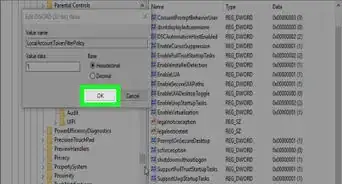
5Click OK. The contents of the XML file will appear.
-
6Click the File menu.
-
7Click Save As.
-
8Type a name for the file.
-
9Select .CSV from the “file type” drop-down menu.
-
10Click Save. The XML file is now saved as a .CSV on your Mac.


References
- ↑ https://support.office.com/en-us/article/Import-XML-data-6eca3906-d6c9-4f0d-b911-c736da817fa4#_showdevelopertab
- ↑ https://answers.microsoft.com/en-us/msoffice/forum/msoffice_excel-mso_mac-mso_mac2016/import-xml/805f11b3-fead-4217-80fb-244e52c389e7
- ↑ https://www.techwalla.com/articles/how-to-convert-xml-to-csv-on-a-mac
About This Article

Nicole Levine, MFA
Tech Specialist
This article was written by Nicole Levine, MFA. Nicole Levine is a Technology Writer and Editor for wikiHow. She has more than 20 years of experience creating technical documentation and leading support teams at major web hosting and software companies. Nicole also holds an MFA in Creative Writing from Portland State University and teaches composition, fiction-writing, and zine-making at various institutions. This article has been viewed 203,400 times.
How helpful is this?
Co-authors: 4
Updated: December 3, 2019
Views: 203,400
Categories: File Manipulation | Basic Computer Skills
Article SummaryX
1. Open the file in Excel.
2. Click File.
3. Click Save As.
4. Change the file type to .CSV.
5. Click Save.
Did this summary help you?