X
wikiHow is a “wiki,” similar to Wikipedia, which means that many of our articles are co-written by multiple authors. To create this article, volunteer authors worked to edit and improve it over time.
This article has been viewed 2,573 times.
Learn more...
Clone painting lets you take a photograph and give it a very painterly appearance without having to learn how to actually paint on a canvas. You can add your own touch, texture, and brushes to give it a unique look and create your own art.
Steps
Method 1
Method 1 of 4:Setting Up the Layers Without an Action
Method 1
-
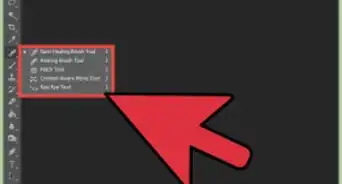
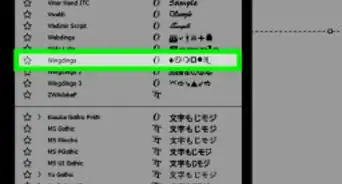
1Open your image in Photoshop and unlock the background. Simply click on the padlock and that will unlock it. Rename it. For this article, it will be renamed 'Original'. Ultimately, It will act as a type of tissue or tracing paper.
-
2Add a blank layer above the 'Original' layer. Fill it with white. For your own purposes, you can add a texture layer, any color, or whatever type of image you might want. You can also add it at a later time. Rename it as 'Canvas'. This is what you will, eventually, be the background.
-
3Reverse the order of the two layers. The 'Original' layer will be on top and the 'Canvas' at the bottom.
-
4Duplicate the 'Original' layer using Ctrl+J. It will be the 'Original copy'.
-
5Click on the 'Original' layer and add a new blank layer by using ⇧ Shift+Ctrl+N.
-
6Go back to 'Original copy' layer, locate the Fill slider and slide it down to 1%. It will appear to be blank, but it isn't.
-
7Merge the 'Original copy' layer down by using Ctrl+E to the blank layer.
-
8Duplicate the merged layers twice. Rename them something like, Underpainting, Intermediate, and Details.
-
9Move the 'Original' layer to the top. Reduce the Opacity to 30-40%. This is where the tracing paper comes through.
-
10Lock the 'Original' layer so that you don't accidentally paint on it.


Method 2
Method 2 of 4:Setting Up the Layers Using an Action
Method 2
-
1Open your image in Photoshop CC. Make sure that it is a single layer. This is because the action will flatten the image.
-
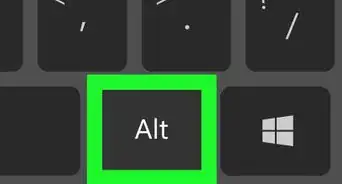
2Access the 'Mixer Brush Cloning Paint Setup' action. If you don't see the Action dialog box, go to Windows >> Action Alt+F9.
-
3Run the action. Click 'Continue' on the box that comes up.
-
4Go to the 'Reference' layer, unlock it, and change the Opacity to 30-40%. Anything more will have your painting looking more like a photograph than you will probably want. Lock it back up.
-
5Duplicate your 'Detail Strokes' layer and lock it. This will leave you a backup just in case you did something to a layer that you don't like. Since you can't erase these layers, you will need a new layer to work on.


Method 3
Method 3 of 4:Painting Your Photograph
Method 3
Underpainting
-
1Start on the 'Underpainting' layer. Duplicate it. You will be testing your brushes on this layer.
-
2Find your 'Mixer Brush' icon and try using several brushes to see which one (or ones) will suit your purpose. Each successive layer will add more clarity and detail to your artwork.
-
3To start with, use a brush like a 'Rough Round Bristle' for your underpainting. Experiment with that, see if you like it, and then continue to experiment.
-
4After selecting your brush, make sure that you check the settings. You will want to do the following:
- Unselect the 'Load the brush after each stroke' option. This keeps any paint from being added to the image with each stroke.
- Select the 'Clean the brush after each stroke' option. This keeps your colors from running together.
- Custom option: You can choose one of the options that it presents you and go from there, or you can go ahead and make changes that you deem appropriate. You could also start with a preset option and then change it for your purposes. How many of these options work will change with each brush that you use.
- Wet: This refers to your layer/image that you are working on. 0% is a completely dry 'painting' to work on, and 100% is a very wet 'painting' to work on. Start with 50%, see how it looks, and go from there.
- Load and Mix will only be used if there is any paint color that you are adding. The settings that you start with here means that they are unnecessary for this application.
- Flow: Flow can be at 100% for the underpainting. As you start to add details, you might consider lowering the flow. That being said, go with what works for you.
- Be sure that 'Sample All Layers' is NOT marked. This is a huge resource drain and unnecessary for this process.
-
5Start painting. In the case of this dog, follow the direction of the fur. If you don't try to at least follow the general direction, your image will get very muddy looking.
-
6Periodically, click on the eye next to the 'Reference' layer and see what your image is looking like.
-
7Start with the larger details first, then reduce the size of your brush and go for the smaller, more detailed parts of your image, like the eyes.
- For areas of high contrast, where the edges of clothes or color changes are, consider doing them first. You will want your paint to be less wet when doing this part of your image so that the paint will not travel as far. It also helps you maintain the shapes in your image as you get further along in your work.
- For close details like eyes, fur, and hair, try reducing the 'Wet' option so that the paint doesn't travel as far, but increasing the Flow option.
-
8Make sure that your underpainting layer is opaque. If your brush strokes are allowing the background to show through, then adjust your 'Wet' option higher. If your Flow is set at a lower number, increase it as well.
-
9Don't zoom in too closely while you are painting. That will cause your image to look too much like the photograph and you don't want that.
-
10Finish the underpainting layer. Precision is not important at this point. You want to get a good base of colors without a lot of detail.


Intermediate Strokes
-
1After finishing your underpainting, move to the 'Intermediate Strokes' layer.
-
2Look at your image and decide on which parts you want to draw attention to. That is where you will start adding detail back to the image. Generally, that will be the face of your subject and the eyes in particular, if it is a person or an animal portrait.
-
3Be sure that your Flow is reduced in the Intermediate strokes. At 100%, it would bring back the photographic sharpness and would jar with the rest of your work. The Wet and the Flow option should be at about 20%, to begin with. Again, your actual brush and tastes will determine your settings.
-
4Start adding some details. This will be the layer that starts to make sense out of the underpainting. Depending on the subject matter or your end goal, it could be a few brush strokes or a lot of brush strokes.
- Turn off the Reference layer and the underpainting layer to see where your intermediate strokes are.
-
5Lock the Intermediate Strokes layer once you have completed it.


Detail Strokes
-
1Change your brush. You want one that will move the paint the least, while still painting it. For details, you want the brush to be smaller. Adapt the settings so that the paint is moved a small amount (lower the Wet settings).
-
2Zoom in closer to the area that you want to paint.
-
3Switch back and forth with showing the reference layer or not showing it. You want to improve the clarity of the details without making it exactly like the photograph.
-
4Zoom in and brush in more and more detail. Do your best to make sure that it is clearer and looks the way you want without it looking like the photograph.
-
5Continue until it is where you want it. Of course, you can always make more changes as you go.


Method 4
Method 4 of 4:Finishing Your Artwork
Method 4
-
1Find a texture that you want to add to your work. Do you want oil painting texture, or watercolor texture, or simply a material canvas type of texture? Whatever you want to use.
-
2Copy the texture layer and move the copy to the top of the layer stack and put it in 'Overlay' or 'Soft light' mode. This will blend your work with the texture layer and help with blending them together.
-
3Make sure that the top two layers, the Reference and texture layer, are invisible.
-
4Select the top layer, right-click, and select Merge Down, or Merge Visible. This will vary depending on what you have. You should have three layers now. The image layer with a textured background, the textured background, and the Reference layer.
-
5Duplicate the bottom layer and work on the duplicate.
-
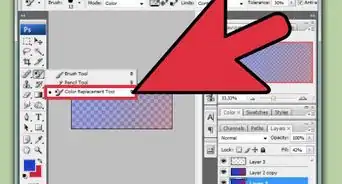
6Click on the Clone Stamp tool and choose the Rough Round Bristle brush.
-
7Set the mode to Darken. That way, only the pieces of your image that are lighter than what you are cloning will be affected. If the coloring of your image doesn't allow for that to work, try the opposite; the Lighten mode.
-
8Start cloning from the background to the edge of your subject. This helps your subject to blend in more naturally with the background.
-
9Duplicate your texture layer. This step is optional. Try experimenting with different blend modes and see what they add to your image. If you like how it looks in one place, but not another, use masks to put the effect where you want it.
-
10While still in the Mixer Brush tool, switch your brush to something like the Pastel Medium Tip Blender.
-
11Use the Medium Tip Blender where you want to draw the attention away from. For instance, clothing. Use it sparingly. Once you have it the way you want it, duplicate the layer and go through the blend modes and see if your attention is focused on your subject and less on the parts that you are trying to reduce the impact. For an image like this where it is just fur, it wouldn't be used.
-
12Change your brush to a 'Hair Brush'. If you don't have any, you can find them on the Internet. Do a search for "Hair Brush abr". The abr is the brush format that a lot of software uses.
-
13Set the 'Wet' to about 50 and reduce your Flow. This will keep the fur from moving too far.
-
14
-
15Duplicate the layer. You do this because in the final steps you don't like something that you have done, you can go back to the backup image.
-
16Reverse the process. Still using the hairbrush, push the hair onto the background. Using a hairbrush allows for the paint that you are manipulating to actually have separations as hair or fur would. Continue until you like its look.


-Step-9.webp)