X
This article was written by Nicole Levine, MFA. Nicole Levine is a Technology Writer and Editor for wikiHow. She has more than 20 years of experience creating technical documentation and leading support teams at major web hosting and software companies. Nicole also holds an MFA in Creative Writing from Portland State University and teaches composition, fiction-writing, and zine-making at various institutions.
This article has been viewed 6,580 times.
This wikiHow teaches you how to keep track of how much internet bandwidth you're using in Windows and macOs.
Steps
Method 1
Method 1 of 2:Windows
Method 1
-
1Download GlassWire from https://www.glasswire.com. It’s a free app that monitors the amount of internet bandwidth used by your Windows PC. To download the app, click Download GlassWire Free.
-
2Run the GlassWire installer. Double-click the file you just downloaded, then follow the on-screen instructions to complete the installation.
-
3Open GlassWire. It’s in the All Apps area of the Start menu.
-
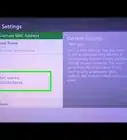
4Click the Usage tab. It’s at the top of the window, near the middle. Your internet bandwidth usage stats appear in the left column.
- The value under “Incoming” is the amount of data you’ve downloaded.
- The value under “Outgoing” is data you’ve uploaded.


Method 2
Method 2 of 2:macOS
Method 2
-
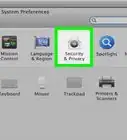
1Install Bandwidth+ from the Mac App Store. This free app monitors internet bandwidth on your Mac. You can also find it by navigating to https://itunes.apple.com/us/app/bandwidth/id490461369?mt=12.[1]
-
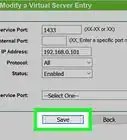
2Open Bandwidth+. Once the app is installed, you’ll find it in the Applications folder. When the app is open, it’ll keep a live count of your bandwidth used in the menu bar at the top-right corner of the screen.
-
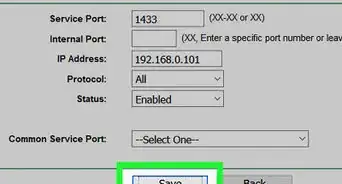
3Click the bandwidth value. It’s the number at the top-right corner of the screen. This displays additional info about your bandwidth used.
- The value under the downward-pointing arrow shows how much data you’ve downloaded.
- The value beneath the upward-pointing arrow shows how much you’ve uploaded.
- The two-sided arrow is the summary.


-Step-26-Version-2.webp)


References
About This Article

Nicole Levine, MFA
Tech Specialist
This article was written by Nicole Levine, MFA. Nicole Levine is a Technology Writer and Editor for wikiHow. She has more than 20 years of experience creating technical documentation and leading support teams at major web hosting and software companies. Nicole also holds an MFA in Creative Writing from Portland State University and teaches composition, fiction-writing, and zine-making at various institutions. This article has been viewed 6,580 times.
How helpful is this?
Co-authors: 2
Updated: August 10, 2021
Views: 6,580
Categories: Computer Networking