X
This article was written by Nicole Levine, MFA. Nicole Levine is a Technology Writer and Editor for wikiHow. She has more than 20 years of experience creating technical documentation and leading support teams at major web hosting and software companies. Nicole also holds an MFA in Creative Writing from Portland State University and teaches composition, fiction-writing, and zine-making at various institutions.
This article has been viewed 7,551 times.
This wikiHow teaches you how to adjust the height and width of slides in your PowerPoint presentation on a PC or Mac.
Steps
-
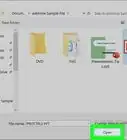
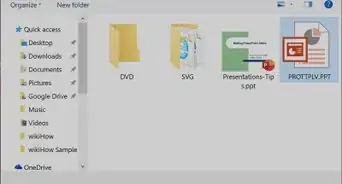
1Open your presentation in PowerPoint. An easy way to do this is to double-click the file on your computer.
-
2Switch to “Normal” view. To do this, click the View tab at the top of the screen, then select Normal (the first icon in the ribbon bar).Advertisement
-
3Click the Design tab. It’s in the menu bar at the top of PowerPoint.
-
4Click Slide Size. It’s on the right side. A drop-down menu will appear.
-
5Click Custom Slide Size. A pop-up window will appear.
-
6Adjust the slide size as needed. There are many options from which to choose, including some useful presets.
- To choose a preset for a specific purpose (e.g. on-screen show), click the “Slides sized for” drop-down at the top-left corner of the window, then make your selection.
- To set the size manually, use the arrows next to the “Width” and “Height” blanks to increase or decrease the size (in inches). You can also enter your own values, including decimals.
- On the right side of the window, select either Portrait or Landscape orientation to further fine-tune the slide size.
-
7Click OK. Your slide size preferences will take effect immediately.Advertisement


About This Article

Nicole Levine, MFA
Tech Specialist
This article was written by Nicole Levine, MFA. Nicole Levine is a Technology Writer and Editor for wikiHow. She has more than 20 years of experience creating technical documentation and leading support teams at major web hosting and software companies. Nicole also holds an MFA in Creative Writing from Portland State University and teaches composition, fiction-writing, and zine-making at various institutions. This article has been viewed 7,551 times.
How helpful is this?
Co-authors: 1
Updated: May 15, 2018
Views: 7,551
Categories: PowerPoint Presentations
Article SummaryX
1. Open your presentation.
2. Switch to “Normal” view.
3. Click Design.
4. Click Slide Size.
5. Click Custom Slide Size.
6. Adjust slide size.
7. Click OK.
Did this summary help you?
Advertisement