This article was co-authored by wikiHow staff writer, Eric McClure. Eric McClure is an editing fellow at wikiHow where he has been editing, researching, and creating content since 2019. A former educator and poet, his work has appeared in Carcinogenic Poetry, Shot Glass Journal, Prairie Margins, and The Rusty Nail. His digital chapbook, The Internet, was also published in TL;DR Magazine. He was the winner of the Paul Carroll award for outstanding achievement in creative writing in 2014, and he was a featured reader at the Poetry Foundation’s Open Door Reading Series in 2015. Eric holds a BA in English from the University of Illinois at Chicago, and an MEd in secondary education from DePaul University.
There are 7 references cited in this article, which can be found at the bottom of the page.
This article has been viewed 4,577 times.
Learn more...
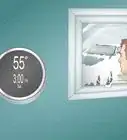
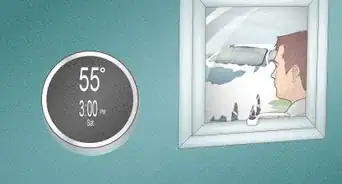
Wireless thermostats like Nest and Honeywell let you control the temperature of your home from your phone, computer, or tablet. This means you’ll be able to turn the heat or air on before you get home. Aside from the convenience, this can actually save you money in the long run since you’ll be able to shut the system down without even being home. While this process isn’t especially difficult, keep in mind that it does involve some light electrical work. If you aren’t comfortable messing with the wires in your thermostat, don’t hesitate to contact an HVAC technician to get some professional help.
Steps
Method 1
Method 1 of 9:Shut off your circuit breaker.
-
1Your HVAC system must be off if you’re going to change the thermostat. Go to the fuse box and flip the breakers for the HVAC system. This will keep you from accidentally shocking yourself while you’re replacing the thermostat. If you aren’t sure which breakers are assigned to your thermostat, simply flip the master breaker or turn all of them to the off position just to play it safe.[1]
- If you want to confirm the electricity is off, try turning your air or heat on. If nothing blows out and the boiler or central air unit doesn’t kick on within 5 minutes, it’s off.
Advertisement

Method 2
Method 2 of 9:Remove the old faceplate.
-
1If you don’t see any screws, you can typically just pull the cover off. Look on the sides of the faceplate for a small lip and pull on it with your finger. If there aren’t any lips on the faceplate cover, try gently pulling it off of the wall. If you see screws connecting the faceplate to the wall, grab a Philips or flathead screwdriver and remove them to take the faceplate off.[2]
- If there aren’t any screws visible from the outside and you can’t pop the cover off, try prying the cover off with a flathead screwdriver.

Method 3
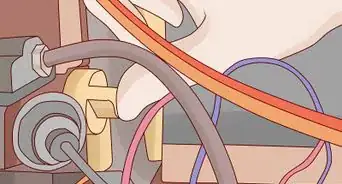
Method 3 of 9:Take a photo of your wiring setup.
-
1You’ll need reference photos to set up the new thermostat. Grab your phone and take a snapshot of the wires. You should see 4-5 wires connecting to terminals in the thermostat. Each of these terminals are labelled with a letter. Make sure the letters and wires are clearly visible in your snapshot.[3]
- The wires are typically color-coded as well. Still, you’ll want plenty of reference points when it comes to setting up your new thermostat.
Advertisement

Method 4
Method 4 of 9:Label your wires with tape.
-
1Labelling your wires will give you another reference point. If your new thermostat comes with adhesive labels, use those. If it doesn’t, grab some electrical tape and wrap a small band of tape around each wire. Use a marker to label each wire with the letter on the terminal that it’s connected to. This should remove any confusion when it comes to setting your new thermostat up.[4]
- If there are any jumpers, which are small connectors that link unused terminals together, pull them out. You won’t need them for the new thermostat.

Method 5
Method 5 of 9:Disconnect your old wires.
-
1You only need to take the wires out of the terminals, not the wall. Use a screwdriver to remove the screws on each terminal. These screws lock your wires into place, so unscrewing them will allow you to slide the wires out of their slots. If there are no screws and you have small buttons on each terminal, press the buttons down with your finger to unlock the wires and slide them out. Take each wire out.[5]Advertisement

Method 6
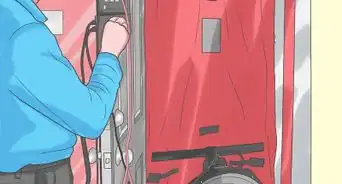
Method 6 of 9:Replace the wiring base of the thermostat.
-
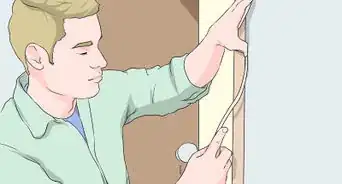
1Take the old wiring base off and install the new one. Unscrew the old base from the wall with a screwdriver and take it off of the wall. Grab your new base and slide the wires through the opening in the middle. Hold it against the wall and use the screws that came with your new thermostat to screw it into the drywall.[6] If you’re attaching the thermostat to brick or wood, you may need to drill a pilot hole for each of the screws.[7]
- This is a good opportunity to patch and paint any damaged drywall hiding behind the old wiring base if you’d like.

Method 7
Method 7 of 9:Connect your wires.
-
1Each wire connects to the same terminal as before. So, if the green wire was in “C” on your old thermostat, it goes into the “C” terminal on your new wiring base. Use the labels you created and the picture you took on your phone as reference points. Press the button a terminal to unlock it, slide the corresponding wire into the slot, and release the button to set it in place.[8]
- If the copper insulation on any wire isn’t exposed, you’ll need to strip the plastic coating to expose the copper first. You need roughly 3⁄8 in (9.5 mm) to be exposed for the connection to be secure.
- If your DIY labels are kind of big and they’re getting in the way, feel free to remove them after you’ve installed each wire.
Advertisement

Method 8
Method 8 of 9:Push the faceplate into the wiring base.
-
1Make sure the faceplate is facing the right direction. Slide it over the wiring base and gently press it into the frame. It should snap right into place. If the wires are sticking up and they’re keeping you from attaching the faceplate, gently pat the wires down by hand to keep them from sticking out too far.[9]
- If you can’t get the faceplate to connect, make sure it’s oriented in the right direction.

Method 9
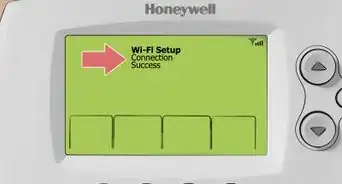
Method 9 of 9:Turn your thermostat on.
-
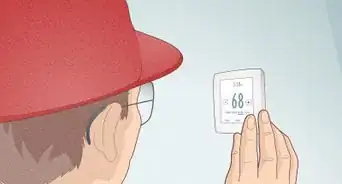
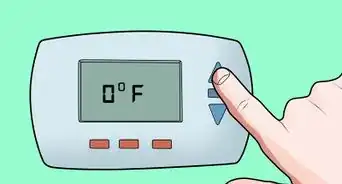
1Flip your circuit breaker on and follow the prompts on the thermostat. You’ll be able to set the language, date, and WiFi settings on the screen. Once your thermostat is connected to the WiFi, read the instruction manual that came with your thermostat and follow the instructions to download the app for the thermostat and sync them up.[10]
- These instructions may differ a bit from brand to brand, but your instruction manual should walk you through any unique steps you need to take.
- If the thermostat isn’t working correctly, contact an HVAC technician.[11]
Advertisement


References
- ↑ https://www.consumerreports.org/smart-thermostats/how-to-install-a-smart-thermostat/
- ↑ https://youtu.be/dHKD-9uI24I?t=73
- ↑ https://www.consumerreports.org/smart-thermostats/how-to-install-a-smart-thermostat/
- ↑ https://www.diysmarthomesolutions.com/smart-thermostat-c-wire-explained/
- ↑ https://youtu.be/dHKD-9uI24I?t=108
- ↑ https://products.gecurrent.com/sites/products.currentbyge.com/files/documents/document_file/DT103-GE-Wireless-Thermostat-Installation-Guide.pdf
- ↑ https://www.consumerreports.org/smart-thermostats/how-to-install-a-smart-thermostat/
- ↑ https://products.gecurrent.com/sites/products.currentbyge.com/files/documents/document_file/DT103-GE-Wireless-Thermostat-Installation-Guide.pdf
- ↑ https://www.consumerreports.org/smart-thermostats/how-to-install-a-smart-thermostat/
About This Article