X
wikiHow is a “wiki,” similar to Wikipedia, which means that many of our articles are co-written by multiple authors. To create this article, volunteer authors worked to edit and improve it over time.
Learn more...
Have you ever struggled with using CAD? do you want to know how to use NX12? This article will explain how to use the engineering software NX12 for creating Cad models. This is useful for engineering majors in college, as many colleges use NX12.
Steps
Part 1
Part 1 of 4:Installing vlab
Part 1
-
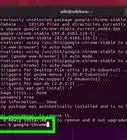
1Install Vlab. The first step to using NX12 is to install a launcher known as Vlab. Vlab is the only way to properly access NX12. This can be installed by using google chrome and looking up vlab launcher or by using a link provided by a school. If you look up Vlab the launcher will be the first link. Once you find the vlab launcher and have installed it you can begin step two.
-
2Log in. After Vlab is installed you must open up the program and login. The login sequence is completed by using your access id and password, which should be provided by the business or school you are using NX12 under.
-
3Open NX12. The next step is opening NX12. After signing into Vlab is to go to folders and open the folder labeled Siemens NX12. Make sure it is standard NX12 and not NX12 layout. The way you can tell the difference is layout mode will be labeled "siemens nx12 layout"
-
4Launch NX12. once NX12 has been launched using Vlab you should be taken to a page that requires you to login again using the same information as Vlab. Once you have logged in a page will appear asking you which domain you would like to use. The domain with the same label as your school or business is the one you will use.


Part 2
Part 2 of 4:Setting up your Layout
Part 2
-
1Pick Measurements. You must pick a measurement to complete the layout. Once have been picked you should click one of the 8 layouts provided in the middle of the page. The most basic layout for CAD will be called modeling and should be the first choice you have.
-
2Find a directory. After having picked out measurements and your layout you must go to the bottom of the page and click the tab called directory. This tab will allow you to chose where you want to save your work. Make sure you choose a secure folder so you do not lose your work. Choosing a folder can by done simply by hitting the directory button and picking where you want to deliver your work.
-
3Pick a layout. Once you have picked a domain, a new page should open. This page will be the set up for your CAD design. The bottom of the page will have a directory, the middle will be the layout type and the top of the page should have a measurement tab called units. The measurements you should use are millimeters, you can access this by clicking the measurements tab and hitting millimeters.
-
4Launch your layout. After completing these 3 steps you should hit the button on the bottom right of the page labeled "ok" this will then launch your layout and allow you to begin work on NX12. This is a key step to begin the other steps of work.


Part 3
Part 3 of 4:Creating a CAD Model in nx12
Part 3
-
1Pick a view. Creating a CAD model in nx12 starts by hitting the right mouse button, this should open up a few tabs wherever you clicked on the page. Go down to the tab labeled Orientate view and click the top view.
-
2Use the line tool. The next step is to go to the hot bar at the top of the page and click the tool in the top left labeled the line tool. Once you have clicked on the line tool in your hot bar you can go onto the blank canvas and start drawing lines. To draw a line, click anywhere on the canvas with the left mouse button then click a second point and a line should appear.
-
3Connect the lines. Once you have an understanding of using the line tool, you can connect various lines to make a shape. Make sure every line is connected, you can do this by hovering over one line with your mouse and if all of them turn orange then they are connected.
-
4Use the extrude tool. The next step after having a shape completed is to go to your hotbar and click the top right search icon. Then you must type in the word "extrude" into the search bar, this will then allow you to use the extrude tool. To begin using the extrude tool click on it from the search menu, then go over to your shape and left click that. A small tab should open up with information about the extruded item, one line should ask the height of your item. To make this shape 3D you must enter in a number greater than 0 for the height. to get a full view of your object, you can left click and hold down the left mouse button, then drag your mouse around and it should rotate your 3D object.


Part 4
Part 4 of 4:Saving your work
Part 4