X
This article was co-authored by wikiHow Staff. Our trained team of editors and researchers validate articles for accuracy and comprehensiveness. wikiHow's Content Management Team carefully monitors the work from our editorial staff to ensure that each article is backed by trusted research and meets our high quality standards.
The wikiHow Tech Team also followed the article's instructions and verified that they work.
Learn more...
This wikiHow teaches you how to create and edit to-do lists in Google Tasks, using Android. You can use the app's various features to keep track of your personal tasks, and access your to-do lists on all your mobile devices.
Steps
Part 1
Part 1 of 7:Adding a Task
Part 1
-
1Open the Tasks app on your Android. The Tasks app looks like a blue dot with a white line in it. You can find it on your Apps menu.
-
2Tap the Get started button. This will log you in with your saved Google account, and open the "My Tasks" list.
- If you have multiple accounts saved on your Android, you'll be prompted to select the account you want to use.
Advertisement -
3Tap the blue + Add a new task button. It's located at the bottom of your screen.
-
4Enter a task title. You can type in a title for your task in the pop-up window.
-
5Tap the blue + icon. This button is in the bottom-left corner of the new task pop-up.
-
6Tap the three-lines icon to add task details. This button will allow you to type in and add some details under your task's title.
-
7Tap the calendar icon to add a task date. This will open a pop-up calendar.
-
8Select the date you want to add. Tap the day you want to add on the pop-up calendar, and tap OK on the bottom-right.
-
9Tap the Save button. It's in the bottom-right corner of the pop-up. It will save your new task to your "My Tasks" list.Advertisement


Part 2
Part 2 of 7:Adding a New List
Part 2
-
1Tap the ☰ icon. It's in the bottom-left corner of your screen. Your navigation panel will slide in from the bottom.
-
2Tap + Create new list on the menu. You can find it at the bottom of your lists.
-
3Enter a list name for your new list. Type in a list name in the "Enter name" field at the top of this page.
-
4Tap Done. It's in the upper-right corner of your screen. This will create and open your new list.Advertisement


Part 3
Part 3 of 7:Switching Between Lists
Part 3


Part 4
Part 4 of 7:Renaming a List
Part 4
-
1Open the list you want to edit. Tap the "☰" icon, and select a list from the menu.
-
2Tap the ⋮ icon. This button is in the lower-right corner of your screen. It will open your list options.
-
3Tap Rename list on the menu. This will allow you to edit the list name on a new page.
-
4Edit the list's current name in the text field. You can change parts of the current name, or delete it and enter a new one.
-
5Tap Done on the top-right. This will save and apply your changes.Advertisement


Part 5
Part 5 of 7:Deleting a List
Part 5
-
1Open the list you want to delete. Tap the "☰" icon, and select a list from the menu.
-
2Tap the ⋮ icon on the bottom-right. It will open your list options.
-
3Tap Delete list on the menu. This option will delete the list and all the tasks in it.
- Alternatively, you can select Delete all completed tasks on the menu. This will only delete the completed tasks in this list.
-
4Tap YES in the pop-up. This will confirm your decision, and delete the selected list from your account.
- If you don't have any tasks here, the list will be deleted without a confirmation pop-up.
Advertisement


Part 6
Part 6 of 7:Moving Tasks
Part 6
-
1Open the list you want to edit. Tap the "☰" icon, and select a list from the menu.
-
2Hold down the task you want to move. The task will lift up from the list.
-
3Drag and move the task up or down. You can move tasks up and down on a list, and order the list however you want.
-
4Tap ⋮ on the bottom-right. It will open your list options.
-
5Select Date under "Sort by." When this option is selected, all the tasks on this list will be automatically sorted by date.
- If you want to switch back to your custom order, select My order on the same menu.
-
6Tap a task to open the task details. You can move the selected task to another one of your saved lists here.
-
7Tap the list name at the top. You can find this task's current list at the top of the details page.
-
8Tap the list you want to move this task to. This will move your task to the selected list.Advertisement


Part 7
Part 7 of 7:Editing Tasks
Part 7
-
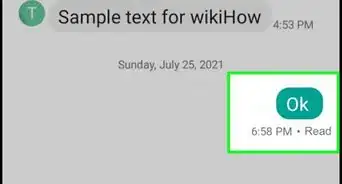
1Tap the empty circle next to a task. You'll see it next to every task on the left-hand side.
- Tapping will turn the circle into a checkmark, and mark the task as "Completed."
- You can tap the checkmark next to a completed task to undo it.
-
2Tap the task you want to edit. This will open the task details on a new page.
-
3Tap and edit the task title at the top. Tapping will open your keyboard, and allow you to edit the task's title here.
-
4Tap Add details below the task title. This will allow you to enter some detail information for the selected task.
- If the task already has details, you can tap on the details field and edit it.
-
5Tap Add date to add a task date. . You can select a date from a pop-up calendar.
- If there's already a date saved here, you can tap on the date to change it, or tap the "X" icon to remove it.
-
6Tap Add subtasks at the bottom. This will allow you to add substeps to your main task. Subtasks will appear below the main task on the list.
-
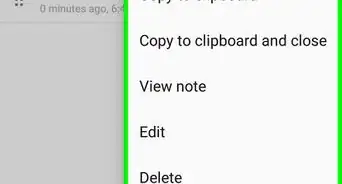
7Tap the icon to delete a task. It's in the top-right corner of your screen. This will permanently delete the selected task, and remove it from your lists.Advertisement


About This Article

wikiHow Staff
wikiHow Staff Writer
This article was co-authored by wikiHow Staff. Our trained team of editors and researchers validate articles for accuracy and comprehensiveness. wikiHow's Content Management Team carefully monitors the work from our editorial staff to ensure that each article is backed by trusted research and meets our high quality standards.
How helpful is this?
Co-authors: 2
Updated: October 25, 2021
Views: 467
Categories: Android | Google Applications
Advertisement