X
This article was written by Nicole Levine, MFA. Nicole Levine is a Technology Writer and Editor for wikiHow. She has more than 20 years of experience creating technical documentation and leading support teams at major web hosting and software companies. Nicole also holds an MFA in Creative Writing from Portland State University and teaches composition, fiction-writing, and zine-making at various institutions.
This article has been viewed 9,161 times.
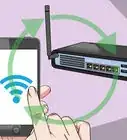
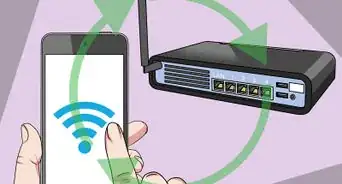
This wikiHow teaches you how to enable and disable Wi-Fi on your Windows PC.
Steps
Method 1
Method 1 of 2:Windows 10
Method 1
-
1Click the Wi-Fi icon. It looks like . If Wi-Fi is disconnected, the icon will have a red “x” at its corner.
- If a network cable is plugged in to your PC, you won’t see this icon. Instead, click the icon that looks like a computer with a network cable on its left side.
- If you don’t see either icon, make sure your Wi-Fi adapter is enabled. Here’s how:[1]
- Click the menu and select Settings .
- Click Network & Internet.
- Click Wi-Fi on the left panel.
- Scroll down and click Change adapter options.
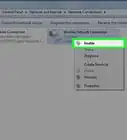
- Right-click the wireless adapter and select Enable.
-
2Click the Wi-Fi button. It’s at the bottom-left corner of the menu. If Wi-Fi was disabled (displaying a red x), it will turn back on and start scanning.
- To turn Wi-Fi back off, click the button again.
- If your keyboard has a Wi-Fi key, you can use it to quickly enable or disable Wi-Fi. Look for a button in the top row of keys that looks like an antenna with curved lines radiating from its center.


Method 2
Method 2 of 2:Windows 8
Method 2
-
1Move the mouse cursor to the right side of the desktop. A menu will slide out.
-
2
-
3Click the Wi-Fi button. It’s the vertical bars at the bottom of the menu.
-
4Click the “Wi-Fi” switch to toggle Wi-Fi on or off. The word “Off” appears next to the switch when Wi-Fi is disabled.
- If your keyboard has a Wi-Fi key, you can use it to quickly enable or disable Wi-Fi. Look for a button in the top row of keys that looks like an antenna with curved lines radiating from its center.


About This Article

Nicole Levine, MFA
Tech Specialist
This article was written by Nicole Levine, MFA. Nicole Levine is a Technology Writer and Editor for wikiHow. She has more than 20 years of experience creating technical documentation and leading support teams at major web hosting and software companies. Nicole also holds an MFA in Creative Writing from Portland State University and teaches composition, fiction-writing, and zine-making at various institutions. This article has been viewed 9,161 times.
How helpful is this?
Co-authors: 2
Updated: March 29, 2019
Views: 9,161
Categories: Wi Fi