X
wikiHow is a “wiki,” similar to Wikipedia, which means that many of our articles are co-written by multiple authors. To create this article, 15 people, some anonymous, worked to edit and improve it over time.
This article has been viewed 126,571 times.
Learn more...
If you have 8mm or Super 8 films lying around the house, it is never too early to have them transferred to a video. Each time they are projected, they become more scratched and damaged. In digital video form, the content can be preserved in the current state.
Steps
-
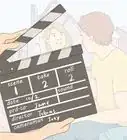
1Determine whether your films are 8mm or Super 8. 8mm sprocket holes are larger, perhaps one third of the width of the film, and they are on the edge of the film between two frames. Super 8 films have sprocket holes the size of the head of a pin and the holes are located on the edge but bisecting the middle of each frame.
-
2Find a projector designed to project the type of film you have. You may discover that you have some reels of 8mm and some reels of Super 8. Some projectors (Dual 8) can handle both kinds. If you don't own a projector, check out your local Goodwill, eBay or vintage camera store. You will likely experience flicker in your transfer unless you can find a variable speed projector. Newer, more expensive projectors might have a special mode for video transfer.[1]Advertisement
-
3If possible, gently clean your films using rewind spindles and pulling the film slowly through a soft, lint-free cloth dampened with a little film cleaner.[2]
-
4Use canned air and an alcohol swab to clean the tape path on the projector. Ideally, you will run the film just once and remove any dirt that might scratch the film or blow away any dust bunny that might hop into the frame during transfer.
-
5Find a piece of bright white paper with no discernible texture to use as a screen. Place the projector on the edge of a table projecting perhaps 24 inches (61.0 cm) to your paper screen taped to the wall. Make the projected rectangle as small and sharp as possible. Turn on the projector with no film in it to define that rectangle.[3]
-
6Use a camera or camcorder that records to a digital format like DV or Digital 8. Newer cameras have better low light capturing properties. Best results will come from a camera that has manual iris and white balance settings.
-
7Place the camcorder on a tripod next to and behind the projector and using zoom and focus, find a position where you can frame up the white rectangle on the screen with as little keystoning as possible. If you can hook up a video out of the camera to a monitor, it will make your framing and exposure correction easier.[4]
-
8Do a manual white balance on the camera with that white light on screen filling your frame and set your manual iris so it is bright without blooming.[5] A zebra feature on the camcorder set to 100% will help you do this. If the camera does not have these features, the automatic settings may do an adequate job.
-
9If the projector has a variable speed adjustment, you should be able to tweak out the flicker on this white screen.
-
10Load the sturdiest looking film onto the projector. Start your camera recording first and then start your projector. This first pass is your chance to make any adjustments. If you are very lucky, you could get it on your first try. More than likely, you will have to run this first film two or more passes to optimize the image with your manual controls.
-
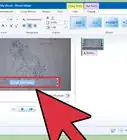
11With a digital video master, you can now edit or transfer to DVD or VHS.Advertisement


Community Q&A
-
QuestionDo you have any tips for getting good focus with an auto focus camera?
 Cactus7Community AnswerTake test pictures. Experiment with lighting, distances and center of focus on near and far objects. Make sure the little doors in front of lens are all the way open. Clean the lens and screen.
Warnings
- As you stand behind the projector loading the film, the sprocket holes should be on the right. If they are on the left, the film might be wound backwards.Thanks!
- Cleaning the film can also remove emulsion (the particles that make up the image). Be very gentle and conservative with your cleaning.Thanks!
- If the film has been edited in the past, it may break on the splices while projecting. Inspect any splices first and repair with splicing tape if necessary.Thanks!
- If you go to all the trouble of setting up a transfer station, don't waste your time going directly to VHS tape. An analog format like VHS will lose quality quickly with each copy.Thanks!
Advertisement
Things You'll Need
- 8mm or Super 8 projector, preferably with a variable speed adjustment
- canned air
- alcohol swab
- soft, lint free cloth
- bright white, texture less paper
- digital format camcorder with blank tape
- splicing tape if you can find it


References
- ↑ https://www.consumerreports.org/audio-video/how-to-convert-film-and-vhs-to-digital/
- ↑ https://www.youtube.com/watch?v=YuTMNEkXWt8
- ↑ https://www.macintouch.com/readerreports/digitizingvideo/topic4867.html
- ↑ https://mistervideo.net/film-transfer-methods/
- ↑ https://www.macintouch.com/readerreports/digitizingvideo/topic4867.html
-
http://jiminger.com/s8/index.html
About This Article
Advertisement