X
wikiHow is a “wiki,” similar to Wikipedia, which means that many of our articles are co-written by multiple authors. To create this article, volunteer authors worked to edit and improve it over time.
This article has been viewed 50,451 times.
Learn more...
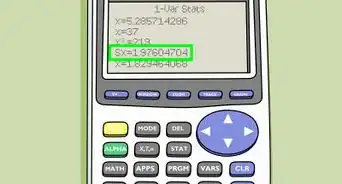
Do you own one of Texas Instruments' Graphing Calculators? Not many people know they can take a screenshot with their graphing calculators. This article will guide you through this process.
Steps
-
1Purchase a TI Connect kit that will include the cord that you need to plug your calculator into your computer to take the screenshot. Although they can't be found offline anymore, they can be found at Amazon.
-
2Bring home the TI Connect kit for your calculator.Advertisement
-
3Open up the kit.
-
4Plug the round-ended end or smaller USB portion of the cord into the calculator itself. Some calculators have the plug-area at the bottom of the calculator, while others have it at the side. Some may even have this area at the top of the device, so look around the device for symbols saying where the cord needs to be plugged in.
-
5Plug in the other end of the cable(rectangular/cubed end) that came with your TI Connectivity cord to the PC/Mac you're going to take the screenshot with/for.
-
6Prepare a computer for taking the screenshot, since a computer will be needed (on top of this cord) for taking one. Make sure you are also logged into, and arrived at the desktop.
-
7Allow the calculator to install the drivers (those informative files your computer will need to know about your calculator). You'll eventually see a box that will say the installation was successful near the bottom right corner of the screen.
-
8
-
9Use the drop-down boxes to select your product, or for the direct download link, visit either TI Connect for Windows or TI Connect for Mac. These two are two of the "Most Popular Downloads" on the TI homepage, but this could change upon every browser session.
-
10Click the "Visit as Guest" button to get around the dialog box that opens asking you to login.
-
11Download the file you've requested from the page to receive.
-
12Install the software.
-
13Turn on the device.
-
14Open the TI Connectivity software.
-
15Click the "TI Screen Capture" app from the software.
-
16Click the "Get screen" button from near the top of the software.
-
17Allow the software to find what calculators are currently enabled on the computer. As long as the calculator is plugged in and turned on, will this verification step work.
-
18Save the image that should be inserted into a separate window from within the software. Use the File menu in the menu bar for this task.
- You can also Copy and Paste the image produced and paste the image into another program (such as Word, PowerPoint, Outlook, Excel, or many other editing programs etc.)
Advertisement


-on-an-Android-Calculator-Step-6.webp)


About This Article
Advertisement