X
This article was written by Nicole Levine, MFA. Nicole Levine is a Technology Writer and Editor for wikiHow. She has more than 20 years of experience creating technical documentation and leading support teams at major web hosting and software companies. Nicole also holds an MFA in Creative Writing from Portland State University and teaches composition, fiction-writing, and zine-making at various institutions.
This article has been viewed 3,165 times.
This wikiHow teaches you how to sync an iPod with iTunes for Windows or macOS.
Steps
Method 1
Method 1 of 2:Windows
Method 1
-
1Connect your iPod to the computer. Use the USB cord that came with the iPod or one that’s compatible.
-
2Open iTunes. If the application did not open automatically, click the Start menu, select All Apps, then click iTunes. It may be in a folder called Apple.
-
3Update to the latest version of iTunes. Here’s how:
- Click the Help menu at the top of the screen.
- Click Check for Updates.
- If an update is found, follow the on-screen instructions to install it now.
-
4Click the iPod icon at the top of iTunes. It’s toward the top-left side of the app. Information about your iPod will appear in the right panel.
-
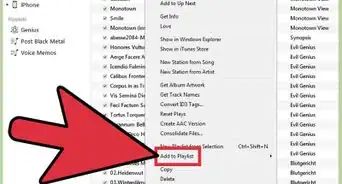
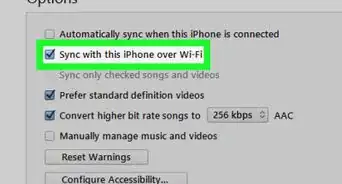
5Select items to sync. The types of items you can sync are listed under the “Settings” header at the top of the left column. Here’s how:
- Click a category (e.g. Music) to open it in the main panel.
- Check the box next to “Sync Music” (or the category you selected) to sync that content. Remove the check if you don’t want to sync that category.
- Go through each of the categories to check or uncheck the sync boxes.
-
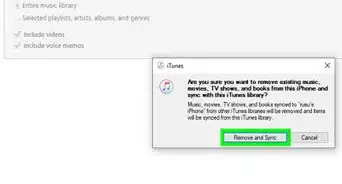
6Click Apply. It’s near the bottom-right corner of iTunes. Your iPod will begin syncing with iTunes.
- If the sync does not begin immediately, click the Sync button in iTunes.


Method 2
Method 2 of 2:macOS
Method 2
-
1Connect your iPod to the computer. Use the USB cord that came with the iPod or one that’s compatible.
-
2Open iTunes. If the application did not open automatically, click the music note icon in the Dock, or double-click iTunes in the Applications folder.
-
3Update to the latest version of iTunes. Here’s how:
- Open the App Store.
- Click the Updates menu.
- If an update is found, click Install.
- Return to iTunes when you’re finished.
-
4Click the iPod icon at the top of iTunes. It’s toward the top-left side of the app. Information about your iPod will appear in the right panel.
-
5Select items to sync. The types of items you can sync are listed under the “Settings” header at the top of the left column. Here’s how:
- Click a category (e.g. Music) to open it in the main panel.
- Check the box next to “Sync Music” (or the category you selected) to sync that content. Remove the check if you don’t want to sync that category.
- Go through each of the categories to check or uncheck the sync boxes.
-
6Click Apply. It’s near the bottom-right corner of iTunes. Your iPod will begin syncing with iTunes.
- If the sync does not begin immediately, click the Sync button in iTunes.


About This Article

Nicole Levine, MFA
Tech Specialist
This article was written by Nicole Levine, MFA. Nicole Levine is a Technology Writer and Editor for wikiHow. She has more than 20 years of experience creating technical documentation and leading support teams at major web hosting and software companies. Nicole also holds an MFA in Creative Writing from Portland State University and teaches composition, fiction-writing, and zine-making at various institutions. This article has been viewed 3,165 times.
How helpful is this?
Co-authors: 2
Updated: January 8, 2020
Views: 3,165
Categories: ITunes