This article was written by Darlene Antonelli, MA. Darlene Antonelli is a Technology Writer and Editor for wikiHow. Darlene has experience teaching college courses, writing technology-related articles, and working hands-on in the technology field. She earned an MA in Writing from Rowan University in 2012 and wrote her thesis on online communities and the personalities curated in such communities.
This article has been viewed 16,468 times.
Although you can use Outlook on multiple platforms, your signature is not always consistent. Microsoft plans to have your signature synced to the cloud by March 2020[1] , but if you can't wait, this wikiHow will teach you how you manually update your Outlook signatures on all platforms to ensure they match.
Steps
Method 1
Method 1 of 3:Using the Mobile App
-
1Open Outlook. This app features a white envelope with a blue piece of paper with a white "O" on it that you can find on one of your Home screens, in the app drawer, or by searching.
-
2Advertisement
-
3Tap Signature. You'll see this under the "Mail" header.
-
4
-
5Tap in the text field under "Signature." Tapping here will activate the keyboard and it will slide up from the bottom of your screen.
-
6Write your signature. Popular signatures include a name and contact information.
-
7Tap . You'll see this checkmark icon in the top right corner of your screen. You'll either tap this at the end of entering your default Outlook-wide signature or between each signature for different accounts.[2]
- You've set and saved a signature for this specific Outlook mobile app; to sync your signature across platforms, you'll need to manually set your signature similar to this one.
Advertisement


Method 2
Method 2 of 3:Using Mail for Windows 10
-
1Open Mail for Windows 10. This is usually a tile at the top of your Start Menu, but if you are having trouble finding the tile, you can browse all programs and find it under "M."
-
2
-
3Click Signature. This is usually in the middle of the menu.
-
4Set an account for the signature. You can either choose a specific account from the drop-down menu at the top of the window or click to select "Apply to all accounts."
-
5
-
6Write your signature. You may have to delete the text that's already in the signature field.
-
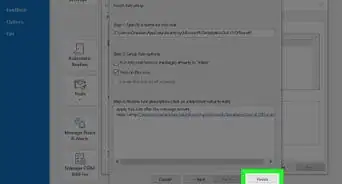
7Click Save. You'll see this at the bottom of the signature window.[3]
- You've set and saved a signature for this specific Windows 10 computer; to sync your signature across platforms, you'll need to manually set your signature similar to this one.
Advertisement


Method 3
Method 3 of 3:Using the Outlook App on Mac and Windows
-
1Open Outlook. You'll find this application in your Start Menu or Applications folder.
-
2Click New Email. You'll find this button with an envelope in the top left corner of the program window.
-
3Click Signature. You'll see this above the blank document area where you'd type your message. It's below the menu option "Format Text" in the center of the window.
-
4Click Signatures from the drop-down menu. If you have signatures already, you'll see them listed here.
-
5Click New. You'll see this in the window that pops-up under the box labeled, "Select signatures to edit."
-
6Type a name for the signature. A window will pop-up that prompts you to enter a name for the signature. This will be displayed instead of the entire signature in menu options, so pick a name that will remind you of what the signature is.
- For example, if you are creating a signature for work purposes, you could name your signature "Work."
-
7Click the large text box under "Edit signature." You can use the tools above the text space (e.g. font style and size) to format your signature.
- For example, you can format your signature with a hyperlink to another site, or you can change your font styles every line.
-
8Click the drop-down menu next to "New messages." You'll see this towards the top of the window on the right side.
-
9Select your signature's name. If you want to use a specific signature for all new messages you write, you can choose that here. If you don't want to use a signature, you can leave it at "none."
- You can also change the setting if you want to apply your signature to a forwarded message in the "Replies/Forwards" area.
-
10Click OK. You'll see that button in the lower right corner of the window.
- Your signature is now set and saved for your Outlook account on this computer. To set all your signatures similar across devices, you'll need to repeat this process on those other platforms.[4]
Advertisement


References
- ↑ https://www.microsoft.com/en-us/microsoft-365/roadmap?filters=&searchterms=60371
- ↑ http://www.ecsu.edu/documents/information-technology/outlook-signature.pdf
- ↑ https://support.office.com/en-us/article/create-a-signature-in-mail-for-windows-10-c07a46ad-8258-45b1-926a-4429a0aa1f9a
- ↑ https://support.office.com/en-us/article/create-and-add-a-signature-to-messages-8ee5d4f4-68fd-464a-a1c1-0e1c80bb27f2#bk_seehow
About This Article

1. Open Outlook.
2. Tap the Settings icon.
3. Tap Signature.
4. Tap the switch to turn on or off the "Per Account" signature.
5. Tap in the text field under "Signature."
6. Write your signature.
7. Tap the check mark icon.