This article was co-authored by wikiHow staff writer, Jessica Gibson. Jessica Gibson is a Writer and Editor who's been with wikiHow since 2014. After completing a year of art studies at the Emily Carr University in Vancouver, she graduated from Columbia College with a BA in History. Jessica also completed an MA in History from The University of Oregon in 2013.
This article has been viewed 11,695 times.
Learn more...
Oilcloth is a great fabric for waterproof sewing projects. Since it's coated with thin plastic, you'll need to make a few adjustments to your sewing machine. Use thicker needles and longer stitches to prevent the fabric from tearing. Replace your standard foot presser with a plastic foot presser that can slide over the fabric. Once you've stitched your project, you can use it right away or finish the edges.
Steps
Method 1
Method 1 of 2:Setting up Your Machine
-
1Select a sharp size 14 or 16 needle. You'll need to use very sharp needles to punch through the tough oilcloth. Use a size 14 or 16 needle so it can withstand the sturdy fabric. If you use weaker needles, they may bend or snap.[1]
- You can also check the fabric store for needles designed for sewing denim. These should be strong enough to work with oilcloth.
-
2Use polyester thread in your favorite color. If you want your project to have a waterproof quality, use polyester thread that won't absorb moisture. You can choose a thread color that matches the fabric so it blends in, or pick a color that stands out. For example, bright green or red thread really pops against black oilcloth.[2]
- If you're not concerned about having waterproof qualities, you could also use standard cotton thread.
Advertisement -
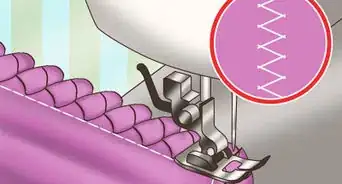
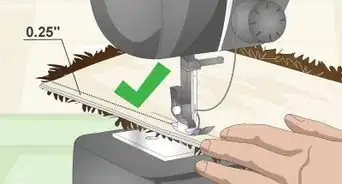
3Adjust your straight stitch between 3.0 and 3.5 mm. Since it's easiest to use oilcloth with basic shapes such as squares or rectangles, use a straight stitch. To avoid punching too many holes in the oilcloth, use a longer stitch than you usually would. For example, adjust the machine for a 3.0 to 3.5 mm stitch.[3]
- If you do plan on stitching curves, consider decreasing the length of the stitch between 2.5 and 3 mm.
-
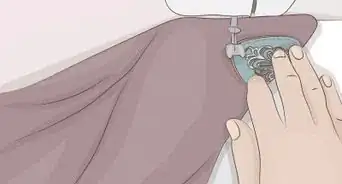
4Use a teflon presser foot to prevent the oilcloth from sticking. Since a standard metal presser foot may stick to the oilcloth, remove it and pop a teflon presser foot in place. You can buy a plastic teflon presser foot at most fabric supply stores. If you can't find them, stick a little masking tape on the bottom of the presser foot so it slides over the oilcloth.[4]
- If you're still struggling to get the presser foot to glide, turn the fabric over so you're stitching the back of the oilcloth. This will make it easier to feed the fabric through the machine.
Advertisement


Method 2
Method 2 of 2:Stitching the Oilcloth
-
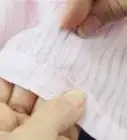
1Lay out the oilcloth for a few hours to remove the wrinkles. If your oilcloth was folded or came in a box, it will be creased when you lay lay it flat. To remove the wrinkles without damaging the oilcloth, lay it out for a few hours in a warm room. The wrinkles should disappear once the fabric warms a little.
- If it's sunny and warm outside, you can lay the oilcloth outdoors.
- Don't use an iron to smooth the oilcloth or you could damage the fabric.
-
2Choose a pattern for your oilcloth. Baby items such as bibs, mess mats, and diaper bags are popular projects to make with oilcloth. You can also find patterns at fabric stores or online for common kitchen items such as aprons, place mats, shelf liners, and tablecloths. For other oilcloth items around the house, make:[5]
- Book covers
- Pen or crayon cases
- Outdoor throw pillows
- Lunch sacks
- Shopping cart seat covers
-
3Cut the fabric and sew it according to your pattern. Use standard shears or scissors to cut the oilcloth according to the pattern you chose. Follow the instructions for stitching it using your sewing machine.
- Because oilcloth is so thick and sturdy, avoid sewing it by hand.
-
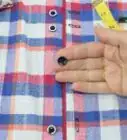
4Use clips when joining layers of oilcloth. If your pattern calls for stitching layers of oilcloth together, it's helpful to hold them in place. Use fabric clips, paperclips, binder clips, or clothespins to prevent the fabric from moving as you sew.[6]
- Avoid using pins because these will poke holes in the fabric. The holes will make the fabric more likely to tear and will compromise its waterproof quality.
-
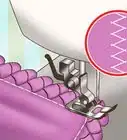
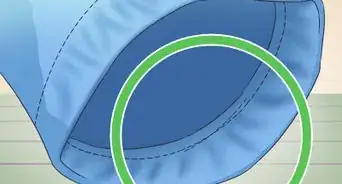
5Finish the edges, if desired. Since the edges of oilcloth won't fray, you don't have to hem or finish the edges. If you'd like a decorative look, finish the edges by cutting them with pinking shears or decorative scissors. You can also hem the edges for a classic finished look.
- For example, cut just the edges with zigzag edge scissors to make a fun look.
Advertisement


Community Q&A
-
QuestionCan a rotary cutter work for cutting oilcloth?
 MidmorrowCommunity AnswerIt would probably not work as well, but you can definitely attempt it! Make sure it's sharp so you get the best cut.
Things You'll Need
Setting up Your Machine
- Sewing machine
- Teflon presser foot
- Polyester thread
- Size 14 to 16 needle
Stitching the Oilcloth
- Sewing machine
- Oilcloth
- Clips such as fabric clips, paperclips, binder clips, or clothespins
- Scissors or shears
- Pattern


References
- ↑ https://sew4home.com/tips-resources/sewing-tips-tricks/successful-sewing-laminated-cottons-oilcloth-and-other-sticky
- ↑ https://sew4home.com/tips-resources/sewing-tips-tricks/successful-sewing-laminated-cottons-oilcloth-and-other-sticky
- ↑ https://sew4home.com/tips-resources/sewing-tips-tricks/successful-sewing-laminated-cottons-oilcloth-and-other-sticky
- ↑ http://www.madetosew.com/sewing-oil-cloth/
- ↑ https://www.patchworkposse.com/20-oil-cloth-projects-sew/
- ↑ https://www.nationalsewingcircle.com/video/how-to-secure-laminated-cotton-or-oil-cloth-for-stitching-008046/
About This Article