X
This article was written by Nicole Levine, MFA. Nicole Levine is a Technology Writer and Editor for wikiHow. She has more than 20 years of experience creating technical documentation and leading support teams at major web hosting and software companies. Nicole also holds an MFA in Creative Writing from Portland State University and teaches composition, fiction-writing, and zine-making at various institutions.
This article has been viewed 1,526 times.
This wikiHow teaches you how to select a screensaver in Windows or macOS.
Steps
Method 1
Method 1 of 2:Windows
Method 1
-
1
-
2Type screen saver into the search bar. A list of results will appear.Advertisement
-
3Click Turn screen saver on or off. The Screen Saver Settings window will appear.
-
4Select a screen saver from the drop-down menu. It’s under the “Screen saver” header. A small preview will appear at the top of the window.
- Some screen savers have extra settings you can adjust, such as 3D Text. Click Settings… to find the options for each screen saver.
-
5Click Preview. This shows a live preview on your desktop. To exit preview mode, move the mouse.
-
6Select when to turn on the screen saver. Use the arrows next to “Wait” to determine how many minutes of non-use Windows should wait before activating the screen saver.
-
7Select whether to log in to unlock the screen saver. To require a password to unlock the screen saver, check the box next to “On resume, display login screen.”
-
8Click Apply.
-
9Click OK. The screen saver is now enabled.Advertisement


Method 2
Method 2 of 2:macOS
Method 2
-
1
-
2Click System Preferences.
-
3Click Desktop & Screen Saver.
-
4Click the Screen Saver tab. It’s near the top-center part of the window, to the right of “Desktop.”
-
5Select a screen saver. Your options appear in the left column. Once you make a selection, a preview will appear in the right column.[1]
- Some screen savers, such as Floating, Reflections, and Shifting Tiles, allow you to create slideshows of images. Select one of these options, then click Source to choose your own images.
- To see a full-screen preview, hover your mouse cursor over the small preview, then click Preview.
-
6Select when to turn on the screen saver. Click the drop-down menu next to “Start after” to choose how many minutes of non-use macOS should wait before activating the screen saver.
-
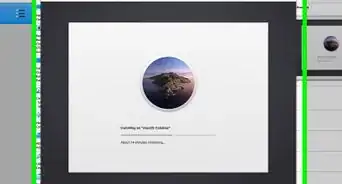
7Require a password to unlock the screen saver. This is optional. If you want to have to enter your password to unlock the desktop once the screen saver appears:
- Click the menu and select System Preferences.
- Click Security & Privacy.
- Click the General tab.
- Check the box next to “Require password.”
Advertisement


-Step-21-Version-2.webp)
References
About This Article

Nicole Levine, MFA
Tech Specialist
This article was written by Nicole Levine, MFA. Nicole Levine is a Technology Writer and Editor for wikiHow. She has more than 20 years of experience creating technical documentation and leading support teams at major web hosting and software companies. Nicole also holds an MFA in Creative Writing from Portland State University and teaches composition, fiction-writing, and zine-making at various institutions. This article has been viewed 1,526 times.
How helpful is this?
Co-authors: 1
Updated: March 29, 2019
Views: 1,526
Categories: Windows | Mac
Advertisement