X
This article was written by Jack Lloyd. Jack Lloyd is a Technology Writer and Editor for wikiHow. He has over two years of experience writing and editing technology-related articles. He is technology enthusiast and an English teacher.
This article has been viewed 3,506 times.
This wikiHow teaches you how to set up and customize your iCloud Family Sharing. Before you can enable family sharing, you'll need to update your Payment settings in the "iTunes & App Store" menu.
Steps
Part 1
Part 1 of 2:Updating Your Payment Settings
Part 1
-
1Open your iPhone's Settings. Do so by tapping the grey gear icon on one of your Home screens (it might also be in a folder named "Utilities").
-
2Scroll to the fourth group of options and select iTunes & App Store.Advertisement
-
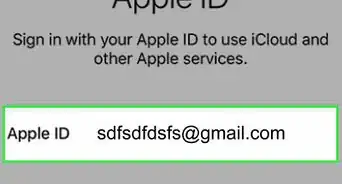
3Tap your Apple ID. This is at the top of the page. If you aren't signed into your Apple ID on this iPhone, you'll tap Sign In here instead.
-
4Tap View Apple ID. If you weren't signed into your Apple ID, you'll have to type in your Apple ID email address and password first.
-
5Type in your Apple ID password. If you have Touch ID enabled, you can use your fingerprint to view your account settings here.
-
6Select Payment Information.
-
7Select a payment type. Valid options include the following:
- Visa
- MasterCard
- Amex
- Discover
-
8Scroll to the "Card Details" section and enter your card details. These include the following:
- Your card number
- Your card's security code
- Your card's expiration date
-
9Verify your billing information. If the information here is inconsistent with your current billing address, you'll need to update the pertinent information.
-
10Tap Done. This is in the top right corner of your screen. You can now set up Family Sharing.Advertisement


Part 2
Part 2 of 2:Setting Up Family Sharing
Part 2
-
1Return to the Settings menu. You may have to tap Done again, and then < Settings, to do so.
-
2Tap iCloud. This is in the fourth group of options.
-
3Tap Set Up Family Sharing. If you aren't already signed into your iCloud account, you'll need to do so by tapping Sign In and then entering your Apple ID with the accompanying password.
-
4Tap Get Started.
-
5Tap Continue. By doing so, you take on the responsibility of "Family Organizer", meaning all account payments and authorizations will go through your account.
-
6Tap Continue again.
-
7Tap Share Your Location. If you'd rather leave your location anonymous for now, select Not Now instead.
-
8Tap Add Family Member. To do this, you'll need to have at least one other family member who has both an iPhone and a working Apple ID.[1]
-
9Type your family member's email address into the provided field.
-
10Tap Next. This is in the top right corner of your screen.
-
11Follow your phone's on-screen instructions. After sending your invite, your selected family member will have to accept your invitation in order for them to join your Family Sharing account.Advertisement


Warnings
- If anyone under your family account purchases something, it will be billed to your card.Thanks!
Advertisement


References
About This Article
Advertisement