X
wikiHow is a “wiki,” similar to Wikipedia, which means that many of our articles are co-written by multiple authors. To create this article, 9 people, some anonymous, worked to edit and improve it over time.
This article has been viewed 8,577 times.
Learn more...
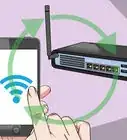
If you're experiencing poor WiFi signal and speeds on your 2012 HP Pavilion laptop, replacing the WiFi adapter may help. This is an extremely cheap and relatively easy fix that can be helpful if you are trying to avoid the expense of a new computer.
Steps
Part 1
Part 1 of 4:Finding the Correct WiFi Adapter
Part 1

Part 2
Part 2 of 4:Removing the Old WiFi Adapter
Part 2
-
1Gather the required materials.
- Begin by turning the closed laptop over so that the bottom is flat, visible, and facing upwards.
- Remove the laptop battery by sliding the battery tab.
-
2Look for an access panel on the bottom.
- It should be the only section on the bottom of the laptop that has a plate with screws.
- There may be a symbol by the access panel that appears to be a bunch of stacked disks, along with a WiFi symbol.
-
3Remove the screws on the access panel.
-
4Slide the access panel out.
-
5Locate the WiFi adapter.
- The WiFi adapter should have two thin antenna wires attached to it.
-
6Take note of the numbers attached to each antenna wire.
-
7Remove screws with screwdriver that may be holding the WiFi adapter in place.
-
8Pry off the two antenna wire connectors from the WiFi adapter.
- Pull the WiFi adapter from the slot.
Advertisement


Part 3
Part 3 of 4:Installing the New WiFi Adapter
Part 3
-
1Unbox the new WiFi adapter. Compare the model number to the model number that is on the website or packaging.
-
2Slide the adapter into the PCI slot.
-
3Check to make sure the WiFi antennas are facing upwards.
- If the WiFi adapter does not fit, it was not inserted properly. Attempt to reinstall if the adapter does not fit.
-
4Attach the WiFi antennas to the WiFi adapter (using a finger or screwdriver is recommended).
- Use one of the small screwdrivers to press down on the antennas to make sure that it is fully attached.
-
5Reinstall the access panel plate, inserting the tabbed side in first.
- The tabbed side will be the opposite of where the screw slot is.
-
6Reinstall the screws.
- Make sure that they are installed tightly.
Advertisement


Part 4
Part 4 of 4:Installing the Correct WiFi Drivers
Part 4
-
1Turn on the laptop.
- Check for proper WiFi signal.
- Use an ethernet cable if no WiFi signal exists.
-
2Navigate to the website of the manufacturer that supplied the wifi adapter (Intel, Atheros, Broadcom).
-
3Locate the driver support page.
-
4Take note of the specific model number.
- This will make sure that the user gets optimal performance with the new WiFi adapter.
-
5Find the download for the specific WiFi adapter.
-
6Download and install the drivers for the WiFi card. Follow the instructions of the installation wizard.
-
7Restart the computer and enjoy improved wifi speeds and range!Advertisement


Things You'll Need
- HP laptop computer
- WiFi adapter
- Small Phillips screwdriver
- Small flathead screwdriver
- Small bowl


About This Article
Advertisement