This article was co-authored by wikiHow Staff. Our trained team of editors and researchers validate articles for accuracy and comprehensiveness. wikiHow's Content Management Team carefully monitors the work from our editorial staff to ensure that each article is backed by trusted research and meets our high quality standards.
Learn more...
This wikiHow teaches you how to download and use the WordPress app to create and publish a blog post on your own blog page, using an iPhone or iPad. WordPress is one of the most popular blogging platforms, and the mobile app lets you easily publish new posts.
Steps
Part 1
Part 1 of 2:Downloading WordPress
-
1
-
2Tap the Search tab. This button looks like a icon on the bottom-right corner of your screen. It will open the search page.Advertisement
-
3Type WordPress into the search bar. Tap the search bar at the top of your screen, and enter the app's name here.
-
4Tap the blue Search button on your keyboard. The WordPress app should appear at the top of the search results.
-
5Tap the GET button next to WordPress. This will download and install the WordPress app on your iPhone or iPad.
- You'll have to confirm the install in a new pop-up window.
-
6Confirm the installation in the confirmation pop-up. This will start installing the app on your phone or tablet.
- If you're using Touch or Face ID, provide your fingerprint or face scan to confirm.
- Otherwise, tap the blue Install button at the bottom.
Advertisement


Part 2
Part 2 of 2:Publishing a Post
-
1Open the WordPress app on your iPhone or iPad. The WordPress icon looks like a white "W" in a blue square.
-
2Tap the Sign up for WordPress.com button. You will see your sign-up options on a pop-up window.
- If you already have a WordPress account, tap the blue Log In button to sign in.
-
3Select a sign-up method. You can use your email address to Sign up with Email, or your Google account to Sign up with Google.
- If you select the email option, you'll have to provide your email address and create a new password.
- With the Google option, you can select one of your saved Google accounts and automatically log in.
-
4Tap the New Post icon. This button looks like a page and a "+" icon between the Reader and Me tabs at the bottom of your screen. It will open a new, blank blog post.
-
5Add a title to your blog post. Tap the "Title" field at the top of your blog post, and enter a title heading for your new blog post.
-
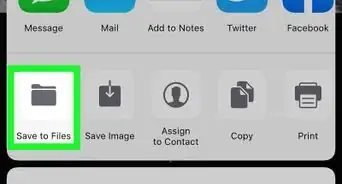
6Write your blog post. Your blog's body is labeled "Share your story here" below the Title field. Tap here, and write your blog.
- Tap the "+" icon above the keyboard to insert an image from your gallery.
- Tap the "H" icon to stylize your text as a heading line.
- Tap the three lines icon to create a list in your post.
- Tap the quotation marks here to insert a quotation box.
- Use the "B" and "I" icons to write in bold or italics.
-
7Tap the Publish button. This button is in the upper-right corner of your blog post. It will publish your new post on your personal blog page.Advertisement


About This Article

1. Download the WordPress app from the App Store.
2. Open the WordPress app.
3. Log in or sign up for a new account.
4. Tap the New Post icon at the bottom.
5. Write your blog post.
6. Tap Publish.