X
This article was written by Travis Boylls. Travis Boylls is a Technology Writer and Editor for wikiHow. Travis has experience writing technology-related articles, providing software customer service, and in graphic design. He specializes in Windows, macOS, Android, iOS, and Linux platforms. He studied graphic design at Pikes Peak Community College.
The wikiHow Tech Team also followed the article's instructions and verified that they work.
This article has been viewed 1,476 times.
This wikiHow teaches you how to publish a blog post using the WordPress, Tumblr, and Blogger apps for Android.
Steps
Method 1
Method 1 of 3:Using WordPress
Method 1
-
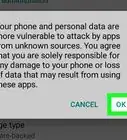
1
-
2Type WordPress in the search bar. It's at the top of the page.
-
3Select the app and tap Install. It's the green button under the app's title on the right. It may take a few moments for the app to install.
-
4Tap Open. This option will appear once the app has been installed. This launches the WordPress app.
-
5Tap Log In or Create a WordPress Site.
- If you have a WordPress account, tap Log In and enter the email address and password associated with your account.
- If you don't have a WordPress account, tap Create a WordPress Site and follow the prompts to create one.
-
6Tap the WordPress logo at the top. It's the blue icon with a white cursive "W" inside.
-
7Tap the "new post" icon. It's the orange button with a white pencil and paper in the bottom-right corner of the screen.
-
8Write a title for your blog post. Tap the "Post Title" field at the top of the screen then type a title for your blog post.
-
9Write the body of your blog post. Tap the "Share Your Story Here" section below and write the blog post you want to share with the world.
-
10Type Publish. It's in the upper-right corner. This publishes the blog entry to your blog.


Method 2
Method 2 of 3:Using Tumblr
Method 2
-
1
-
2Type Tumblr in the search bar. It's at the top of the page.
-
3Select the app and tap Install. It's the green button under the app's title on the right. It may take a few moments for the app to install.
-
4Tap Open. This option will appear once the app has been installed. This launches the Tumblr app.
-
5Tap Log In or Get Started
- If you have a Tumblr account, tap Log In enter the email address and password associated with your account.
- If you don't have an account, tap Get Started and follow the prompts to create one.
-
6
-
7Tap the type of blog post you want to create. Tap an icon for one of the following options.
- Text is the white icon. This will start a text-based post.
- Quote is the orange icon. This allows you to post a quote.
- GIF is the yellow icon. This allows you to upload an animated gif.
- Link is the green icon. This allows you to post a link to another website.
- Chat is the blue icon. This allows you to write a chat dialogue.
- Audio is the purple icon. This allows you to post an audio or music file.
- Video is the grey icon. This allows you to record or upload a video file.
- Photo is the red icon. This allows you to take or upload a picture.
-
8Write your blog entry and pick the content you want to share. Follow the prompts and required fields to make the type of blog post you selected.
-
9


Method 3
Method 3 of 3:Using Blogger
Method 3
-
1
-
2Type Blogger in the search bar. It's at the top of the screen.
-
3Select the app and tap Install. It's the green button under the app's title on the right. It may take a few moments for the app to install.
-
4Tap Open. This option will appear once the app has been installed. This launches the app.
-
5Select a Google account or tap Add account.
- If you don't have an account tap Sign-up for Blogger when prompted and follow the steps to create a new blog.
-
6
-
7Write a title for your blog entry. Tap the "Post title" field and enter a title for your post.
-
8Write the body of your blog post. Tap the "Post content" field and write the blog post you want to share with the world.
- Tap when you are finished typing the blog post's main body.
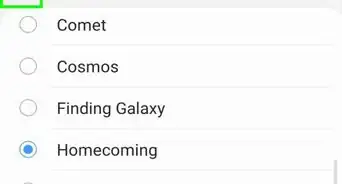
- You can add labels (like categories or topics) in the "Labels" field so readers can find your content easily. Make sure you separate each label with a comma.
-
9


About This Article

Travis Boylls
Tech Specialist
This article was written by Travis Boylls. Travis Boylls is a Technology Writer and Editor for wikiHow. Travis has experience writing technology-related articles, providing software customer service, and in graphic design. He specializes in Windows, macOS, Android, iOS, and Linux platforms. He studied graphic design at Pikes Peak Community College. This article has been viewed 1,476 times.
How helpful is this?
Co-authors: 5
Updated: May 25, 2021
Views: 1,476
Categories: Android