This article was co-authored by wikiHow staff writer, Hannah Madden. Hannah Madden is a writer, editor, and artist currently living in Portland, Oregon. In 2018, she graduated from Portland State University with a B.S. in Environmental Studies. Hannah enjoys writing articles about conservation, sustainability, and eco-friendly products. When she isn’t writing, you can find Hannah working on hand embroidery projects and listening to music.
There are 7 references cited in this article, which can be found at the bottom of the page.
The wikiHow Video Team also followed the article's instructions and verified that they work.
This article has been viewed 2,908 times.
Learn more...
Sewing garments is a fun way to add your personal style to your clothing, especially if you make them entirely on your own. Most clothing pieces have patterns that require some careful pinning and planning. If you’d like to pin your pattern effectively, wash and iron your fabric, lay it out on a flat surface, and place your sewing pins strategically to keep your pattern and fabric in line as you cut.
Steps
Part 1
Part 1 of 3:Washing the Fabric and Cutting the Pattern
-
1Wash and iron your fabric to ensure it is flat. Before you start pinning your pattern, it is important to make sure that your materials are flat. If your fabric has a tendency to shrink, you can also wash and dry it before you iron it so it doesn’t shrink after you sew it.[1]
- Cotton is fairly prone to shrinking.
-
2Iron your pattern to smooth it out. Patterns can get wrinkles in them just like fabric can. Use an iron on low heat and gently pass over your pattern to smooth it out. Swipe your iron over your pattern 2 to 3 times.[2]
- Most patterns are safe to iron. Check the instructions to see if yours is.
Advertisement -
3Read the directions on the pattern for any specific instructions. Some patterns will tell you to fold your fabric a certain way, or how to lay them on your fabric to get the most out of it. Read the instructions on the package of your pattern carefully and follow them if there are any.[3]
- Most advanced patterns will have specific instructions.
-
4Cut the pattern pieces out of the paper 1 inch (2.5 cm) outside the lines. Do not cut your pattern directly on the lines in case you need more room while sewing your garment. Use new scissors that aren’t dull to cut your pattern.[4]
- If your pattern is already in separate pieces, you don’t need to do this.
- You will most likely need to cut patterns that only have a few pieces.
Advertisement


Part 2
Part 2 of 3:Positioning the Pattern Pieces on the Fabric
-
1Lay out your fabric on a flat surface, like a table or countertop. Wipe down your surface to make sure it is clean. Smooth your fabric out with the palms of your hands to make sure there aren’t any lumps that will disrupt your pattern. If your fabric is folded over itself, line up the edges so that they are straight.[5]
Tip: If your fabric is especially large, lay it out on the floor.
-
2Arrange your pattern facing the same way for patterned designs. If you want your garment to look seamless, lay your pattern pieces facing the same way on your patterned fabric. This ensures that any designs or folds in your fabric will be facing the same way in your pattern pieces.[6]
- You can also lay your pattern pieces in opposing directions if your pattern instructions call for it.
-
3Position the largest pattern piece first. Some patterns have numbers on each piece that specify which one goes where. If yours doesn’t, put the largest pattern piece on the fabric first, and then follow it up with the next pieces in descending size order.[7]
- Putting the largest piece first ensures that it will have enough fabric.
-
4Find the grain of your fabric. Every fabric has a “grain,” meaning the direction that it stretches. Some fabrics like lycra stretch both directions, while others like fleece only stretch 1 way. Test your fabric to see which direction its grain is in by pulling it in both directions and seeing which way it stretches.[8]
- You can also pull at a loose thread at the end of your fabric and observe which way it pulls. This will show you the direction of the grain.
-
5Locate the grainline on your pattern. Most patterns will point in the direction of their grain with an arrow or a line. Find this on the larger pieces of your pattern to identify which way you should be laying your pattern. Often, it is labeled “grainline.”[9]
-
6Set your pattern on the fabric with the arrow in the direction of the grain. Lay your pattern on the fabric with the arrow, or grainline, in the same direction as the fabric’s grain. If your pattern calls for your pieces against the grain, lay them with the arrow in the opposite direction.[10]
- It will be much harder to put on the clothes that you make if they are sewn against the grain, unless your pattern calls for it.
Advertisement


Part 3
Part 3 of 3:Inserting Pins and Cutting the Fabric
-
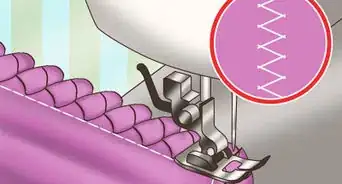
1Use straight pins that are an appropriate size for your fabric. Sewing pins come in a variety of sizes. If your fabric is thick, like velvet, use large, long pins. If your fabric is thin and delicate, like silk, stick to small, short pins to avoid damaging the fabric.[11]
- You can buy sewing pins at most craft supply stores.
-
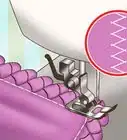
2Insert a pin every 6 inches (15 cm) and at each corner. You do not need a ton of pins to keep your pattern in place. Use sewing pins to pin down the edges of the pattern onto the fabric. Use a pin at every corner to keep the corners down and about every 6 inches (15 cm) on the sides of the pattern. Stick the pin through the pattern and fabric, then bring it back up again through the fabric and the pattern.[12]
Tip: Use as few pins as possible to avoid poking too many holes in your fabric.
-
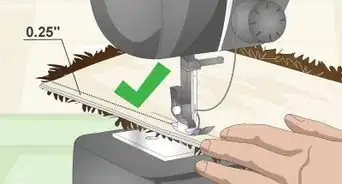
3Keep pins on the inside of the pattern lines. Keep the area around the pattern lines free. Put each pin about 1 inch (2.5 cm) away from the pattern edge. Place the pins parallel to the pattern lines to avoid cutting through them.[13]
-
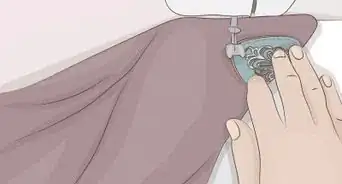
4Use sharp scissors to cut your fabric along the pattern edge. Do not cut into any part of the pattern. Cut your fabric along the edge of the pattern. Keep the pins in until you have finished cutting out the entire pattern. [14]
- Allow your scissors to glide through your fabric to create straight, even lines.
-
5Cut into seam allowances on your pattern if it has any. Seam allowances are extra space given on the edges of a pattern for when you start to sew. They often look like small triangles and may be in clusters of 3. Use your scissors to cut out each triangle before you remove your pattern. Remove the pins and the pattern before you start sewing.[15]
- Never sew with your pattern in place, or you will end up with your pattern stuck to your garment.
Advertisement

Things You’ll Need
- Sewing pattern
- Fabric
- Scissors
- Sewing pins
References
- ↑ https://www.allfreesewing.com/Sewing-Tips-and-Tricks/Sewing-Tips-and-Tricks-How-to-Pin-a-Pattern
- ↑ https://www.allfreesewing.com/Sewing-Tips-and-Tricks/Sewing-Tips-and-Tricks-How-to-Pin-a-Pattern
- ↑ https://www.youtube.com/watch?v=2N1Qv1uMltk&feature=youtu.be&t=14
- ↑ https://www.allfreesewing.com/Sewing-Tips-and-Tricks/Sewing-Tips-and-Tricks-How-to-Pin-a-Pattern
- ↑ https://www.youtube.com/watch?v=9EJRa1gSit0&feature=youtu.be&t=29
- ↑ https://www.threadsmagazine.com/2008/11/17/pattern-layouts
- ↑ https://www.threadsmagazine.com/2008/11/17/pattern-layouts
- ↑ https://www.youtube.com/watch?v=2N1Qv1uMltk&feature=youtu.be&t=226
- ↑ https://www.threadsmagazine.com/2008/11/17/pattern-layouts
- ↑ https://www.youtube.com/watch?v=2N1Qv1uMltk&feature=youtu.be&t=226
- ↑ https://www.threadsmagazine.com/2008/11/17/pattern-layouts
- ↑ https://www.youtube.com/watch?v=9EJRa1gSit0&feature=youtu.be&t=83
- ↑ https://www.youtube.com/watch?v=9EJRa1gSit0&feature=youtu.be&t=88
- ↑ https://www.allfreesewing.com/Sewing-Tips-and-Tricks/Sewing-Tips-and-Tricks-How-to-Pin-a-Pattern
- ↑ https://www.allfreesewing.com/Sewing-Tips-and-Tricks/Sewing-Tips-and-Tricks-How-to-Pin-a-Pattern
About This Article