X
wikiHow is a “wiki,” similar to Wikipedia, which means that many of our articles are co-written by multiple authors. To create this article, 18 people, some anonymous, worked to edit and improve it over time.
There are 11 references cited in this article, which can be found at the bottom of the page.
This article has been viewed 66,080 times.
Learn more...
Feeling crafty? Want to transform your school, work, or personal journal cover from totally plain to uniquely your own? Maybe it’s because you’re feeling a bit of writer’s block or stuck in a mid-semester or creative slump. Here’s a guide to personalizing the notebook of your dreams.
Steps
Method 1
Method 1 of 11:Making a collage.
Method 1
-
1Make the cover of your notebook into your own mood board. Find things that really inspire you! You can use magazine or newspaper clippings, pages from old books, copies of personal photos, and other printed images.[1]
- First, lay out your design on your work surface before gluing. This way, you can make adjustments without ripping or damaging any of the paper you’re using.
- Carefully cut your materials into your desired shapes and sizes, then glue each piece to the front of your notebook.
- If you feel stuck, try coming up with a theme for your collage, like music or film. Then, you can organize your design with that theme in mind.
Method 2
Method 2 of 11:Drawing on your cover.
Method 2
-
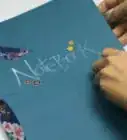
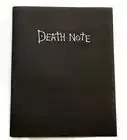
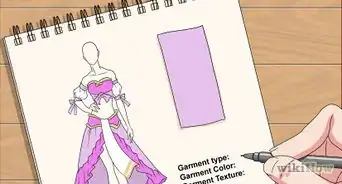
1Sketch your design in pencil on a separate sheet of paper beforehand. If possible, use a pencil again when transferring your image or words to the front of your notebook cover. You can easily trace over the pencil with a marker or pen, but this way you can erase any little mistakes along the way.[2]
- If it's a personal journal, you can try doing a self-portrait. It doesn’t have to be perfect! Even a stick figure will do. Draw whatever you think represents your unique personality.
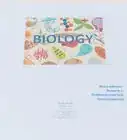
- If you’re working on designs for school notebooks, find symbols that represent each subject, like a globe for geography or a paintbrush for art.
Method 3
Method 3 of 11:Painting your notebook.
Method 3
-
1Acrylic paints are a great choice, but watercolor also works well. Acrylics are vibrant and bold, while watercolors are more transparent, which makes them great for layering and landscape designs. No matter which one you choose, make sure to also use a paint varnish or seal, so your masterpiece lasts. You can find these at your local craft store.[3]
- Place a scrap sheet of paper between your cover and the first page of your notebook to collect any excess paint.
- If you start by painting your entire cover one color, make sure to let this paint dry before beginning the rest of your design.
- If you’re using acrylic paints, make sure to rinse your paintbrush when changing colors, then gently wring out any remaining water.
Method 4
Method 4 of 11:Decorating with stickers.
Method 4
-
1You can use stickers you’ve collected or even make your own. Before you begin, arrange your design on a work surface before placing your stickers on your notebook cover. To create your own sticker designs, you’ll need sticker paper, which you can usually find online or at the craft store, and access to an ink-jet printer.[4]
- Using a word processor or graphic design tool, create an image or design that's all your own or copy and paste an image of your choice. Print using sticker paper, peel off the adhesive, and place stickers on your notebook’s cover.
Method 5
Method 5 of 11:Creating a chalkboard design.
Method 5
-
1This way, you can change your design as many times as you want! You can find chalkboard paint online or at almost any craft store. Use a sponge brush to paint your cover completely, then wait until the first coat dries. You can repeat this process about 2-3 more times.[5]
- It’s important to “season” your chalkboard once your paint is completely dry. If you don’t, a faint outline of your first sketch will remain on your notebook, no matter how many times you try to erase it.
- You can season your notebook by using the side of a piece of chalk and rubbing it into the chalkboard cover, making sure to fill in all the empty space.
- Once you’re done, wipe off the chalk with a dry paper towel or piece of cloth.
Method 6
Method 6 of 11:Using washi tape.
Method 6
-
1Washi tape is decorative masking tape you can use to enhance almost any design. You can apply the tape as a vibrant border or arrange it on the cover in a decorative pattern, like stripes or polka dots. If you just want a single image on the cover of your notebook but want something a little extra, use colorful washi tape to attach the print.[6]
Method 7
Method 7 of 11:Attaching a writing utensil.
Method 7
-
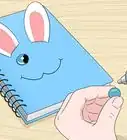
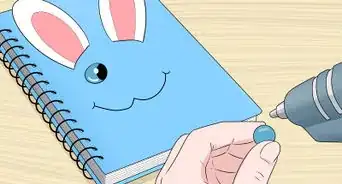
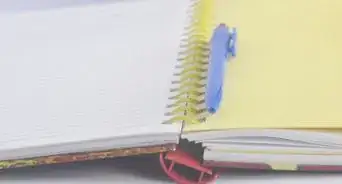
1You’ll never have to dig around in your bag for a pen or pencil again. Instead of clipping your pen to the front, make your own holder that will attach to the inside of your notebook.[7]
- You’ll need an elastic band that’s roughly a ½ inch (1.27 cm) thick, which you can find at a craft store. Start by cutting a 2 inch (5 cm) piece from the band.
- Wrap the elastic around any pen or pencil, preferably ones you see yourself using in the future.
- Pinch the band together when you’ve achieved your desired loop size, then, hot glue the ends together.
- Place your loop and pencil in the back cover of your notebook, then roughly outline where you want the holder attached. You want to make sure your pencil doesn’t get in the way when closing your notebook.
- Finally, hot glue your holder to the back of your notebook.
Method 8
Method 8 of 11:Weaving ribbon through your cover.
Method 8
-
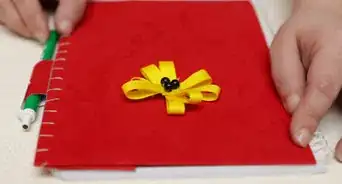
1Keep in mind, this is probably not the best option for school notebooks. If left in a crowded backpack, the ribbon may become ripped or frayed. However, it’s perfect for personal diaries or journals.[8]
- Find patterned or colorful cardboard paper, then cut it to fit the size of your notebook cover.
- Punch evenly spaced holes around the border of your sheet of paper, then glue the back of the page, covering the entire inner border.
- For every punched hole, you’ll need a 3 inch (7 cm) strand of ribbon. Loop them through the punched holes, and double knot them in a bow.
Method 9
Method 9 of 11:Creating a pattern with scrapbook paper.
Method 9
-
1Instead of creating your own print, find one you like at the craft store. You can either glue the paper directly to the cover if you just want a pop of color. Or you can trace a shape on the scrapbook paper in pencil, then cut out that image to glue to your cover.[9]
Method 10
Method 10 of 11:Embroider the cover.
Method 10
-
1This is usually only possible if you’re using a notebook with a card or paper cover. If you’re working with a harder surface, you won’t be able to use your embroidery needle to poke through your sketch outline. When embroidering, make sure to be very gentle to avoid ripping the page.[10]
- Start sketching out your embroidery in pencil on a separate sheet of paper, then, also using pencil, transfer your chosen design to the cover of your notebook.
- Using the embroidery needle, poke evenly-spaced holes through your design.
- Cut roughly 20 inches (50.8 cm) of embroidery thread and tie a knot at the end. Then, start embroidering! Lift the needle up through the first hole, down through the next, and repeat.
- If you change colors, make sure to lace your thread under a few extra stitches and carefully knot the end. Then, using your scissors, cut off any extra thread.
Method 11
Method 11 of 11:Make your own notebook.
Method 11
-
1If you’ve been walking the aisles and searching online for the perfect notebook and haven’t had any luck, try making something completely customized just for you.[11]
- Using a pencil, draw a line dividing the 8 ½ x 11 inches (22 x 28 cm) cardstock into two notebook-sized pages. Then, cut along the line.
- Trace your cardstock pages in pencil on the scrapbook paper, then cut out your two scrapbook paper outlines. Glue your cardstock and scrapbook paper together, leaving you with two notebook covers.
- Fold your 8 ½ x 11 inches (22 x 28 cm) lined paper in half (no more than 20-30 pages), then secure the pages with binder clips. Coat the bounded edges with rubber cement. Let it dry for 5-10 minutes.
- Finally, glue one of your cardstock pages to the front side of your bound notebook and the other page to the back of your notebook.
Community Q&A
-
QuestionHow do I make a spiral notebook for science?
 Azaria HindsmanCommunity AnswerGet a bunch of papers or however many you need -- I'd recommend 100 sheets. Then get two pieces of cardboard that are the same size as your papers and put one on the bottom and one on the top. Then cut any excess cardboard off. Now you can put that together and punch holes through the left-hand margin of the stack. Then get a silver wire, get a skinny stick and curl the wire. Then you may apply your wire going through the holes. And then you're done!
 -
QuestionIs it necessary to decorate the notebook?
 EllieCommunity AnswerNo, it isn't. Some people just prefer to decorate it to make it feel more personalized.
 -
QuestionHow can I attach a pen to a notebook?
 Community AnswerYou can tie a ribbon on, make sure it is a comfortable length for writing/doodling, then tie or glue the pen on. There are plenty of YouTube tutorials for projects like this.
 -
QuestionHow can I get the pen that I'm using to not leak through the next page?
 Community AnswerYou'll either need to use a different pen or get a notebook with thicker paper so the pen doesn't bleed through.
Things You'll Need
Collage Cover
- Newspaper clippings (optional)
- Magazine clippings (optional)
- Buttons (optional)
- Old book pages (optional)
- Glue stick
- Scissors
Drawn Cover
- Pencil
- Colorful pens
- Markers (optional)
Painted Cover
- Acrylic or watercolor paints
- Pencil
- Water
- Paintbrushes
- Scrap paper
- Spray varnish
Sticker Cover
- Stickers
- Sticker paper (optional)
- Printer (optional
Chalkboard Cover
- Chalkboard paint
- Sponge brush
- Chalk
- Rag or paper towel
Washi Tape Cover
- Washi tape
DIY Pencil or Pen Holder
- Elastic band
- Hot glue
- Scissors
- Pencil (optional)
Ribbon Cover
- Hole puncher
- Ribbon
- Scissors
- Glue
- Cardboard paper
Scrapbook Cover
- Scrapbook
- Glue
- Scissors
- Pencil (optional)
Embroidered Cover
- Embroidery thread
- Embroidery needle
- Pencil
- Scissors
- Scrap paper
Original Cover
- Glue stick
- Ruler
- Scrapbook paper
- Lined paper (grid or dotted may also be used)
- Cardstock
- Binder clips
- Rubber cement
- Scissors

References
- ↑ https://www.masterclass.com/articles/how-to-make-a-collage#3-common-elements-in-collages
- ↑ https://www.youtube.com/watch?v=tJou70q24lQ
- ↑ https://www.youtube.com/watch?v=4xG-OLqXC7Y
- ↑ https://www.youtube.com/watch?v=5c2C5aR3QCE
- ↑ https://www.makinghomebase.com/chalkboard-notebook/
- ↑ https://www.youtube.com/watch?v=I45J8MV5bmg
- ↑ https://www.youtube.com/watch?v=hdTsxsD29Ps
- ↑ https://www.livecrafteat.com/craft/how-to-make-a-dollar-store-notebook-look-like-its-not/
- ↑ https://modpodgerocksblog.com/decorate-notebooks/