X
wikiHow is a “wiki,” similar to Wikipedia, which means that many of our articles are co-written by multiple authors. To create this article, volunteer authors worked to edit and improve it over time.
This article has been viewed 10,401 times.
Learn more...
Inflatable stand-up paddleboards (SUPs) are sturdy but not impenetrable. An unexpected collision with a submerged, sharp object can spring a leak that will cut a pleasant paddle short. The good news is that a leak repair can be done in the comfort of a garage or in the backyard and with a short list of materials. This wikiHow will show you a simple process to quickly locate a small leak in a SUP and patch it with attention to the SUP's aesthetics.
Steps
Part 1
Part 1 of 3:Locating the Leak
Part 1
-
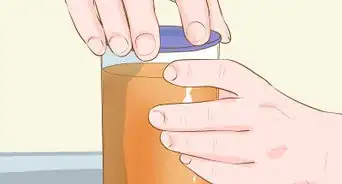
1Locate the general area of the leak by ear; place finger if the leak is found.
- Inflate your paddleboard and apply a weight
- Listen for a whistling sound - this is a great way to find the general area of a leak.
-
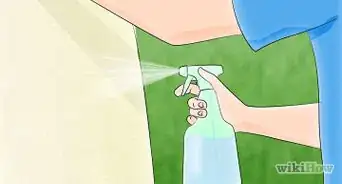
2If the leak is invisible, pinpoint it using soapy water. Place a finger on the exact location and dry the area.
- Apply soapy water to the suspected area while applying some weight to your paddleboard.
- The largest bubbles will form directly above the leak.
- This step is important because leaks may be microscopic - invisible to the naked eye.
Advertisement -
3Keeping your finger in place, mark the exact leak with a marker. The marker serves a visual aid as you prepare the patch.Advertisement


Part 2
Part 2 of 3:Preparing the Patch
Part 2
-
1Prepare the leak and surrounding area for patch application.
- Use a marker to indicate the leak source and about 3-4 inches in each direction away from the source.
-
2Cut a patch to cover the leak and surrounding area.
- The patch should extend about 2-4in away from the leak in each direction for maximum effectiveness.
-
3Use sandpaper to increase the effectiveness of glue application.
- Smooth both the leak’s surrounding area and the to-be-applied side of the patch.
- Wipe down the sanded areas with a wet rag to remove any dust residue.
-
4Clean the area thoroughly. Use soapy water and then MEK.
- The MEK is an industrial solvent that prepares the plastics for a strong bond. Wear proper protective equipment.
-
5Use a brush to apply adhesive to patch and leak area.
- Follow adhesive-specific directions! These should be located on the bottle.
- Apply appropriate coats to both the marked patch area and the to-be-applied side of the patch (usually 2-3). Wait 20 minutes in-between application.
- Test stickiness of glue with a knuckle test - your knuckle should come away cleanly from the glue without leaving a dent.
- Be generous in glue distribution.
Advertisement


Part 3
Part 3 of 3:Applying the Patch
Part 3
-
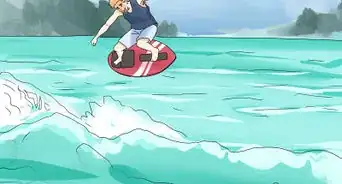
1Slowly apply the patch to avoid any air bubbles. Patience and precision are important when placing patch to avoid trapping air bubbles.
- When back out on the water, moisture will leak into any trapped air bubbles and increase the likelihood of further air leakage.
-
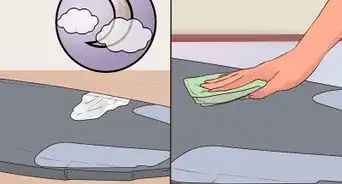
2Use the rolling tool to ensure no smaller air bubbles remain.
- Roll the patch in at least 4 directions to maximize surface area adhesion between the patch and the SUP.
-
3Let surface air dry with respect to adhesive directions.
- The paddleboard should cure in a dry area for at least 24 hours before being inflated and taken back on the water. Moisture will loosen the adhesive bonding and ruin the patch.
Advertisement


Warnings
- Methyl ethyl ketone is an industrial cleaner. Wear proper safety gear.Thanks!
- The patch must cure absolutely before being exposed to moisture.Thanks!
- The chemicals involved in this process can be overwhelming. Ensure proper ventilation.Thanks!
- If the paddleboard continues to leak after being patched, restart the entire process after ensuring total removal of incorrectly applied patch/adhesive.Thanks!
- Be aware of allergies and the chemicals/materials used throughout the process.Thanks!
- Be patient with glue drying times and other process steps to avoid damage to your SUP.Thanks!
Advertisement
Things You'll Need
- Soapy water
- Dry towel
- Scissors
- Fine grit sandpaper
- Methyl ethyl ketone (M.E.K.)
- Roller tool (1/8in - 1/4in width)
-
Patching materials:
- Patch material that matches material of SUP (PVC or urethane coating)
- Glue appropriate for paddleboard outer material (urethane adhesive)
- Often your paddleboard supplier has given you a small repair kit with patching materials. If not, your best bet for finding patch material is by contacting your SUP supplier or a specialty retail store.


About This Article
Advertisement