This article was written by Travis Boylls. Travis Boylls is a Technology Writer and Editor for wikiHow. Travis has experience writing technology-related articles, providing software customer service, and in graphic design. He specializes in Windows, macOS, Android, iOS, and Linux platforms. He studied graphic design at Pikes Peak Community College.
The wikiHow Tech Team also followed the article's instructions and verified that they work.
This article has been viewed 8,155 times.
This wikiHow teaches you how to make a simple table on the Google Sheets app for iPhone and iPad. You cannot create tables with advanced functions, such as pivot tables, on the mobile app. To create pivot tables, table charts, or other advanced tables, you'll need to use the full browser version of Google Sheets on a computer. The type of table you want to create may differ depending on the kinds of data you want to display.
Steps
Part 1
Part 1 of 3:Creating a New Document
-
1Open Google Sheets. It's the app that resembles a green sheet of paper with a table in the middle.
- Download the Google Sheets app from the App Store and sign in with your Google account if you haven't done so already.
-
2
-
3
-
4Type a title for table and tap CREATE. Enter a title for your spreadsheet document and then press CREATE in the bottom-right corner of the pop-up.


Part 2
Part 2 of 3:Creating the Table
-
1Tap cell A1. Tap the first cell in the top-left corner of the spreadsheet. This selects the cell we will use as the title of our table.
-
2Write a title for your table in the formula bar. The formula bar is at the bottom next to the "fx" icon. Tap the formula bar and type a title on the keyboard.
- For example, if you are making a table to track monthly spending, you might type Expenses as a heading.
-
3
-
4Add your column labels. Tap the cells under the heading to select them and enter labels for each column of data you want your table to have. For example, if you are making a table to track monthly spending, you might label cell A2 as Date, cell B2 as Description, and cell C2 as Amount.
- For each label, tap the cell to select it, tap the formula bar (to the right of the "fx" symbol), type your label, then tap the checkmark button. Repeat this for each column of data you want your table to have.
-
5Add the first data point to your table. In the row under the labels, tap each cell and fill out the data. You can tap 123 above the keyboard to switch to a number pad to enter numbers, and you can tap Aa to switch back to the keyboard again.
- For example, for a table tracking monthly expenses you might type all the information for the first expense in this row, putting the date of the expense in cell A3 (e.g. 12/10/2017), a description in cell B3 (e.g. Plane Ticket to Colorado), and the amount of the expense in cell C3 (e.g. $185.96).
-
6Repeat to include all of your data. Add additional data points in each row below to continue putting all of your data into the table.


Part 3
Part 3 of 3:Format the Table
-
1Tap the top heading cell. Tap cell A1 that contains your title (or whatever cell you put your title in) to select it. When it's selected it will be outlined in blue with two blue dots in the corners.
-
2Drag the blue dot (handle) to select the other empty cells above the label cells. Tap and hold on the blue dot of the title cell and drag it to include all the empty cells to the right of the title.
- Don't select any empty cells beyond the number of columns that are in your table.
-
3Tap the A symbol. It's the symbol that resembles an "A" with lines coming off of it to the right at the top of the screen. This opens a pop-up menu from teh bottom of the screen.
-
4Tap the CELL tab. It's at the top of the pop-up menu, next to "TEXT".
-
5Tap the switch for "Merge cells" to the 'ON' position. The knob of the switch will move to the right and switch will turn blue. This will merge the cells at the top of your table into one with the title in it.
-
6Tap the TEXT tab. It's the tab at the top of the pop-up menu to the left of the "CELL" tab.
-
7
-
8Select the entire table. Tap the top-left cell of your table and then drag the blue handles to select every cell that's a part your table.
-
9Tap ⋯. It's the button with three horizontal dots in the upper-right corner. This opens a pop-out menu on the left-side of the screen.
-
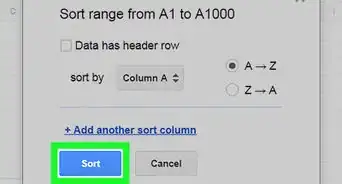
10Tap Explore. It's the third option from the top.
-
11Tap a table style. Tap any of the formatting styles to apply them to your table. These formatting styles will add an alternating color pattern for each cell making it easier to read and follow.


About This Article