wikiHow is a “wiki,” similar to Wikipedia, which means that many of our articles are co-written by multiple authors. To create this article, 25 people, some anonymous, worked to edit and improve it over time.
wikiHow marks an article as reader-approved once it receives enough positive feedback. This article received 14 testimonials and 84% of readers who voted found it helpful, earning it our reader-approved status.
This article has been viewed 303,334 times.
Learn more...
Did you know that you can send any stamped piece of paper as a postcard, as long as it's cut to the right dimensions? This means the possibilities for crafting your own unique postcard are endless. Never again will you have to decide between a dull landmark photo or a cheesy picture of a "hunk" wearing a Santa hat. See Step 1 to learn how to create fantastic postcards your friends will be happy to receive!
Steps
Part 1
Part 1 of 3:Making the Card
-
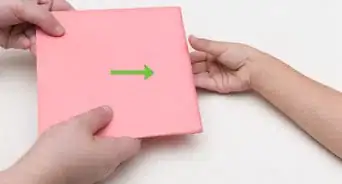
1Use sturdy paper. To make sure your postcard won't get destroyed in the mail, choose a sturdy type of paper, like cardstock. The postcard you make should be about the same thickness as a regular postcard. If you're afraid the paper you have is too flimsy, you can glue more than one piece together to make it sturdier.
- The USPS specifies that postcards must not be thinner than .007". Postcards thicker than .016" are considered letter weight and will require a more expensive stamp.[1]
- You can use any color paper that you want, as long as the address will be clearly visible.
- Blank notecards are a good choice - you can buy them in white or any other color, and they come in the right sizes.
-
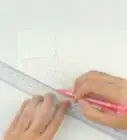
2Cut the paper to the right dimensions. Take a ruler and measure out a card between 3 1/2 and 4 1/4 inches high and between 5 and 6 inches long.[2] Carefully cut out the card, making sure it's not lopsided or irregular in shape. The USPS won't send a postcard that isn't rectangular.
-
3Draw a line down the center of the back. Now your piece of paper will start looking more like a postcard! Use a straightedge to help you create a straight line down the center of the back of your card. The space on the left side of the line will be reserved for your message, and the space on the right side will be reserved for the address of the recipient.
- There's no reason the line has to be drawn directly down the center of the card. If you want more space to write a longer note, scoot the line toward the right side of the card so you have more room on the left.
-
4Draw address lines. On the right side of the center line, draw three horizontal lines. This is where you'll write the recipient's name and address. If you want, draw a box in the upper right hand corner where the stamp will go.
Part 2
Part 2 of 3:Decorating the Front
-
1Gather supplies. Now comes the fun part. Gather up the art supplies you want to use so you can create a one-of-a-kind picture for the front of your postcard. You can draw directly on the postcard, but don't feel limited to just using pens and pencils. Here are some fun supplies you could use to decorate your card:[3]
- Newspaper clippings
- Magazine clippings
- Photos
- Construction paper
- Inks
- Paint
- Ribbons
- Sequins
- Glitter
- Glue
-
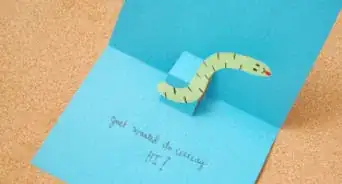
2Decorate the card. If you can fit it within your 4 x 6" (or 3 x 5") card, it works. Use your art supplies to decorate the card however you'd like. You can draw your version of a classic postcard or create something original and extraordinary for your recipient. Here are a few ideas:
- Glue a photo you took to the front of the card. Decorate it with a fun border using colored paper and glitter.
- Make an original drawing of something you saw on your trip that reminded you of your friend.
- Cut out words from a magazine and make a word collage on the front of the postcard.
- Use ribbons to make a basket-weave pattern or another abstract design.
-
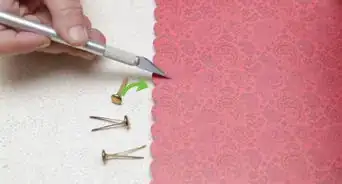
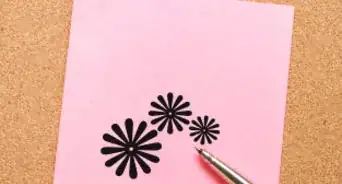
3Seal the card. This step will help protect the front of your card in the mail. It's especially important if you used materials other than pens and pencils to decorate the card. Get mod podge or another clear craft sealant and use a paintbrush to paint it over the front of the card. Allow it to dry for a few hours before you finish your card.
- Don't cover the back of the card in sealant, or you won't be able to write on it.
Part 3
Part 3 of 3:Addressing and Sending the Card
-
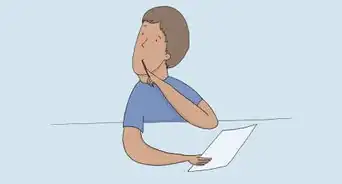
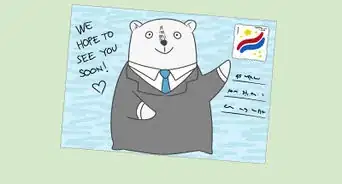
1Write a note on the card. Use the space on the left hand side of the back of your postcard to write a personal note to your recipient. Inside jokes, funny drawings, and well wishes will make your postcard fun to receive! You can also draw a border around the back of the postcard or include little embellishments in the corners. As long as the address will be clearly visible, you can fill the space however you choose.
-
2Address the card. On the right side of the card, write the recipient's name, followed by his or her full address. Make sure to include the zip code.
-
3Stamp it. Affix a postcard stamp to the top right corner of the back of the postcard. Postcard stamps are a few cents less expensive than letter stamps. If your postcard ended up feeling heavy and thick after you decorated and sealed it, you might want to use a letter stamp instead of a postcard stamp.
-
4Send it! Drop your finished postcard in the mail so it can start making its way to the lucky recipient.
Community Q&A
-
QuestionHow big does the stamp box have to be?
 Community AnswerIt doesn't have to be a specific size, you don't even need a stamp box. As long as you put the stamp in the right corner everything is good.
 -
QuestionWhat can I put on the front?
 Community AnswerAnything! You have artistic freedom to decorate the front of your postcard if it's blank. You could use markers, stickers, watercolors, etc. Get creative!
 -
QuestionHow do I make an oversized postcard?
 Community AnswerIf your postcard is larger than the 4" x 6" max size for the US Post Office, the only difference is you need to use first class postage stamp for letters vs. postcard stamps. In 2016, letter postage is 47 cents, whereas the postcard rate is 34 cents. So keeping it 4" x 6" can save you 13 cents per postcard.
 -
QuestionDo you need to put your return address on a postcard?Community AnswerNo, you don't. However, if the postcard can't be delivered, it won't be returned to you if there is no return address.
-
QuestionWhat should I do if my country doesn't have a zip code?Community AnswerUse your postcode instead. If you don't have one, then leave it without one. For more specific instructions, ask your local mailing office or look up mailing instructions for your country online.
-
QuestionWhat will happen if the front is not decorated?Community AnswerNothing will happen.
-
QuestionHow can I make my pretty-but-flimsy paper sturdier to meet the .007-inch requirement?
 Community AnswerGlue it to another piece of paper or card stock. I like to use a stiff paste that is less likely to make the paper buckle from the moisture. To keep it flat, dry it under a paper towel/book stack. (The paper towels will let the moisture "out" while the book will keep the paper flat. You might have to change your paper towels a couple of times if the card is pretty wet.)
 -
QuestionWhat are some other ideas for what to write as a note?Community AnswerVirtually anything goes as long as you remember that your note will not be private. That means it's a good idea to keep the content of your note "safe for work." You could write a few lines describing how you feel about the recipient, write about three interesting things you witnessed that week, or include a cipher puzzle or riddle that you can challenge the recipient to solve. You're essentially only limited by two things here: available card space and your imagination. Have fun with it!
-
QuestionCan I make a post card from card sheet?Community AnswerOf course you can. You can make it with whatever you want.
-
QuestionWhat is the best way to make a postcard with digital photography?Community AnswerPrint the photo you want to use onto card stock in the proper dimensions and cut it out. Depending on the type of printer you use, you may want to seal the ink (once it's dry) with a layer of Mod Podge or other medium, though you might not need to worry if you use a laser printer.
Warnings
- Make sure the paint is dry.Thanks!
Things You'll Need
- Cardstock
- Ruler
- Paint
- Colored pencils
- Magazine and newspaper clippings
- Photos
- Glue
- Clear craft sealant
- Postcard stamp
-Step-17.webp)
References
About This Article
To make a postcard, cut a piece of sturdy cardstock down to be 4 by 6 inches. Cut carefully so your postcard isn't lopsided or irregular! Next, use a straightedge to draw a line down the center of the backside—the space on the left is for your message. Then, draw 3 horizontal lines on the right side for the recipient's name and address. If you want, you can draw a box in the upper right hand corner for the stamp. Decorate the front side however you'd like using newspaper or magazine clippings, photos, ribbons, paint, or glitter! For help addressing your postcard, and how to send it through the mail, keep reading!
-Step-2-Version-2.webp)