X
wikiHow is a “wiki,” similar to Wikipedia, which means that many of our articles are co-written by multiple authors. To create this article, volunteer authors worked to edit and improve it over time.
This article has been viewed 7,050 times.
Learn more...
This pocket sized sketchbook will give you the freedom to sketch on the go without the hassle of lugging around its full size counterpart.
Steps
Part 1
Part 1 of 4:Creating the Pages
Part 1


Part 2
Part 2 of 4:Assembling the Pages
Part 2
-
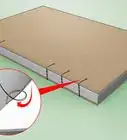
1Take four "cards" and line them up so the folded edges are all on the same side and the edges are neat and even all the way around.
-
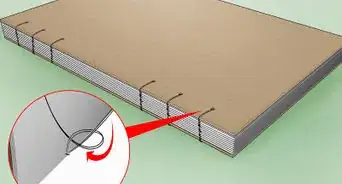
2Place two staples in the spine (the side with the folded edge) of the stack. Be sure to place them close to the edge! One goes at the top of the folded side and the other will go at the bottom.
-
3Continue this process until you have five stapled stacks of paper.


Part 3
Part 3 of 4:Gluing
Part 3
-
1Plug in the hot glue gun and allow it to heat up properly.
-
2Place a thin line of glue along the spine edge of one of the stacks of paper. This line of glue should run from the top of the spine to the bottom covering both staples. Your glue should be on the top of the spine, not along the side.
-
3Take another stack of paper. Carefully line up the spines of both stacks, and place the new stack on top of the one with the glue. Line everything up and allow the glue to set.
-
4Repeat the gluing process with the remaining stacks of paper until you have a single booklet.


Part 4
Part 4 of 4:Adding a Cover
Part 4
-
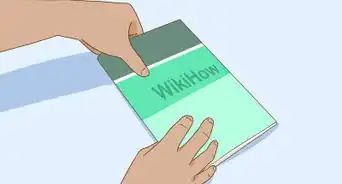
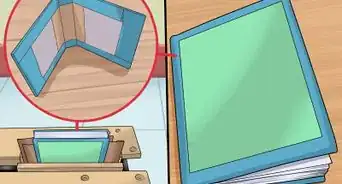
1Place the booklet on the cardstock.
-
2Using the pen or pencil, trace the around the shape of the booklet forming an outline for the front cover. Leave half an inch of space around the top and bottom sides and one inch around the left and right sides.
-
3Turn the booklet over and trace the other side. You should have a strip of cardstock that is twice as long as your booklet.
-
4Cut out the cover using the scissors.
-
5Fold the cover in half.
-
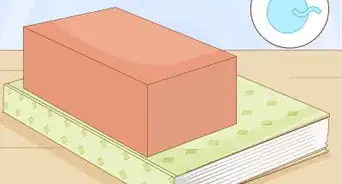
6Make sure the booklet will fit inside of the cover. Then place a line of hot glue on the inside crease of the cover.
-
7Place the spine of the booklet on the line of glue to attach the booklet to the cover.
-
8Once the glue sets, trim the cover to your liking. Make sure everything is even and neat.
-
9Open the cover of the sketchbook and place a line of glue on top of the exposed staples. Then close the cover and press down. Allow the glue to set, then repeat on the other side.
-
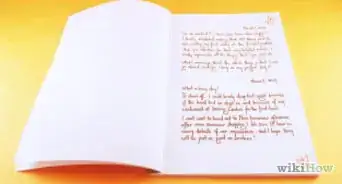
10Enjoy your new sketchbook! At this point, you can leave the sketchbook as it is or decorate it anyway you want.


Community Q&A
-
QuestionWhat if I don't have a glue gun?
 Community AnswerYou can use a strong wood glue or super glue instead, just be careful when you're applying it.
 -
QuestionWhat if I don't have cardstock?
 Community AnswerIf you don't have a cardstock, you can use regular printer paper, or glue multiple pieces of paper together.
 -
QuestionCan you use construction paper?
 BhumikaCommunity AnswerYes, Contruction paper can be used as long as the paper is not too thick and it can be folded evenly.
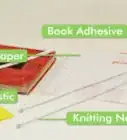
Things You'll Need
- 10 sheets of A4 size paper (8.5 x 11 or 215.9 mm x 279.4 mm)
- Scissors
- Stapler
- Staples
- Hot glue gun
- Glue sticks
- One large sheet of card stock
- Pen or pencil
- Optional items for decoration: markers, stickers, scrapbook paper, crayons, colored pencils, stamps, etc.