X
This article was co-authored by wikiHow Staff. Our trained team of editors and researchers validate articles for accuracy and comprehensiveness. wikiHow's Content Management Team carefully monitors the work from our editorial staff to ensure that each article is backed by trusted research and meets our high quality standards.
This article has been viewed 21,417 times.
Learn more...
This wikiHow teaches you how to record a video of yourself using different features and apps on Mac OS. You can use your built-in webcam or an external camera to record a video on your Mac.
Steps
Method 1
Method 1 of 3:Making a Photo Booth Video
Method 1
-
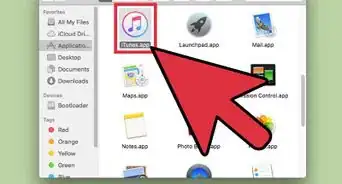
1Open the Photo Booth app on your Mac. Photo Booth is a camera app that comes bundled with your Mac OS. The Photo Booth icon looks like a camera and four small photographs in your Applications folder.
- If you can’t see Photo Booth in Applications, click on the magnifying glass icon in the upper-right corner of your screen, and then type Photo Booth. It will show up at the top of the list.
-
2Click Camera on the menu bar. This menu will be at the top your screen when you open Photo Booth.Advertisement
-
3Select your camera from the menu. If you have multiple cameras connected to your Mac, you will have to select the one you want to use.
- Depending on your Mac’s model and current software, your built-in camera may show up as Built-in iSight or FaceTime HD Camera. This is the default option in Photo Booth. You don’t need to change it if you want to use your computer's internal camera.
-
4Click on the film roll icon in Photo Booth. You will see a film roll icon in the lower-left corner of your Photo Booth window. This button will switch Photo Booth from photo capture to video recording mode.
-
5Click the Effects button. This button is located in the lower-right corner of your Photo Booth window. It will open a menu of visual effects you can apply to your video.
-
6Select a video effect. You can preview all video effects on the Effects menu. Clicking on an effect will apply it to your video and go back to the Photo Booth home screen.
-
7Click the Video Record button. This button looks like a red movie camera icon at the center-bottom of your Photo Booth window. Photo Booth will count back from 3 and start recording your video.
-
8Click the Stop button. This button looks like a red square button at the bottom of Photo Booth. It will stop recording and save your video to your Photo Booth camera roll.
-
9Click on your video from your Photo Booth roll. A thumbnail of your video will appear in your camera roll at the bottom of your Photo Booth window. Clicking on it will play the video in Photo Booth.
-
10Right-click on the video thumbnail. It will open a drop-down menu.
-
11Select Export. This option will open a pop-up window to browse your computer. It will let you export and save your video to any folder on your computer, or on iCloud.
-
12Select a folder on your Mac. Use the pop-up window to select a folder to save your video.
-
13Click Save. This is the blue button in the lower-right corner of the pop-up window. It will save your video to the destination folder you chose.
- Your video will save as a MOV file. You can use QuickTime Player or different software to play it.
Advertisement


Method 2
Method 2 of 3:Recording a Quicktime Movie
Method 2
-
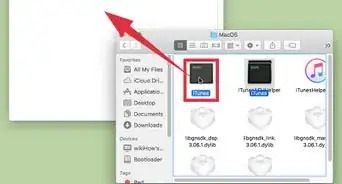
1Open the QuickTime Player app on your Mac. Most Mac computers come bundled with QuickTime Player 10 installed. It looks like a blue “Q” logo in your Applications folder.
- If you can’t find QuickTime Player in Applications, click on the magnifying glass icon in the upper-right corner of your screen, and then type QuickTime. It will show up at the top of the list.
-
2Click the File menu. This option will be on the menu bar at the top of your screen when you open QuickTime Player.
-
3Click New Movie Recording from the menu. This option will be at the top of QuickTime Player’s File menu.
- You can also press the ⌥ Option+⌘ Command+N shortcut on your keyboard to start a new movie recording.
-
4Click the Record button. This button looks like a red dot in the movie recording toolbox at the bottom of your video. It will start recording a video of you on QuickTime.
- If the movie recording toolbox disappears from your screen, hover over the video with your mouse to see it again. If you want to hide the toolbox, click on the video.
-
5Click the Stop button. This button looks like a gray square in the movie recording toolbox. It will stop recording your video.
- The Stop button replaces the red dot (Record) button when you start recording video.
-
6Click the Play button. This is the arrow icon facing your right-hand side at the bottom of your video. It will play your video in QuickTime player.
-
7Click File on the menu bar.
-
8Hover over Export. This will let you select a video format to save your video on your computer.
-
9Select a video format. Depending on your hardware and current software, your options may include 1080p, 720p, 480p, iPad, iPhone, iPod touch & Apple TV, and Audio Only. Clicking on one of these options will open a pop-up window to select a folder to save your video.
-
10Select a folder on your Mac. Use the pop-up window to browse your computer and select a folder to save your video.
-
11Click Save. This is the blue button in the lower-right corner the pop-up window. It will export your video and save it to the folder you chose.
- Your video will save as a MOV file. You can use QuickTime Player or different software to play it.
Advertisement


Method 3
Method 3 of 3:Recording a FaceTime Movie
Method 3
-
1Open the FaceTime app on your Mac. All Mac computers come bundled with FaceTime installed. The FaceTime app looks like a green and white video camera behind a smaller phone icon in your Application folder.
- If you can’t find FaceTime in Applications, click on the magnifying glass icon in the upper-right corner of your screen, and then type FaceTime. It will show up at the top of the list.
-
2Start a FaceTime call. Call a friend on FaceTime as you normally do on your Mac.
- If you need help starting a FaceTime call, this article will show you how to set it up and call your friends on your Mac.
-
3Open the QuickTime Player app on your Mac. Most Mac computers come bundled with QuickTime Player 10 installed. It looks like a blue “Q” logo in your Applications folder.
- If you can’t find QuickTime Player in Applications, click on the magnifying glass icon in the upper-right corner of your screen, and then type QuickTime. It will show up at the top of the list.
-
4Click the File menu. This option will be on the menu bar at the top of your screen when you open QuickTime Player.
-
5Click New Screen Recording from the menu. This option will be at the top of QuickTime Player’s File menu. QuickTime will open a Screen Recording toolbox.
- You can also press the ^ Control+⌘ Command+N shortcut on your keyboard to start a new screen recording.
-
6Click the Record button. This button looks like a red dot in the Screen Recording toolbox. It will start recording your video in QuickTime.
-
7Click and drag your mouse to select the FaceTime window. You can make your selection bigger or smaller from the corners before you start recording.
-
8Click the Start Recording button. This button will appear in the middle of your selection window when you select a part of your screen. It will start recording your screen as video.
-
9Click the Stop button on the menu bar. This button looks like a gray square inside a circle at the top of your screen. It will stop recording and open your screen recording as a QuickTime video.
- The Stop button will automatically appear on the menu bar when you start screen recording.
-
10Click the Play button. This is the arrow icon facing your right-hand side at the bottom of your video. It will play your video in QuickTime player.
-
11Click File on the menu bar.
-
12Hover over Export. This will let you select a video format to save your video on your computer.
-
13Select a video format. Depending on your hardware and current software, your options may include 1080p, 720p, 480p, iPad, iPhone, iPod touch & Apple TV, and Audio Only. Clicking on one of these options will open a pop-up window to select a folder to save your video.
-
14Select a folder on your Mac. Use the pop-up window to browse your computer and select a folder to save your video.
-
15Click Save. This is the blue button in the lower-right corner the pop-up window. It will export your video and save it to the folder you chose.
- Your video will save as a MOV file. You can use QuickTime Player or different software to play it.
Advertisement


-Step-21-Version-2.webp)
About This Article

wikiHow Staff
wikiHow Staff Writer
This article was co-authored by wikiHow Staff. Our trained team of editors and researchers validate articles for accuracy and comprehensiveness. wikiHow's Content Management Team carefully monitors the work from our editorial staff to ensure that each article is backed by trusted research and meets our high quality standards. This article has been viewed 21,417 times.
How helpful is this?
Co-authors: 2
Updated: January 7, 2019
Views: 21,417
Categories: Mac
Advertisement