This article was co-authored by wikiHow staff writer, Hannah Madden. Hannah Madden is a writer, editor, and artist currently living in Portland, Oregon. In 2018, she graduated from Portland State University with a B.S. in Environmental Studies. Hannah enjoys writing articles about conservation, sustainability, and eco-friendly products. When she isn’t writing, you can find Hannah working on hand embroidery projects and listening to music.
There are 9 references cited in this article, which can be found at the bottom of the page.
This article has been viewed 139,942 times.
Learn more...
If you love collecting swords but you aren't a fan of spending a ton, you’ve probably thought about making your own. However, not everyone has a forge they can use whenever they want, which makes sword-making a little tough. Fortunately, there’s a way you can craft your very own sword without using a forge at all! Read through these instructions to learn how to make a metal sword in a single afternoon.
Steps
Method 1
Method 1 of 10:Trace the tip of your sword onto a strip of metal.
-
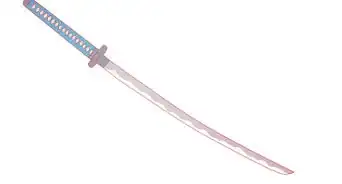
1Steel generally works the best. Pick one out that’s around 1 to 1.5 m (3.3 to 4.9 ft) long, then trace a pointed tip onto the end of it with a permanent marker. Make it into a triangle shape for the perfect point on the edge of your sword.[1]
- You can find steel strips at most hardware stores for under $10.

Method 2
Method 2 of 10:Cut the shape of your sword out with an angle grinder.
-
1Use a C-clamp to secure the metal strip onto a work table. Put on eye protection and power up an angle grinder with a cutting wheel blade. Hold the angle grinder with both hands and carefully cut the tip into the strip of metal, following the lines you traced earlier. Do this outside so you don’t shoot sparks into your home![2]
- Angle grinders are fairly easy to use. You can either buy one for around $70, or you can rent one from your local hardware store.

Method 3
Method 3 of 10:Grind the edges of the sword.
-
1Most swords have a slight angle on the edges. Put a grinding disc onto your angle grinder and make small passes over both edges of the metal strip, holding the angle grinder at a 45-degree angle to the sword itself. Keep going until both edges are slightly slanted.[3]
- Don’t hold the angle grinder parallel to the sword, as that will flatten the edges.

Method 4
Method 4 of 10:Sand the sword if you’d like it to be shiny.
-
1Don’t sand it if you want a dark finish. If you want the whole thing to be shiny, grab a power sander and load it with 80-grit sandpaper. Turn it on and press it against your sword, moving in circular motions over the flat side. It will take about 1 hour of sanding until your sword looks shiny, but it will be worth it![4]
- If you don’t care about the shininess of your sword, you can skip this step.

Method 5
Method 5 of 10:Add a guard made out of a fridge handle.
-
1A guard protects your hands from the rest of the sword. Try to find a metal fridge handle that’s about 6 in (15 cm) long from your local hardware store. Use a masonry drill bit to cut a slot in the dead center of it that's the same length and width as the flat end of your sword. Slide the guard onto that end of the sword so it’s situated at the end of the hilt, or the area where you’ll grab the sword.[5]
- If the guard slides around at all, put a screw in front of it using a masonry bit.

Method 6
Method 6 of 10:Cut a hilt out of a block of wood.
-
1Make a handle for your sword for extra comfort. Grab a block of wood that’s about 2 inches (5.1 cm) thick and set the non-pointed edge of your sword on top of it (the spot where you’d grab your sword to hold it). Trace the shape of the hilt onto the wood with a pencil, then use a band saw or a hand saw to cut out the shape. Then, cut out another piece of wood in the same shape and size so you can cover both sides of your hilt.[6]
- The type of wood you choose doesn’t really matter. Just make sure it’s a color that you like, since it will be on the end of your sword.

Method 7
Method 7 of 10:Drill 3 holes into the metal strip.
-
1They’re how you’ll attach the hilt to your sword. Clamp your sword down onto your workbench with a C-clamp and mark out where your hilt will be. Use a masonry drill bit to drill 3 holes along the hilt that are about 2 inches (5.1 cm) apart from each other. Drill slowly and carefully to avoid heating up the metal too much.[7]

Method 8
Method 8 of 10:Drill holes into each block of wood.
-
1One block will get 2 holes, and one block will get 1 hole. Place the blocks of wood onto the strip of metal and line them up with the holes you already made. Use a pencil to mark the holes onto the wood, then clamp the pieces of wood down onto a workbench with a C-clamp. Use a drill to make 2 holes (the top and the bottom hole) on one block, and 1 hole (the center hole) in the other block.[8]
- It’s much easier to attach the wood to the hilt of your sword if the holes are already there.

Method 9
Method 9 of 10:Attach the hilt to the sword with screws.
-
1Place the 2 pieces of wood around the grip of your sword. Screw in 2 screws on one side of the sword, going for the top and bottom drill holes that you made. Flip the sword over and add the last screw in the center drill hole. If parts of the screws stick out, file them off with a metal file to make sure your hilt is smooth.[9]
- If the wood on your hilt is kind of rough, use a sheet of 80-grit sandpaper to sand it down until it’s smooth.

Method 10
Method 10 of 10:Wrap the grip in leather or twine.
-
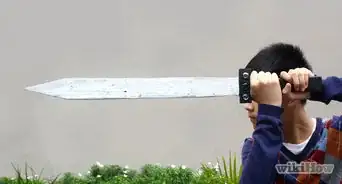
1Grabbing a wooden hilt won’t be very comfortable. Add a thin layer of super glue over the wooden hilt, then start wrapping your leather or twine from the bottom up. Overlap each layer so your wooden hilt is completely hidden. When you get to the top of the sword, cut off the excess twine or leather, then let it dry.[10]
- Try cutting up an old leather belt into strips for the perfect grip material.

Community Q&A
-
QuestionHow durable is this sword?
 Community AnswerIt is not very durable, as it is not heat treated or tempered. Only use this method for display pieces -- if you want a good sword, then use a forge.
 -
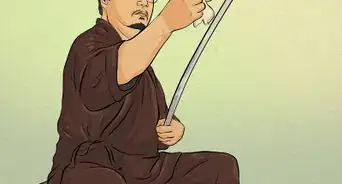
QuestionWhat's a good steel for a beginning?Community AnswerCarbon steel 1045-1080; stainless steel 440 a, b or c for a knife, but no sword longer than a foot 316 to make something that won't rust. Anything made of tough steel (impact resistant) that has not suffered too much wear and tear.
-
QuestionWhere can I get the metal to make the sword?Community AnswerA junkyard or any place storing old cars would be a good place to start.
-
QuestionWhat are the best metals to make swords?
 Community AnswerCarbon steel is a good metal and is used frequently for high-end swords, but for this build, I suggest metals that are easier to work with - such as aluminium and stainless steel.
 -
QuestionWhere I can get the folded steel?
 Joshua McKinneyCommunity AnswerAt a metal smith shop, or if your really dedicated, a junkyard - but be specific if you go with this option.
 -
QuestionHow dangerous is it if it was properly made?
 Community AnswerIt's mostly for display, so it's not as dangerous as other swords - but it can still be dangerous, depending on how sharp it is.
 -
QuestionWill it slice through anything?Joshua McKinneyCommunity AnswerIt depends on the type of metal you used and the material you're cutting through.
-
QuestionWhat if I don't have all this stuff?Community AnswerBuy the the bench grinder, or file. You might find the metal strip at a junkyard.
-
QuestionHow long should the handle be?Community AnswerIt depends on your hand size. The handle should be about two inches longer than your clenched fist.
-
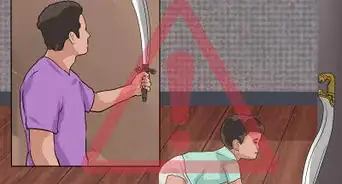
QuestionHow could I make a sheath for it?
 Community AnswerYou can make a sheath out of just about anything. Since this is a display sword, you might want it to be fancier. You can take the easy path by sawing a cane nearly in half and gluing 2 strips of wood or sewing a wide strip of leather to it.
Warnings
- Always wear eye protection when working with power tools.Thanks!
- Read the user manual of every tool you use completely before you start.Thanks!
Things You'll Need
- Permanent marker
- C-clamp
- Angle grinder
- Grinding disc
- Drill
- Masonry bit
- Steel strip
- Block of wood
- Screws
- 80-grit sandpaper
- Leather or twine
- Superglue


References
- ↑ https://www.youtube.com/watch?v=NgFXm9naNUc&t=91s
- ↑ https://www.youtube.com/watch?t=121&v=pNhZRH_BmzM&feature=youtu.be
- ↑ https://www.youtube.com/watch?t=116&v=NgFXm9naNUc&feature=youtu.be
- ↑ https://www.youtube.com/watch?t=167&v=NgFXm9naNUc&feature=youtu.be
- ↑ https://www.youtube.com/watch?t=220&v=NgFXm9naNUc&feature=youtu.be
- ↑ https://www.youtube.com/watch?t=513&v=syMZkMmpTxQ&feature=youtu.be
- ↑ https://www.youtube.com/watch?t=191&v=NgFXm9naNUc&feature=youtu.be
- ↑ https://www.youtube.com/watch?t=191&v=NgFXm9naNUc&feature=youtu.be
- ↑ https://www.youtube.com/watch?t=522&v=syMZkMmpTxQ&feature=youtu.be
About This Article