X
wikiHow is a “wiki,” similar to Wikipedia, which means that many of our articles are co-written by multiple authors. To create this article, volunteer authors worked to edit and improve it over time.
This article has been viewed 12,264 times.
Learn more...
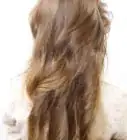
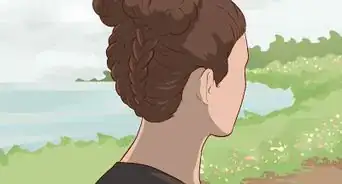
The good news is that it's possible to make a small low side bun even for short hair. It's possible to make this with a part either to the left or the right, or with no part at all. Suitable for sport, school or fancy occasions, it's a do that's worth mastering.
Steps
Method 1
Method 1 of 4:Low Side Bun Parted To the Right
Method 1
-
1Part according to the correct perspective. When your hair is parted to the right, remember that it is parted to the viewer's right, not your own right, so you want to have more hair to your left side.
-
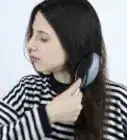
2Clean and tease the hair before starting. You'll be wanting to do this with clean hair otherwise your bun will appear too small, which does not look attractive. After your hair is dry, flip it upside down and brush it downwards. When you stand upright again, you'll hair will look teased, which is important.Advertisement
-
3Find where you want your part to be. Push the hair to the left to create the part. Although your tease will make it difficult to make a clean part, you need the tease to create a proper size bun. When you see the line on your scalp where the hair is divided, you know you've created a clean part.
-
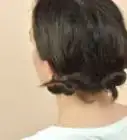
4Create the bun. When you gather your hair, gather it to either side. It will be easier to create the bun to the left (your viewer's right), because your hair is parted to that direction, but either side is fine. Gather the hair on that side of your head, and remember to smooth your hair down to get rid of any bumps, while being careful to keep the part.
-
5Hold the gathered hair. Loosely wrap it around itself for the biggest bun you can make without flyaways.
-
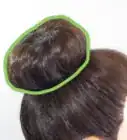
6Take a few bobby pins and stick them through the base, pinning the loose ends to your head. You may even decide to slide a clip through the bottom, if need be.
- Do not secure with a hair tie; it will all too easily slip off and the bun will fall out.
-
7Spray a little hairspray on the base of the bun. If you find it necessary, use a hair tie to loosely wrap it around the bun, tying it will make the bun shrink. Only do this when there is already a bobby pin or clip holding the bun well in place.
-
8Add some more hairspray and it'll look great.Advertisement


Method 2
Method 2 of 4:Low Side Bun Parted to the Left
Method 2

Method 3
Method 3 of 4:Low Side Bun Without Part
Method 3
This look is slightly easier as it does not involve smoothing out the hair when it is pulled to the side.
-
1Flip your hair upside down. Brush downwards until it has no tangles.
-
2Stand upright––your hair will appear teased. Bring the hair to the back so that none is hanging over your shoulders. Gather it to the side you want the bun to be.
-
3Loosely wrap your hair around the base of the gathering spot . Wrap so that it is not falling apart, but is still bigger than the size it would be if it were twisted tightly.
-
4Hold the tip to your head and secure with bobby pins. Do not use hair ties, as they slip off too easily.
-
5Spritz the bun with hairspray. You are all done!Advertisement


Method 4
Method 4 of 4:Bangs
Method 4
-
1Part the bangs. Bangs may seem like they could be a difficulty, but just part them the direction you are parting most of your hair and it will go with the part.
-
2If you want to get them out of your face, bobby pin the ends to your forehead. Just pull them to the side of the part and secure the ends. You may spritz hairspray here as well.Advertisement


Things You'll Need
- Shampoo and conditioner if washing hair first
- Brush/comb
- Bobby pins and/or hair clip
- Hair elastic only as an additional holder, not the main one (see above)
- Hairspray
- Decorative hair accessory (optional)
About This Article
Advertisement