X
wikiHow is a “wiki,” similar to Wikipedia, which means that many of our articles are co-written by multiple authors. To create this article, 19 people, some anonymous, worked to edit and improve it over time.
This article has been viewed 78,768 times.
Learn more...
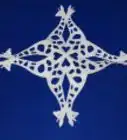
If you have tried to make a paper snowflake at some point in your life, most probably at school or with your children, it's possible that you'll have found that the result can look a bit messy or disorganized. In this wikiHow tutorial, you will learn you how to make a perfect looking snowflake that is beautifully symmetrical and good enough to hang in your house as a winter or Christmas decoration.
Steps
-
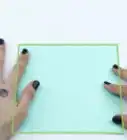
1Take a piece of rectangular paper as shown. Fold where shown in the image.
-
2Cut off the rectangle at the end, to leave a triangle shape.Advertisement
-
3Fold the triangle in half again.
-
4Fold again.
-
5Draw the marked design as shown here near the edge of the folded triangle. Then cut following the dashed lines.
-
6Open up the paper. You will have a lovely snowflake design.
-
7Finished.Advertisement


Community Q&A
-
QuestionWhen it snows, can I throw these around the house?
 Goodvillain034Community AnswerYes, if you want. In the winter, you can hang them from the ceiling for a nice look.
Things You'll Need
- A sheet of A4 white paper
- A pencil
- Scissors
About This Article
Advertisement